There’s something absolutely magical about the combination of sweet honey and fiery spice that makes my taste buds dance every single time. When I first discovered hot honey chicken, I knew I had found my new obsession. This Easy Baked Crispy Hot Honey Chicken Breast recipe has become my go-to dinner solution when I want something that’s both impressive and incredibly satisfying.
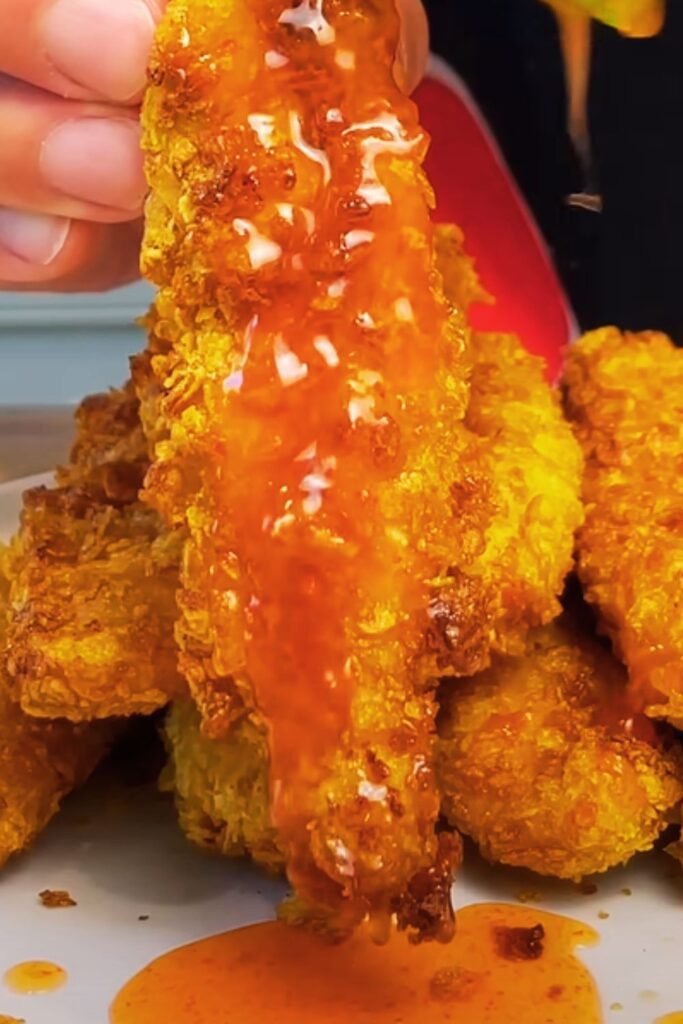
The beauty of this recipe lies in its perfect balance of flavors and textures. You get that irresistible golden-brown crispy exterior that gives way to incredibly juicy, tender chicken inside. Then there’s that glorious hot honey glaze that coats every bite with sweet heat that builds gradually, leaving you reaching for more.
What makes this recipe particularly special is how achievable it is for home cooks. I’ve eliminated the guesswork and simplified the process without sacrificing any of the incredible flavors. Whether you’re cooking for a weeknight family dinner or entertaining guests, this chicken breast recipe delivers restaurant-quality results right from your own oven.
Understanding Hot Honey: The Perfect Sweet Heat Balance
Hot Honey : A condiment combining natural honey with chili peppers or hot sauce, creating a sweet and spicy flavor profile that enhances both savory and sweet dishes.
Maillard Reaction : The chemical reaction between amino acids and sugars when exposed to heat, responsible for the golden-brown color and complex flavors in properly cooked chicken.
Brine : A saltwater solution used to enhance moisture retention and flavor penetration in poultry before cooking.
Glaze : A shiny coating applied to food during or after cooking, typically containing sugars that caramelize to create an attractive finish and concentrated flavor.
The hot honey trend has absolutely exploded in recent years, and for good reason. This magical combination transforms ordinary chicken into something extraordinary. I’ve experimented with countless variations, and I can tell you that getting the balance just right makes all the difference between good chicken and absolutely phenomenal chicken.
Essential Ingredients Breakdown
Let me walk you through each component that makes this recipe so special. I’ve tested various combinations and ratios to ensure every ingredient serves a specific purpose in creating that perfect bite.
| Ingredient | Quantity | Purpose | Substitution Options |
|---|---|---|---|
| Chicken Breasts | 4 large (6-8 oz each) | Main protein base | Chicken thighs, pork chops |
| Honey | 1/3 cup | Sweet base for glaze | Maple syrup, agave nectar |
| Hot Sauce | 2-3 tablespoons | Heat component | Sriracha, cayenne pepper |
| Olive Oil | 3 tablespoons | Moisture and browning | Avocado oil, melted butter |
| Paprika | 2 teaspoons | Color and mild spice | Smoked paprika, chili powder |
| Garlic Powder | 1 teaspoon | Savory depth | Fresh minced garlic |
| Onion Powder | 1 teaspoon | Umami enhancement | Dried onion flakes |
| Salt | 1 tablespoon | Flavor enhancement | Sea salt, kosher salt |
| Black Pepper | 1/2 teaspoon | Heat and complexity | White pepper, cracked pepper |
| Panko Breadcrumbs | 1 cup | Crispy coating | Regular breadcrumbs, crushed cornflakes |
| Butter | 2 tablespoons | Richness in glaze | Coconut oil, ghee |
The quality of your ingredients directly impacts the final result. I always recommend using raw, unfiltered honey when possible because it provides more complex flavors than processed varieties. For the hot sauce, I prefer something with good heat but not overwhelming spice – you want to taste the honey alongside the heat, not have it completely dominated.
Step-by-Step Preparation Method
Preparing the Chicken
First, I start by properly preparing my chicken breasts. This step is crucial for achieving that perfect texture we’re after. I place each breast between plastic wrap and gently pound them to an even thickness of about 3/4 inch. This ensures uniform cooking and prevents those dreaded dry edges while the center is still cooking.
Next comes the brining process, which I consider absolutely essential. I dissolve 1/4 cup of salt in 4 cups of warm water, then submerge the chicken breasts for exactly 30 minutes. This brief brine dramatically improves moisture retention and flavor penetration throughout the meat.
Creating the Coating System
While the chicken brines, I prepare my coating system. I set up three shallow dishes in assembly-line fashion. The first contains all-purpose flour seasoned with salt, pepper, and a pinch of paprika. The second holds beaten eggs mixed with a tablespoon of hot sauce. The third contains my panko breadcrumb mixture combined with additional seasonings.
The key to achieving maximum crispiness lies in this triple-coating method. I’ve found that pressing the breadcrumbs gently but firmly onto each piece ensures they adhere properly during baking.
The Baking Process
I preheat my oven to 425°F and line a large baking sheet with parchment paper. After coating each chicken breast, I arrange them on the prepared sheet, making sure they don’t touch each other. This spacing allows hot air to circulate freely, promoting even browning and crisping.
The initial baking time is 20 minutes without opening the oven door. This uninterrupted cooking period allows the coating to set properly and begin developing that golden color we’re after.
Hot Honey Glaze Mastery
Creating the perfect hot honey glaze requires attention to timing and temperature. I combine honey, hot sauce, melted butter, and a pinch of salt in a small saucepan over medium-low heat. The mixture should warm gently without boiling, which would break the emulsion and affect the final texture.
| Glaze Component | Amount | Temperature | Timing |
|---|---|---|---|
| Honey | 1/3 cup | Room temperature | Start to finish |
| Hot Sauce | 2-3 tablespoons | Room temperature | Add second |
| Butter | 2 tablespoons | Melted | Add third |
| Salt | Pinch | – | Add last |
| Cook Time | – | Medium-low heat | 3-4 minutes |
I taste the glaze at this point and adjust the heat level by adding more hot sauce if needed. Remember, the flavors will concentrate slightly as the glaze reduces, so err on the side of caution initially.
Cooking Timeline and Temperature Control
Timing is everything when it comes to perfectly executed hot honey chicken. I’ve developed this foolproof timeline that ensures everything comes together at exactly the right moment.
Preparation Phase (30 minutes)
- Minute 0-5: Set up brining solution and submerge chicken
- Minute 5-10: Prepare coating stations and preheat oven
- Minute 10-15: Mix glaze ingredients and set aside
- Minute 15-25: Remove chicken from brine and pat dry
- Minute 25-30: Coat chicken breasts and arrange on baking sheet
Cooking Phase (25 minutes)
- Minute 0-20: Initial baking at 425°F
- Minute 20-22: Check internal temperature (should reach 155°F)
- Minute 22-25: Apply first glaze coat and return to oven
- Minute 25: Final temperature check (165°F) and rest
Using an instant-read thermometer is non-negotiable for perfect results. I insert it into the thickest part of the breast, avoiding any bone contact. The chicken is perfectly done when it reaches an internal temperature of 165°F.
Nutritional Profile and Health Benefits

Understanding the nutritional aspects of this dish helps me make informed decisions about portion sizes and accompanying sides. Here’s a comprehensive breakdown per serving:
| Nutrient | Per Serving | % Daily Value | Health Benefits |
|---|---|---|---|
| Calories | 385 | 19% | Moderate calorie density |
| Protein | 42g | 84% | Muscle maintenance and growth |
| Carbohydrates | 18g | 6% | Quick energy source |
| Fat | 12g | 18% | Essential fatty acids |
| Fiber | 1g | 4% | Digestive health |
| Sodium | 890mg | 39% | Electrolyte balance |
| Sugar | 15g | – | Natural honey sugars |
| Vitamin A | 15% DV | 15% | Eye health support |
| Iron | 8% DV | 8% | Oxygen transport |
The high protein content makes this dish excellent for anyone focused on fitness goals or maintaining muscle mass. The honey provides natural sugars that offer quick energy without the crash associated with refined sugars.
Serving Suggestions and Pairings
The versatility of hot honey chicken makes it suitable for numerous serving styles and occasions. I’ve experimented with countless combinations over the years, and these pairings consistently deliver outstanding results.
Classic Dinner Plate
- Roasted vegetables (Brussels sprouts, carrots, sweet potatoes)
- Garlic mashed potatoes or wild rice pilaf
- Simple green salad with vinaigrette
Casual Meal Options
- Sliced over mixed greens with avocado and cherry tomatoes
- Diced into grain bowls with quinoa and roasted vegetables
- Served with cornbread and coleslaw for a Southern-inspired meal
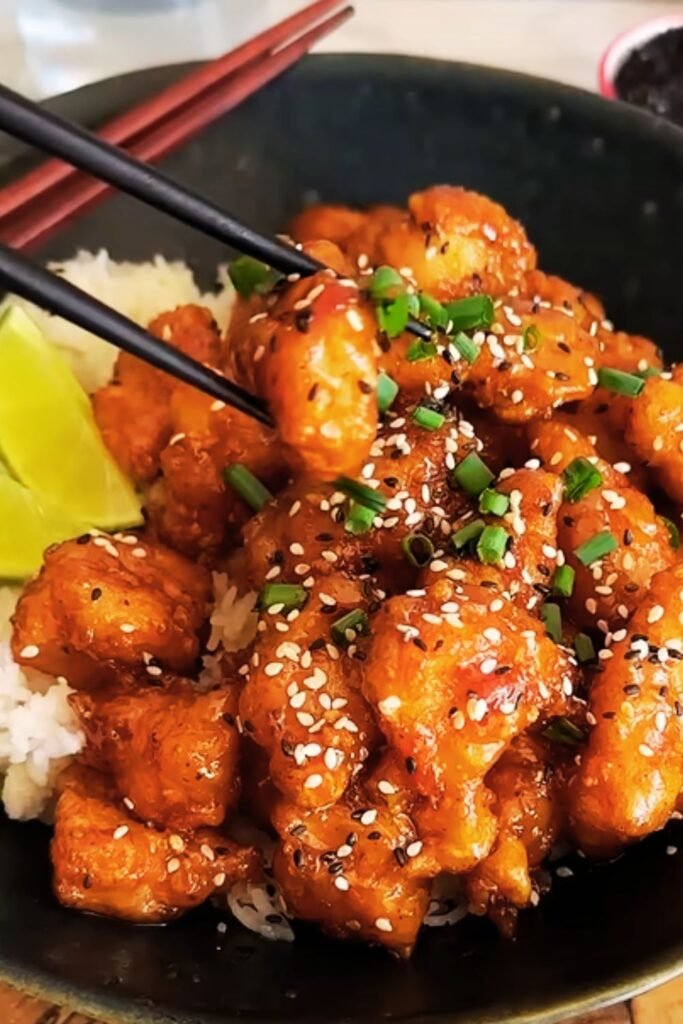
International Fusion
- Over jasmine rice with steamed broccoli (Asian-inspired)
- With cilantro-lime rice and black beans (Mexican-influenced)
- Alongside Mediterranean roasted vegetables and tzatziki
The key is balancing the sweet heat of the chicken with complementary flavors and textures. I avoid overly spicy sides that would compete with the hot honey glaze, instead opting for cooling or neutral accompaniments.
Troubleshooting Common Issues
Through years of making this recipe, I’ve encountered and solved virtually every problem that can arise. Here are the most common issues and my proven solutions:
Dry Chicken The most frequent complaint I hear involves dry, overcooked chicken. This typically results from skipping the brining step or overcooking. Always brine for at least 30 minutes, and never exceed 165°F internal temperature.
Soggy Coating When the coating doesn’t crisp properly, it’s usually due to insufficient oven temperature or overcrowding the pan. Ensure your oven is fully preheated to 425°F and leave space between each piece.
Glaze Separation If your hot honey glaze appears broken or separated, the temperature was too high during preparation. Always use medium-low heat and whisk constantly while warming.
Uneven Cooking Chicken breasts of varying thickness cook unevenly. Always pound to uniform thickness, and consider using a meat thermometer to check multiple spots.
Storage and Reheating Guidelines
Proper storage extends the life of your hot honey chicken while maintaining quality. I’ve tested various methods to determine the best approaches for different timeframes.
| Storage Method | Duration | Quality Retention | Reheating Instructions |
|---|---|---|---|
| Refrigerator | 3-4 days | Excellent | 325°F oven, 15 minutes |
| Freezer | 2-3 months | Good | Thaw overnight, then reheat |
| Meal Prep Portions | 5 days | Very Good | Microwave 2-3 minutes |
For meal prep purposes, I slice the chicken and store it separately from any sides. This prevents the coating from becoming soggy and makes reheating more efficient.
Variations and Flavor Adaptations
The basic hot honey chicken framework adapts beautifully to various flavor profiles and dietary preferences. Here are some of my favorite variations:
Spice Level Modifications
- Mild version: Reduce hot sauce to 1 tablespoon, add extra honey
- Medium heat: Use recipe as written
- Extra spicy: Add cayenne pepper to coating and increase hot sauce
International Flavors
- Asian-inspired: Add ginger and soy sauce to glaze
- Mediterranean: Include dried herbs and lemon zest in coating
- Mexican-style: Incorporate chili powder and lime juice
Dietary Adaptations
- Gluten-free: Substitute almond flour for regular flour
- Keto-friendly: Replace honey with sugar-free alternative
- Paleo version: Use coconut flour and omit breadcrumbs
Q&A Section
Q: Can I make this recipe ahead of time for meal prep? Yes, absolutely! I prepare the coated chicken up to 24 hours in advance and store them covered in the refrigerator. The glaze can be made up to a week ahead and stored in the fridge. Just reheat gently before using.
Q: What’s the best hot sauce to use for this recipe? I prefer hot sauces with good flavor balance rather than just pure heat. Frank’s RedHot, Sriracha, or Cholula work beautifully. Avoid extremely hot sauces unless you really enjoy intense heat, as they can overpower the honey.
Q: Can I use chicken thighs instead of breasts? Definitely! Chicken thighs actually work wonderfully with this recipe. Increase the cooking time to 25-30 minutes and ensure they reach 175°F internal temperature. The extra fat in thighs helps keep them moist and flavorful.
Q: How do I prevent the honey from burning in the oven? The key is applying the glaze during the last 5 minutes of cooking. If you notice excessive browning, tent the chicken with foil for the remaining cooking time. Also, make sure your oven rack is positioned in the center, not too close to the heating element.
Q: Can I double this recipe for a larger crowd? Yes, but you’ll need to use two baking sheets to avoid overcrowding. Rotate the pans halfway through cooking for even browning. The glaze recipe scales up proportionally.
Q: What should I do if my coating isn’t sticking properly? Make sure each piece is thoroughly patted dry after brining. Press the coating firmly onto each piece, and let the coated chicken rest for 10 minutes before baking. This helps the coating adhere better.
Q: Is there a way to make this recipe healthier? You can reduce the honey by half and add more spices for flavor. Using cooking spray instead of oil in the coating reduces calories. Serving with plenty of vegetables increases the nutritional density of the meal.
Q: How do I know when the chicken is perfectly done? Use an instant-read thermometer inserted into the thickest part of the breast. It should read exactly 165°F. The juices should run clear, and the coating should be golden brown and crispy.
This Easy Baked Crispy Hot Honey Chicken Breast recipe has become a staple in my kitchen because it delivers consistent, restaurant-quality results every single time. The combination of techniques and flavors creates something truly special that never fails to impress family and friends. Whether you’re looking for a show-stopping dinner or a reliable weeknight meal, this recipe delivers on all fronts.