I’ve always believed that the perfect dessert should transport you to another realm, and nothing accomplishes this quite like a well-crafted coffee mousse. This ethereal creation combines the bold, robust flavors of coffee with the silky smoothness of a classic French mousse, resulting in a dessert that’s both sophisticated and comforting.
My journey with coffee mousse began during a rainy afternoon in Paris, where I first tasted this heavenly dessert at a small bistro tucked away in Montmartre. The way the rich coffee flavor melted on my tongue, followed by that impossibly light texture, left me determined to recreate this magic in my own kitchen. After countless experiments and refinements, I’m thrilled to share with you my perfected recipe that captures that same enchanting experience.
Coffee mousse represents the perfect marriage between the intensity of espresso and the delicate artistry of French patisserie. Unlike dense chocolate desserts or overly sweet confections, coffee mousse strikes an elegant balance that appeals to both coffee enthusiasts and dessert lovers alike. The key lies in understanding how to harness coffee’s natural bitterness while creating a texture so light it practically floats off your spoon.
Understanding Coffee Mousse: Essential Definitions
Mousse: A French culinary term meaning “foam,” referring to a light, airy dessert or savory dish achieved through the incorporation of air via whipped cream, beaten egg whites, or gelatin.
Espresso: A concentrated coffee brewing method that forces hot water through finely-ground coffee beans, producing a rich, intense flavor base essential for authentic coffee mousse.
Crema: The golden foam layer that forms on top of properly extracted espresso, contributing both flavor and visual appeal to coffee-based desserts.
Tempering: The gradual process of equalizing temperatures between ingredients to prevent curdling or separation, crucial when combining hot coffee with eggs or cream.
Gelatin Bloom: The process of softening gelatin in cold liquid before dissolving it in warm liquid, ensuring smooth incorporation without lumps.
Sabayon: A light custard base made by whisking egg yolks with sugar over gentle heat, providing structure and richness to the mousse.
The Science Behind Perfect Coffee Mousse
Creating exceptional coffee mousse requires understanding the delicate interplay between proteins, fats, and air incorporation. The proteins in egg whites and gelatin provide structure, while the fats from cream and egg yolks contribute richness and mouthfeel. The coffee component adds both flavor complexity and tannins that can affect the final texture if not properly balanced.
Temperature control plays a crucial role throughout the process. Too much heat can cause the eggs to scramble, while insufficient heat won’t properly dissolve the gelatin. I’ve learned that maintaining temperatures between 160-170°F (71-77°C) during the sabayon stage ensures optimal results without compromising food safety.
The timing of each component’s incorporation matters tremendously. Adding ingredients in the wrong sequence can result in a dense, heavy mousse rather than the ethereal lightness we’re seeking. My method involves creating a stable coffee base, preparing the sabayon separately, then carefully folding everything together with freshly whipped cream.
Essential Ingredients and Their Roles

| Ingredient | Quantity | Purpose | Quality Tips |
|---|---|---|---|
| Fresh Espresso | 1/2 cup (120ml) | Primary flavor base | Use beans roasted within 2 weeks |
| Heavy Cream | 1 1/2 cups (360ml) | Texture and richness | 35% fat content minimum |
| Large Egg Yolks | 4 | Structure and richness | Room temperature preferred |
| Granulated Sugar | 1/3 cup (65g) | Sweetness and stability | Fine crystals dissolve easier |
| Unflavored Gelatin | 2 tsp (7g) | Setting agent | Always bloom in cold liquid first |
| Vanilla Extract | 1 tsp | Flavor enhancement | Pure extract, not artificial |
| Dark Rum | 2 tbsp (optional) | Depth and complexity | Aged varieties work best |
| Unsweetened Cocoa | For dusting | Visual appeal and flavor | Dutch-processed preferred |
The quality of your coffee cannot be overstated in its importance. I always recommend using freshly roasted beans, ideally a medium to dark roast that provides robust flavor without excessive bitterness. Single-origin beans from regions like Colombia, Ethiopia, or Guatemala offer unique flavor profiles that can elevate your mousse from good to extraordinary.
When selecting cream, I insist on using heavy whipping cream with at least 35% fat content. Lower-fat alternatives won’t achieve the proper texture and stability required for professional-quality mousse. The eggs should be fresh and brought to room temperature before use, which allows for better incorporation and volume when whipped.
Step-by-Step Coffee Mousse Preparation
Phase 1: Coffee Base Preparation
Begin by preparing your espresso using your preferred method. I personally favor a traditional espresso machine, but a stovetop moka pot or concentrated cold brew can work admirably. The key is achieving a coffee concentrate that’s strong enough to maintain its flavor profile even when diluted with cream and other ingredients.
Allow the freshly brewed espresso to cool to room temperature. This step prevents the hot coffee from cooking the eggs when combined later. If you’re adding rum or other spirits, this is the perfect time to incorporate them, allowing the flavors to meld while the mixture cools.
Phase 2: Gelatin Activation
Sprinkle the gelatin over 1/4 cup of cold water in a small bowl, ensuring even distribution without clumps. Allow it to bloom for 5-10 minutes until it becomes spongy and translucent. This blooming process is crucial for achieving smooth incorporation without any gritty texture in the final mousse.
Once bloomed, gently heat the gelatin mixture in a small saucepan over low heat, stirring constantly until completely dissolved. The mixture should be clear and smooth, with no visible granules. Remove from heat and set aside to cool slightly.
Phase 3: Sabayon Creation
In a large mixing bowl, combine the egg yolks and sugar. Using a whisk or electric mixer, beat vigorously until the mixture becomes pale yellow and slightly thickened. This process typically takes 3-5 minutes of continuous beating and creates the foundation for your mousse’s structure.
Create a double boiler by placing the bowl over a saucepan of gently simmering water, ensuring the bottom of the bowl doesn’t touch the water. Continue whisking while gradually adding the cooled espresso mixture. The goal is to create a light, foamy sabayon that coats the back of a spoon.
Phase 4: Assembly and Incorporation
Remove the sabayon from heat and immediately whisk in the dissolved gelatin mixture. The warm sabayon will help ensure complete gelatin integration. Allow this mixture to cool to room temperature, stirring occasionally to prevent skin formation.
Meanwhile, whip the heavy cream to soft peaks in a chilled bowl. I cannot emphasize enough the importance of not over-whipping at this stage. Soft peaks provide the perfect texture for folding, while stiff peaks can result in a grainy, over-beaten final product.
Phase 5: The Final Fold
Using a large rubber spatula, gently fold one-third of the whipped cream into the coffee mixture. This initial incorporation lightens the base, making it easier to fold in the remaining cream without deflating the precious air bubbles.
Add the remaining whipped cream in two additions, folding with broad, sweeping motions from the bottom of the bowl up and over the mixture. The folding motion should be gentle but confident, ensuring complete incorporation while maintaining maximum volume.
Texture Analysis and Troubleshooting
| Issue | Cause | Solution | Prevention |
|---|---|---|---|
| Dense, Heavy Texture | Over-mixed cream | Start over with fresh cream | Stop at soft peaks |
| Grainy Mouthfeel | Undissolved gelatin | Strain mixture | Proper blooming and heating |
| Separation | Temperature shock | Equalize temperatures | Gradual incorporation |
| Weak Coffee Flavor | Diluted espresso | Use stronger concentration | Quality beans, proper extraction |
| Overly Sweet | Sugar imbalance | Reduce sugar, add salt pinch | Taste and adjust |
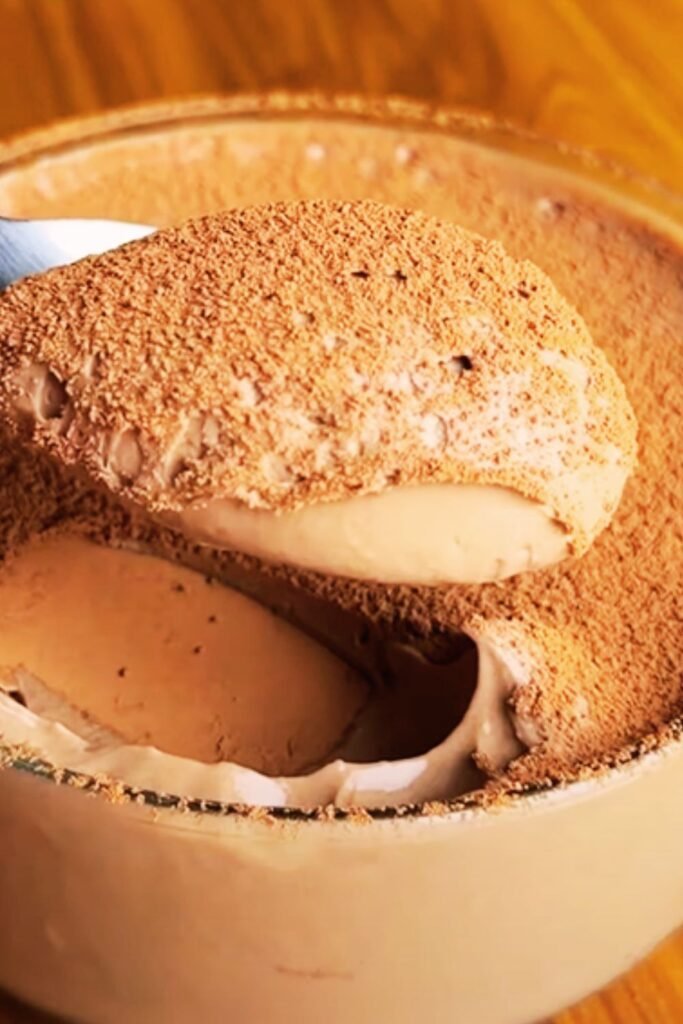
The perfect coffee mousse should hold its shape when spooned but melt smoothly on the tongue. If your mousse seems too firm, you may have used too much gelatin or over-whipped the cream. Conversely, if it won’t hold its shape, insufficient gelatin or under-whipped cream could be the culprit.
Presentation and Serving Techniques
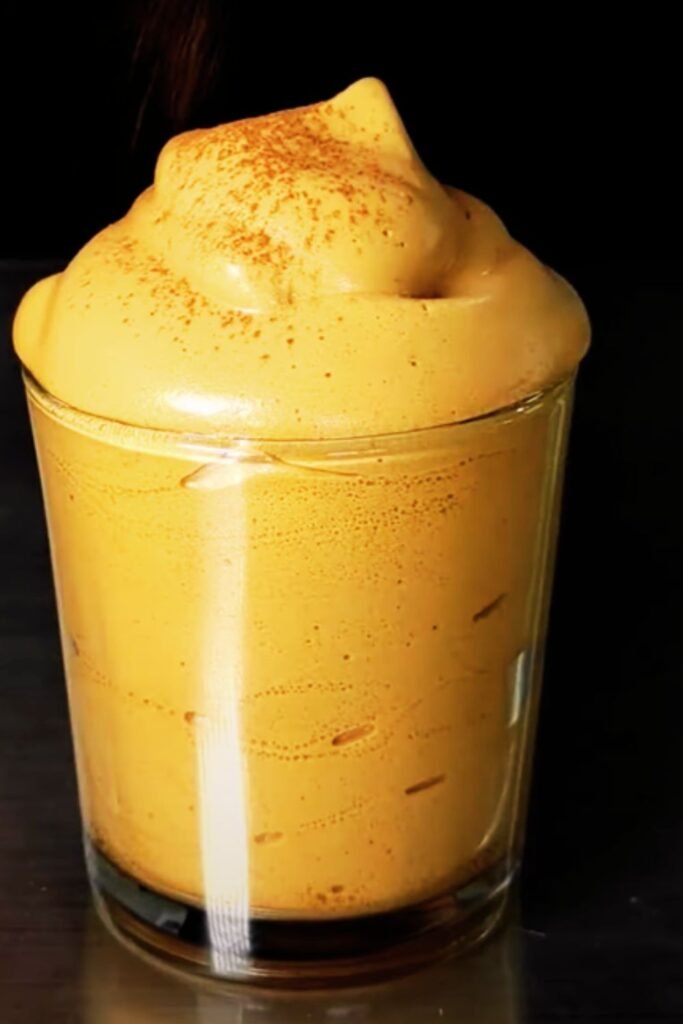
Presentation transforms a simple dessert into a memorable experience. I prefer serving coffee mousse in clear glass vessels that showcase the beautiful coffee color and allow guests to appreciate the texture. Small ramekins, wine glasses, or even shot glasses for mini portions work beautifully.
Piping the mousse creates professional-looking presentations. Using a pastry bag fitted with a large star tip, pipe the mousse in elegant swirls, finishing with a flourish at the top. For a more rustic approach, simply spoon the mousse into serving dishes and use the back of the spoon to create attractive swirls on the surface.
Garnishing options are virtually limitless. A light dusting of unsweetened cocoa powder provides classic elegance, while a few coffee beans scattered around the plate add visual interest. Whipped cream rosettes, chocolate shavings, or even a delicate tuile cookie can elevate the presentation further.
Serving Temperature and Timing
Coffee mousse is best served chilled, ideally after chilling for at least 4 hours or overnight. This extended chilling time allows the gelatin to fully set while the flavors meld and develop complexity. Remove from refrigeration about 10-15 minutes before serving to allow the mousse to soften slightly, enhancing its creamy texture.
For special occasions, I like to present the mousse alongside complementary elements. A small glass of sparkling water cleanses the palate, while amaretti cookies provide delightful textural contrast. Fresh berries, particularly raspberries or strawberries, offer a bright acidic counterpoint to the rich coffee flavors.
Variations and Flavor Innovations
The beauty of mastering basic coffee mousse lies in the endless possibilities for creative variations. My personal favorite involves substituting half the espresso with strong Turkish coffee, which adds subtle spice notes from the cardamom traditionally used in Turkish coffee preparation.
For chocolate lovers, I recommend my mocha variation, which incorporates 2 ounces of melted dark chocolate into the warm sabayon. The result is a more decadent dessert that appeals to both coffee and chocolate enthusiasts. White chocolate variations work equally well, creating a milder flavor profile perfect for those who find traditional coffee mousse too intense.
Liqueur additions can transform the basic recipe into sophisticated adult desserts. Kahlúa enhances the coffee flavor while adding sweetness, while Amaretto introduces almond notes that pair beautifully with coffee. For something unexpected, try adding a splash of orange liqueur like Grand Marnier, which creates a surprising but delightful citrus note.
International Inspirations
Drawing inspiration from global coffee traditions, I’ve developed several international variations. The Vietnamese-inspired version incorporates sweetened condensed milk and a touch of cinnamon, creating a mousse reminiscent of the famous Vietnamese iced coffee. The Italian affogato variation includes a small scoop of vanilla gelato placed in the center of each serving, allowing guests to experience the hot-cold contrast as they eat.
My Mexican-inspired version adds a pinch of cinnamon and cayenne pepper, along with a touch of vanilla, creating a complex flavor profile that pays homage to Mexican hot chocolate traditions. The heat from the cayenne is subtle but adds an intriguing warmth that complements the coffee beautifully.
Storage and Make-Ahead Tips
One of coffee mousse’s greatest advantages is its excellent keeping quality. Properly stored in the refrigerator, covered with plastic wrap pressed directly onto the surface to prevent skin formation, coffee mousse maintains its quality for up to three days. This makes it an ideal dessert for entertaining, as it can be prepared entirely in advance.
For longer storage, coffee mousse can be frozen for up to one month. However, I recommend adding an extra teaspoon of gelatin to the original recipe if you plan to freeze it, as freezing can affect the texture slightly. Thaw overnight in the refrigerator before serving, and give it a gentle stir if any separation has occurred.
Individual portions freeze particularly well, making them perfect for unexpected guests or personal treats. I often prepare a double batch and freeze half in individual serving containers, creating a ready-made dessert supply that never fails to impress.
Nutritional Considerations and Dietary Adaptations
| Component | Per Serving | % Daily Value | Notes |
|---|---|---|---|
| Calories | 285 | 14% | Based on 6 servings |
| Total Fat | 22g | 28% | Primarily from cream |
| Saturated Fat | 14g | 70% | Consider portion size |
| Cholesterol | 165mg | 55% | From egg yolks |
| Sodium | 45mg | 2% | Naturally low |
| Carbohydrates | 15g | 5% | Mainly from sugar |
| Protein | 6g | 12% | From eggs and cream |
| Caffeine | 25mg | – | Varies with coffee strength |
For those following specific dietary requirements, several adaptations are possible. A dairy-free version can be created using coconut cream whipped to soft peaks, though the flavor profile will be noticeably different. Agar powder can substitute for gelatin in vegetarian versions, though the texture may be slightly firmer.
Sugar substitutes work reasonably well in this recipe, though I recommend using only about 75% of the suggested amount when substituting with artificial sweeteners, as they often taste sweeter than sugar. Monk fruit sweetener and erythritol provide the best results in my experience.
Advanced Techniques and Professional Tips
After years of perfecting this recipe, I’ve discovered several professional techniques that elevate home results to restaurant quality. Temperature monitoring using an instant-read thermometer ensures perfect sabayon consistency without risk of scrambling. The ideal temperature range for the sabayon is between 165-170°F (74-77°C).
Straining the completed mousse base before folding in the whipped cream removes any potential lumps and creates an impossibly smooth final texture. Use a fine-mesh strainer and gently press the mixture through with a rubber spatula.
For the ultimate professional presentation, consider layering different coffee intensities or adding textural elements between layers. I sometimes create a two-tone effect using regular coffee mousse layered with espresso mousse made with double-strength coffee.
The key to consistent results lies in understanding that mousse-making is as much about technique as it is about ingredients. Pay attention to the subtle cues: the way the sabayon ribbons from your whisk, the exact moment when cream reaches soft peaks, and the gentle resistance you feel when folding in the final additions.
Questions and Answers
Q. How long should I chill the coffee mousse before serving? The mousse needs at least 4 hours to properly set, but I recommend chilling overnight for the best texture and flavor development. The extended chilling time allows the gelatin to fully set while the coffee flavors meld beautifully with the other ingredients.
Q. Can I make coffee mousse without gelatin? While gelatin provides the ideal structure, you can create a lighter version using only whipped cream and egg whites. However, the texture will be more fragile and the mousse won’t hold its shape as well. For vegetarians, agar powder works as a substitute, though it creates a slightly firmer texture.
Q. What type of coffee works best for this recipe? I strongly recommend using freshly brewed espresso or very strong coffee concentrate. Medium to dark roast beans provide the robust flavor needed to stand up to the cream and other ingredients. Avoid using instant coffee, as it lacks the depth and complexity required for exceptional mousse.
Q. Why did my mousse turn out grainy? Graininess usually results from improperly dissolved gelatin or temperature shock when combining ingredients. Always bloom gelatin properly in cold liquid before heating, and ensure all mixtures are at similar temperatures before combining to prevent curdling or separation.
Q. Can I prepare individual portions in advance? Absolutely! Individual portions are perfect for entertaining and can be prepared up to two days in advance. Cover each portion with plastic wrap pressed directly onto the surface to prevent skin formation, and refrigerate until ready to serve.
Q. What’s the best way to achieve the lightest texture? The secret lies in gentle folding and proper cream whipping. Stop whipping cream at soft peaks rather than stiff peaks, and use broad, sweeping folding motions to maintain as much air as possible. Never use a mixer once you start folding ingredients together.
Q. How can I intensify the coffee flavor without affecting texture? Use espresso powder dissolved in a small amount of hot water, or reduce your brewed coffee by half through gentle simmering to concentrate the flavor. You can also add a tablespoon of coffee liqueur, which enhances the coffee taste while adding complexity.
Q. Is it safe to use raw egg yolks in this recipe? The sabayon process heats the egg yolks to a safe temperature (160°F/71°C), effectively pasteurizing them. However, if you’re concerned about raw eggs, you can use pasteurized egg yolks available in cartons at most grocery stores.
Q. Can I freeze coffee mousse for longer storage? Yes, coffee mousse freezes well for up to one month. Add an extra half teaspoon of gelatin if you plan to freeze it, as freezing can slightly affect the texture. Thaw overnight in the refrigerator and gently stir before serving if needed.
Q. What garnishes pair best with coffee mousse? Classic options include cocoa powder dusting, whipped cream, and chocolate shavings. For more creative presentations, try candied coffee beans, amaretti cookie crumbs, or a drizzle of chocolate sauce. Fresh berries provide a lovely color and flavor contrast to the rich coffee taste.