Have you ever wondered why restaurant rice dishes taste so much better than what you make at home? I certainly did, and that quest led me down a fascinating culinary rabbit hole exploring the art of perfect basmati rice pilaf. After countless attempts (and a few memorable disasters), I’ve mastered the technique to create restaurant-quality rice pilaf that will elevate any meal from ordinary to extraordinary.
Basmati rice pilaf isn’t just rice—it’s an aromatic canvas that carries flavors beautifully while maintaining its distinctive character. Unlike plain boiled rice, pilaf involves toasting the grains in fat before adding liquid, creating layers of flavor and that perfect fluffy texture where every grain remains separate.
Today, I’m sharing everything I’ve learned about making the perfect basmati rice pilaf—from selecting the right rice to creative variations that will make this dish a staple in your cooking repertoire.
What Makes Basmati Rice Special?
Before diving into pilaf techniques, let’s understand what makes basmati rice worth seeking out. Basmati is a long-grain rice primarily grown in India and Pakistan, with a name that translates to “fragrant” in Hindi. This isn’t just marketing—the rice releases a distinct nutty aroma when cooked, thanks to a compound called 2-acetyl-1-pyrroline, the same molecule found in pandan leaves.
Basmati rice has several distinctive characteristics:
- Elongation: Unlike other rice varieties, basmati grains expand dramatically lengthwise during cooking rather than widthwise, sometimes stretching to twice their original length
- Distinct aroma: The natural fragrance is reminiscent of nuts and flowers
- Texture: When properly cooked, basmati maintains a firm yet tender bite with grains that remain separate
- Aging: Quality basmati is aged for at least six months to a year, which reduces moisture content and enhances flavor
This special rice deserves special treatment, which is exactly what the pilaf method provides.
The Science Behind Perfect Pilaf
The pilaf technique originated in the Middle East and spread throughout Asia and Europe, with each culture adapting it to local ingredients. What distinguishes pilaf from ordinary rice is the cooking method:
- Toasting the rice in fat (butter, ghee, or oil) before adding liquid
- Using a precise ratio of liquid to rice
- Cooking with aromatic ingredients
- Allowing the rice to rest after cooking
This method creates multiple flavor development stages. When you toast dry rice in fat, the grains develop nutty, complex notes through a process similar to the Maillard reaction. The fat also coats each grain, helping them remain separate during cooking. This step is crucial—skip it, and you’ll miss out on significant flavor development.
Essential Ingredients
To make a classic basmati rice pilaf, you’ll need:
- 2 cups aged basmati rice
- 3 tablespoons ghee or unsalted butter (olive oil works for a vegan version)
- 1 medium onion, finely diced
- 2-3 cloves garlic, minced
- 1 cinnamon stick
- 4-5 green cardamom pods
- 4 whole cloves
- 1 bay leaf
- 1 teaspoon cumin seeds
- 3-3.25 cups chicken or vegetable stock (the exact ratio depends on your specific rice)
- 1.5 teaspoons kosher salt (adjust based on whether your stock is salted)
- 2 tablespoons fresh herbs for garnish (cilantro, mint, or parsley)
Equipment You’ll Need
Before starting, gather these kitchen tools:
- Heavy-bottomed pot with a tight-fitting lid
- Fine-mesh strainer for rinsing rice
- Measuring cups and spoons
- Wooden spoon or heat-resistant spatula
- Clean kitchen towel
The Perfect Basmati Rice Pilaf Method
Step 1: Properly Rinse Your Rice
This step isn’t optional! Rinsing removes excess starch that would otherwise make your pilaf gummy. Here’s my foolproof method:
- Place rice in a fine-mesh strainer
- Run cold water over the rice, using your fingers to gently agitate the grains
- Continue rinsing until the water runs clear (usually 3-4 rinses)
- After rinsing, some traditionalists soak their basmati for 30 minutes, which I find produces even better results
Step 2: Aromatics and Spices Base
The aromatics and spices become the foundation of flavor for your pilaf:
- Heat your heavy-bottomed pot over medium heat
- Add ghee or butter and allow it to melt completely
- Add whole spices (cinnamon, cardamom, cloves, bay leaf, cumin seeds) and let them sizzle for 30 seconds until fragrant
- Add diced onions and sauté until translucent and just beginning to turn golden (about 5-7 minutes)
- Add minced garlic and sauté for another 30 seconds until fragrant but not browned
This aromatic base is what distinguishes a memorable pilaf from an ordinary one. The fat carries these flavors throughout the dish.
Step 3: Toast the Rice
Now comes the crucial step that creates that distinct pilaf texture and flavor:
- Drain your rinsed (and optionally soaked) rice thoroughly
- Add it to the pot with aromatics and spices
- Stir constantly for 2-3 minutes until each grain is coated with fat and begins to look slightly translucent at the edges
- You’ll notice a nutty aroma developing—this is exactly what you want!
Be careful not to brown the rice; you’re just looking for it to be well-coated and lightly toasted.
Step 4: Add Liquid and Cook
The liquid-to-rice ratio is crucial for perfectly cooked grains:
- Pour in the warm stock or water (cold liquid can shock the rice and lead to uneven cooking)
- Add salt and stir once to distribute everything evenly
- Bring to a gentle boil
- Once boiling, immediately reduce heat to the lowest setting, cover with a tight-fitting lid
- Let cook undisturbed for exactly 15 minutes
- Resist the urge to peek! Each time you lift the lid, you lose steam and extend cooking time
Step 5: The Essential Rest
This often-skipped step is what separates good pilaf from great pilaf:
- After 15 minutes, remove the pot from heat without removing the lid
- Place a clean kitchen towel between the pot and lid (this absorbs excess steam that would otherwise fall back and make the top layer soggy)
- Let the covered rice rest for 10-15 minutes
- During this time, the rice continues to steam gently, and the moisture distributes evenly throughout
Step 6: Fluff and Serve
The final touch:
- Remove the lid and towel
- Use a fork (not a spoon) to gently fluff the rice, lifting and separating the grains rather than stirring
- Remove whole spices if desired (or warn guests to eat around them)
- Garnish with fresh herbs and serve immediately
Troubleshooting Common Pilaf Problems
Even experienced cooks occasionally encounter issues with rice pilaf. Here’s how to address common problems:
| Problem | Potential Cause | Solution |
|---|---|---|
| Rice is too firm/undercooked | Not enough liquid or cooking time | Add 2-3 tablespoons hot water, cover, and cook for an additional 5 minutes |
| Rice is mushy | Too much liquid or overcooked | Next time, reduce liquid by ¼ cup; for current batch, spread on baking sheet and dry in low oven for 5-10 minutes |
| Bottom layer is burnt | Heat too high or pot too thin | Use a heavy-bottomed pot; lower heat; add a piece of flatbread under rice for “tahdig” style crispy bottom |
| Grains clump together | Not enough fat or inadequate rinsing | Rinse thoroughly; ensure each grain is coated with fat during toasting |
| Spices are overwhelming | Too many whole spices or ground instead of whole | Use fewer spices or bundle them in cheesecloth for easy removal |
| Rice tastes bland | Insufficient salt or aromatics | Add salt to finished dish; next time increase aromatics and toast more thoroughly |
Variations to Explore
Once you’ve mastered the basic technique, try these variations to expand your pilaf repertoire:
Jeweled Rice Pilaf
This Persian-inspired variation adds:
- ⅓ cup dried cranberries or barberries
- ⅓ cup golden raisins
- ¼ cup slivered pistachios or almonds
- Pinch of saffron threads bloomed in 2 tablespoons hot water
- 2 tablespoons orange zest
Add the bloomed saffron to your cooking liquid, and fold in fruits, nuts, and zest after fluffing.
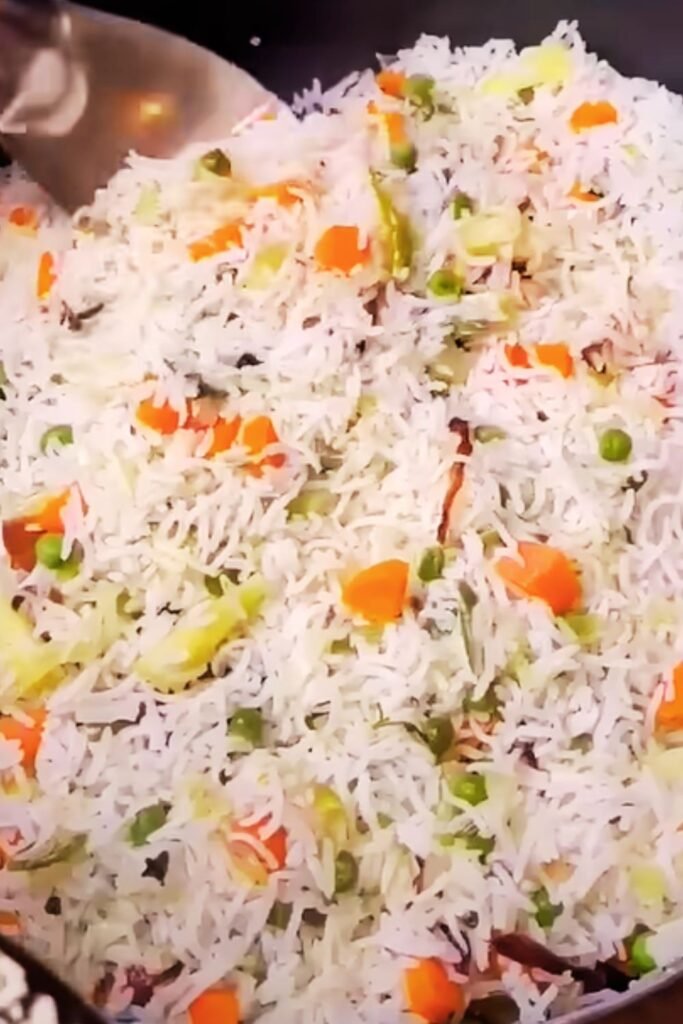
Vegetable Pilaf
Transform your pilaf into a complete meal:
- ½ cup diced carrots (add with onions)
- ½ cup frozen peas (add during the resting phase)
- ½ cup diced bell peppers (add with onions)
- 2 tablespoons tomato paste (add after toasting rice)
Lemon-Herb Pilaf
For a bright, fresh variation:
- Zest and juice of one lemon
- ¼ cup chopped fresh herbs (parsley, dill, and mint)
- 2 tablespoons pine nuts, toasted
Add lemon zest before cooking and fold in juice, herbs, and pine nuts after fluffing.
Make-Ahead and Storage Tips
Pilaf can be prepared in advance, making it perfect for entertaining:
Make-Ahead Method
- Complete the recipe through the resting phase
- Fluff the rice and let it cool completely
- Refrigerate in an airtight container for up to 3 days
- To reheat, sprinkle with 1-2 tablespoons water, cover with a damp paper towel, and microwave in 30-second intervals until hot
- Alternatively, reheat in a covered pan over low heat with a splash of water
Freezing Instructions
- Cool cooked pilaf completely
- Portion into freezer-safe containers or bags
- Freeze for up to 3 months
- Thaw overnight in the refrigerator before reheating
Nutritional Benefits of Basmati Rice Pilaf
Beyond being delicious, basmati rice pilaf offers several nutritional advantages:
| Nutrient | Benefit | Amount per Serving (1 cup) |
|---|---|---|
| Complex Carbohydrates | Provides steady energy | 45g |
| Protein | Supports tissue repair | 4-5g |
| Fiber | Promotes digestive health | 1.7g |
| B Vitamins | Supports metabolism | 15% DV (thiamine) |
| Magnesium | Muscle function and bone health | 20% DV |
| Iron | Oxygen transport | 8% DV |
| Zinc | Immune support | 5% DV |
Values are approximate and may vary based on specific ingredients used.
Basmati rice has a lower glycemic index compared to other rice varieties, meaning it causes a more gradual rise in blood sugar. When combined with vegetables, proteins, and healthy fats in a pilaf, it becomes part of a well-balanced meal.
Serving Suggestions
A well-prepared basmati rice pilaf deserves the right accompaniments:
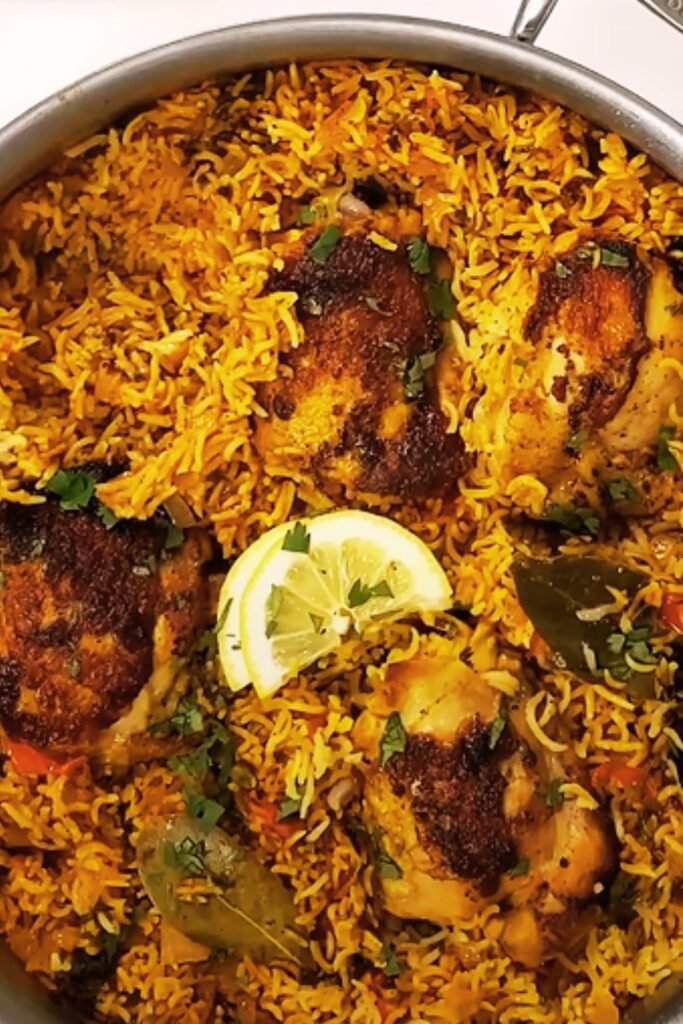
Complementary Main Dishes
- Grilled or roasted chicken with herbs
- Lamb or beef kebabs
- Vegetable curry
- Grilled fish with lemon
- Roasted vegetables with yogurt sauce
Side Dishes
- Cucumber raita or yogurt sauce
- Fresh green salad with citrus dressing
- Roasted vegetables
- Pickled vegetables for contrast
- Warm flatbread
Garnishes to Elevate Your Pilaf
- Fried onions
- Toasted nuts (almonds, pistachios, pine nuts)
- Pomegranate seeds
- Fresh herbs (cilantro, mint, parsley)
- Dried fruit
Cultural Significance of Rice Pilaf
Rice pilaf transcends cultural boundaries, appearing in various forms across the globe:
- Middle Eastern Pilaf: Often includes vermicelli noodles and pine nuts
- Indian Pulao: Features aromatic spices like cardamom, cloves, and cinnamon
- Persian Chelow: Distinguished by its crispy tahdig bottom
- Turkish Pilav: Made with orzo pasta and often served with kebabs
- Central Asian Plov: Includes meat, carrots, and heavy spicing
Each culture has developed its own techniques and flavor profiles, but all share the fundamental approach of toasting rice before cooking in a flavorful liquid.
Questions & Answers
Q: Why does my rice pilaf sometimes turn out mushy despite following the recipe?
The most common reason is incorrect liquid-to-rice ratio. Different rice batches (even of the same variety) can require slightly different amounts of liquid. Start with a ratio of 1:1.5 (rice to liquid) and adjust based on your results. Also, make sure you’re letting the rice rest after cooking—this step is crucial for moisture to distribute evenly.
Q: Can I use brown basmati rice for pilaf?
Yes, though you’ll need to adjust the cooking time and liquid ratio. Brown basmati generally requires about 2.25 cups of liquid per cup of rice and approximately 35-40 minutes of cooking time. The toasting step remains the same, but you’ll want to sauté the rice slightly longer.
Q: How can I add protein to make this a complete meal?
There are several ways to incorporate protein:
- Add 1 cup of cooked chickpeas or lentils during the resting phase
- Mix in 1 cup of toasted nuts like almonds or pistachios after fluffing
- Sauté 1 cup of diced firm tofu with the onions
- Stir in 2 cups of cooked, shredded chicken after fluffing
- For a traditional biryani-style approach, layer partially cooked protein with the rice before the final steaming
Q: Can I make pilaf in a rice cooker or Instant Pot?
Absolutely! For a rice cooker:
- Complete the toasting steps on the stovetop
- Transfer toasted rice and aromatics to the rice cooker
- Add appropriate amount of liquid
- Cook on the regular rice setting
For Instant Pot:
- Use the Sauté function for toasting steps
- Add stock, seal lid, and cook on high pressure for 5 minutes
- Allow 10 minutes natural release before manually releasing remaining pressure
- Continue with the resting and fluffing steps
Q: My rice develops a crust on the bottom—is this normal?
Yes! In many cultures, this crust (called tahdig in Persian cuisine, socarrat in Spanish paella) is considered the best part of the dish. If you want to avoid it, use a lower heat setting or a heavier pot with better heat distribution. If you want to enhance it, leave the pot on low heat for an extra 5 minutes at the end of cooking before resting.
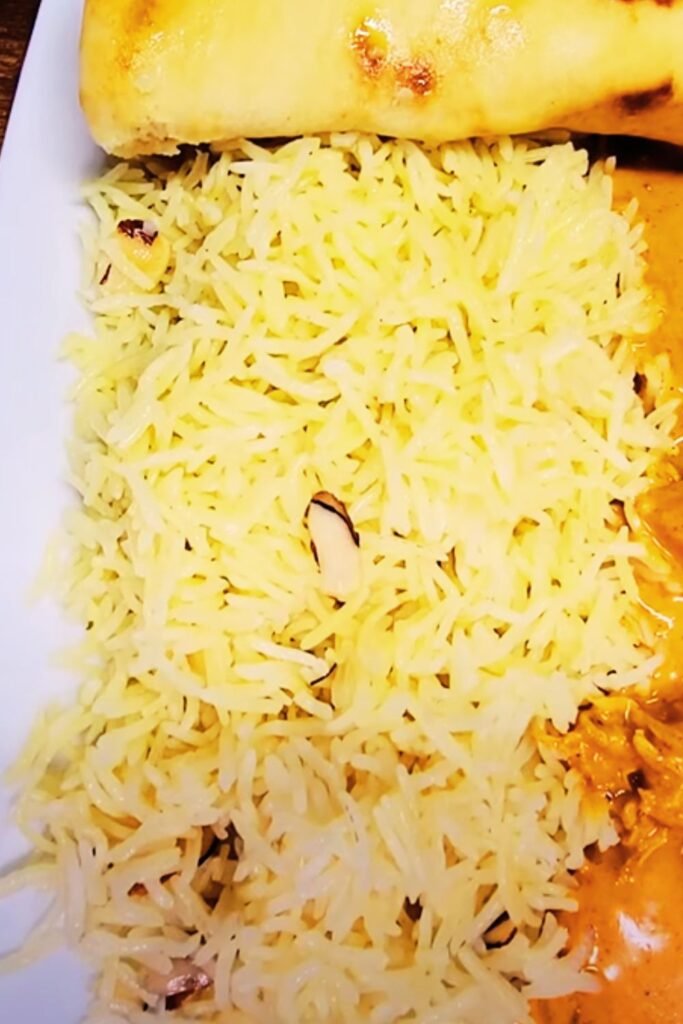
Q: How can I make my pilaf more colorful for special occasions?
Natural food colorings work beautifully in rice:
- For yellow rice, add ¼ teaspoon turmeric or a few saffron threads
- For red/pink sections, mix in 2 tablespoons tomato paste or beet juice
- For green accent, blend 2 tablespoons of herb paste (cilantro/mint)
- For visual contrast, divide your rice after toasting and color different portions, then layer them in the pot
Final Thoughts
Mastering basmati rice pilaf is like gaining a culinary skeleton key—it opens doors to countless delicious meals. The technique might seem particular at first, but the attention to detail pays off in perfectly fluffy, aromatic rice where each grain remains distinct yet infused with flavor.
I encourage you to start with the basic recipe, perfect your technique, and then explore the variations that speak to your taste preferences. Remember that rice pilaf is both a science and an art—the measurements matter, but so does the cook’s intuition and creativity.
Whether served alongside a complex curry or as the foundation for a simple weeknight meal, a well-executed basmati rice pilaf transforms any dining experience. The combination of toasted grains, aromatic spices, and proper cooking technique creates something far greater than the sum of its parts—a dish that’s simultaneously humble and elegant.