“As an Amazon Associate, I earn from qualifying purchases.”
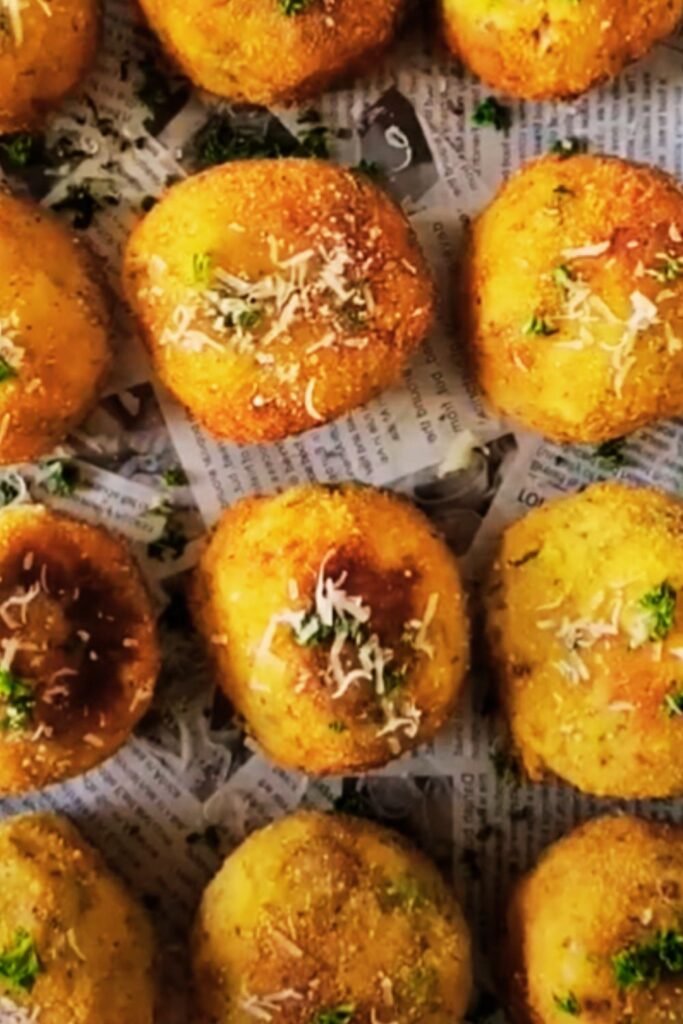
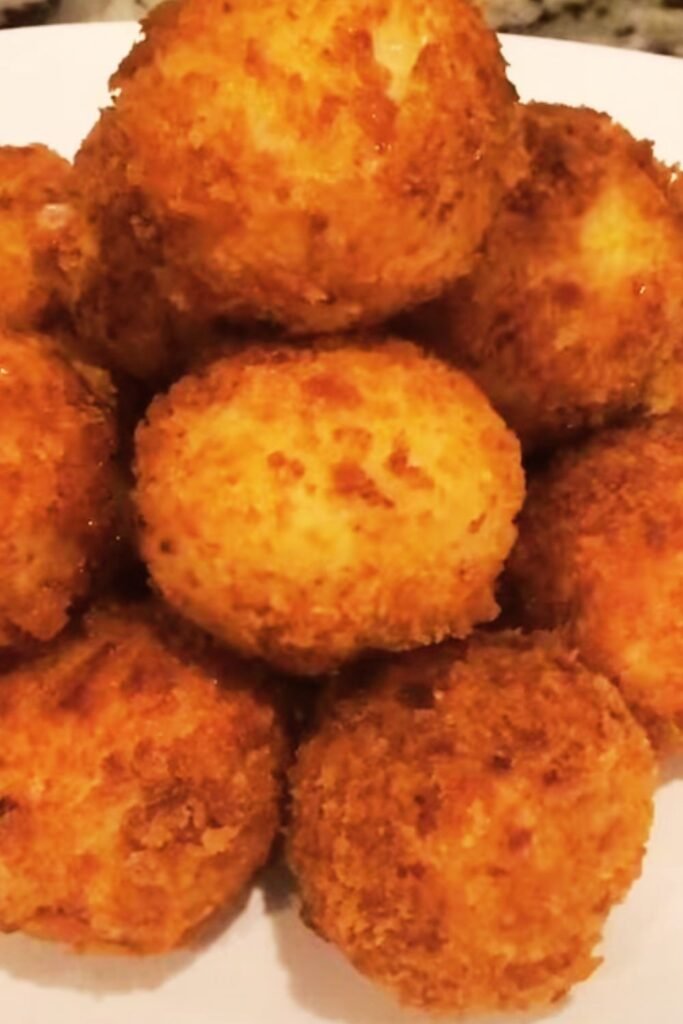
There’s something truly magical about Italian rice balls. Known traditionally as arancini, these golden orbs of risotto filled with cheese and other delectable ingredients have been a staple of Italian cuisine for centuries. While the classic version is deep-fried to perfection, I’ve discovered that baking them creates an equally delicious yet lighter alternative that’s perfect for modern kitchens.
When I first attempted to bake arancini instead of frying them, I was skeptical. Would they achieve that signature crispy exterior? Would the flavors develop properly? After much experimentation, I’m thrilled to share this healthier approach that sacrifices none of the authentic taste and texture that makes rice balls so irresistible.
In this comprehensive guide, I’ll walk you through my foolproof method for creating baked Italian rice balls that will transport your taste buds straight to Sicily. From preparing the perfect risotto base to mastering the technique of forming and baking these delightful morsels, you’ll soon be creating restaurant-quality arancini in your own home.
The History Behind Italian Rice Balls
Before diving into the recipe, I think it’s important to appreciate the rich culinary heritage of these delicious morsels. Arancini originated in Sicily in the 10th century during Arab rule. The name “arancini” comes from their resemblance to small oranges (“arancia” in Italian).
Traditionally made as a way to use leftover risotto, these rice balls were a practical solution for creating a portable meal that workers could carry into the fields. The classic Sicilian version typically contains ragù (meat sauce), peas, and mozzarella, all encased in saffron-infused risotto and deep-fried to golden perfection.
Over centuries, different regions of Italy developed their own variations. In Naples, they’re known as “palle di riso” (rice balls), while Rome has its own version called “supplì,” typically filled with just cheese and sometimes a meat sauce.
My baked version pays homage to this tradition while adding a contemporary, healthier twist that I think you’ll appreciate just as much as the original.
Essential Ingredients for Perfect Baked Rice Balls
The key to exceptional arancini lies in high-quality ingredients. Here’s what you’ll need:
For the Risotto Base:
- Arborio or Carnaroli rice: 2 cups
- Low-sodium chicken or vegetable broth: 6 cups
- White wine (dry): 1/2 cup
- Yellow onion (finely diced): 1 medium
- Garlic cloves (minced): 3
- Butter: 3 tablespoons
- Olive oil: 2 tablespoons
- Parmesan cheese (freshly grated): 1 cup
- Salt and freshly ground black pepper to taste
- Optional: Saffron threads (1/4 teaspoon) for authentic color and flavor
For the Filling:
- Mozzarella cheese (cut into small cubes): 8 ounces
- Prosciutto (finely chopped): 4 ounces (optional)
- Frozen peas (thawed): 1/2 cup
- Fresh basil leaves (chopped): 2 tablespoons
For the Coating:
- Large eggs (beaten): 3
- Italian-seasoned breadcrumbs: 2 cups
- Panko breadcrumbs: 1 cup (for extra crispiness)
- Parmesan cheese (grated): 1/2 cup
- Olive oil cooking spray
Missing a few things? You can grab them on Amazon here.
Equipment You’ll Need
Before starting, gather these essential tools:
- Large pot for cooking risotto
- Wooden spoon
- Baking sheets
- Parchment paper
- Small ice cream scoop or 1/4 cup measuring cup
- Small bowl for water (to moisten hands while forming balls)
- Shallow dishes for breading station
- Wire cooling rack
Missing any kitchen essentials? You can grab them on Amazon here.
Step-by-Step Preparation
Making the Perfect Risotto Base
The foundation of great arancini is perfectly cooked risotto. Here’s how I achieve consistent results:
- Prepare the broth: In a medium saucepan, heat your chicken or vegetable broth until it’s hot but not boiling. Keep it warm throughout the risotto-making process.
- Sauté the aromatics: In a large, heavy-bottomed pot, heat the olive oil and 1 tablespoon of butter over medium heat. Add the finely diced onion and cook until translucent, about 3-4 minutes. Add the minced garlic and cook for another 30 seconds until fragrant.
- Toast the rice: Add the Arborio or Carnaroli rice to the pot and stir to coat each grain with the oil and butter. Continue cooking and stirring for about 2 minutes until the edges of the rice grains become translucent while the centers remain white.
- Add wine: Pour in the white wine and stir constantly until it’s completely absorbed by the rice. You’ll know it’s ready when you can drag your wooden spoon through the rice and it leaves a clear path that slowly fills in.
- Begin adding broth: Add the warm broth one ladle at a time (about 1/2 cup), stirring frequently. Wait until each addition is nearly absorbed before adding the next. If using saffron, add it with the first ladle of broth.
- Continue the process: This gradual addition of liquid should take about 18-22 minutes total. The rice should be creamy but still have a slight firmness in the center when done (al dente).
- Finish the risotto: Remove from heat and stir in the remaining 2 tablespoons of butter and the grated Parmesan cheese. Season with salt and pepper to taste. The risotto should be slightly thicker than you would normally serve it, as it needs to hold its shape for the rice balls.
- Cool completely: Spread the risotto on a baking sheet and refrigerate for at least 2 hours or overnight. This cooling step is crucial for the rice to firm up and become moldable.
Forming and Filling the Rice Balls
Now comes the fun part—creating these delightful stuffed treasures:
- Prepare your workstation: Set up a breading station with beaten eggs in one shallow dish and a mixture of Italian breadcrumbs, panko, and grated Parmesan in another.
- Prepare the filling: In a small bowl, combine the mozzarella cubes, prosciutto (if using), thawed peas, and chopped basil.
- Form the balls: With slightly moistened hands (keep a small bowl of water nearby), take about 1/4 cup of the chilled risotto and flatten it into a disc in your palm. Place a small portion of filling (about 1 tablespoon) in the center. Carefully fold the edges of the risotto over the filling and gently roll between your palms to form a ball about 2-3 inches in diameter.
- Coat the balls: Dip each ball into the beaten eggs, letting excess drip off, then roll in the breadcrumb mixture until evenly coated. Place on a parchment-lined baking sheet.
- Chill again: Refrigerate the formed rice balls for at least 30 minutes. This helps them maintain their shape during baking.
Baking to Perfection
This is where my method differs from traditional recipes, but I promise the results are worth it:
- Preheat the oven: Set your oven to 425°F (220°C) and position the rack in the middle.
- Prepare for baking: Line a baking sheet with parchment paper and place a wire rack on top if you have one. This helps air circulate around the rice balls for even browning.
- Add a light coating of oil: Generously spray the rice balls with olive oil cooking spray. This helps achieve that golden-brown exterior without deep-frying.
- Bake: Place the rice balls in the preheated oven and bake for 25-30 minutes, turning halfway through, until they’re golden brown and crispy on the outside.
- Rest briefly: Allow them to cool for 5 minutes before serving. This helps the melted cheese inside to set slightly so it doesn’t all run out when you take your first bite.
Missing a few things? You can grab them on Amazon here.
Missing any kitchen essentials? You can grab them on Amazon here.
Troubleshooting Common Issues
In my years of perfecting this recipe, I’ve encountered a few challenges. Here’s how to overcome them:
Rice Balls Breaking Apart
- Possible cause: Risotto not cooled enough or too wet
- Solution: Make sure your risotto is thoroughly chilled before forming balls. If it seems too wet, you can add a bit more Parmesan cheese to help it bind.
Filling Leaking Out
- Possible cause: Too much filling or thin spots in the rice coating
- Solution: Use less filling and ensure you have an even layer of rice all around the filling, with no thin spots.
Not Crispy Enough
- Possible cause: Oven temperature too low or insufficient oil spray
- Solution: Make sure your oven is fully preheated and use a generous amount of olive oil spray. The panko breadcrumbs in the coating are also crucial for crispiness.
Rice Balls Sticking to the Pan
- Possible cause: Not using parchment paper or a wire rack
- Solution: Always use parchment paper and consider investing in a wire rack for even better results.
Nutritional Information
For those who are curious about the nutritional benefits of baking versus frying, here’s a comparative breakdown:
| Nutritional Element | Traditional Fried (per serving) | Baked Version (per serving) |
|---|---|---|
| Calories | 375 kcal | 290 kcal |
| Total Fat | 22g | 12g |
| Saturated Fat | 8g | 6g |
| Cholesterol | 75mg | 65mg |
| Sodium | 620mg | 580mg |
| Carbohydrates | 32g | 33g |
| Fiber | 1.5g | 2g |
| Protein | 14g | 13g |
Note: Values are approximate and may vary based on specific ingredients used.
As you can see, my baked version significantly reduces fat and calories while maintaining nearly the same protein content and other nutrients.
Flavor Variations to Explore

One of the things I love most about arancini is how versatile they are. Here are some of my favorite variations:
Classic Ragù Filling
- Ground beef or pork: 1/2 pound
- Tomato sauce: 1 cup
- Carrot, celery, onion (finely diced): 1/4 cup each
- Red wine: 2 tablespoons
- Peas: 1/4 cup
- Mozzarella cheese: 4 ounces
Mushroom and Truffle (Vegetarian)
- Mixed mushrooms (finely chopped): 2 cups
- Shallots (minced): 2
- White wine: 3 tablespoons
- Truffle oil: 1 teaspoon
- Fontina cheese: 4 ounces
- Fresh thyme: 1 tablespoon
Spinach and Ricotta (Vegetarian)
- Spinach (cooked and well-drained): 1 cup
- Ricotta cheese: 1/2 cup
- Nutmeg: 1/4 teaspoon
- Lemon zest: 1 teaspoon
- Mozzarella: 4 ounces
- Pine nuts (toasted): 2 tablespoons
Seafood Sensation
- Mixed seafood (cooked shrimp, crab, etc.): 1 cup
- Mascarpone cheese: 1/4 cup
- Lemon zest: 1 teaspoon
- Fresh dill: 1 tablespoon
- Capers: 1 tablespoon
- White wine reduction: 2 tablespoons
Sauce Pairings
The perfect sauce can elevate your rice balls from great to extraordinary. Here are some excellent options:
Marinara Dipping Sauce
- San Marzano tomatoes (crushed): 1 can (28 oz)
- Garlic cloves (minced): 3
- Olive oil: 2 tablespoons
- Fresh basil: 1/4 cup
- Red pepper flakes: 1/4 teaspoon
- Salt and pepper to taste
Pesto Aioli
- Mayonnaise: 1/2 cup
- Basil pesto: 1/4 cup
- Lemon juice: 1 tablespoon
- Garlic (minced): 1 clove
Roasted Red Pepper Sauce
- Roasted red peppers: 2 large
- Tomato paste: 1 tablespoon
- Olive oil: 2 tablespoons
- Red wine vinegar: 1 teaspoon
- Garlic clove: 1
- Fresh oregano: 1 teaspoon
Missing a few things? You can grab them on Amazon here.
Make-Ahead and Storage Tips
I often make a large batch of these rice balls for entertaining or meal prep. Here’s how to store them:
Make-Ahead Options:
- Prepare risotto in advance: The risotto base can be made up to 2 days ahead and refrigerated.
- Form and coat rice balls: Form, fill, and coat the rice balls up to 24 hours in advance. Store covered in the refrigerator.
- Freeze unbaked balls: Place formed and coated rice balls on a baking sheet and freeze until solid. Transfer to freezer bags and store for up to 3 months.
Storage of Cooked Rice Balls:
- Refrigeration: Store cooked rice balls in an airtight container for up to 3 days.
- Freezing: Cooked rice balls can be frozen for up to 1 month.
Reheating Instructions:
- From refrigerated: Reheat in a 350°F (175°C) oven for 10-15 minutes.
- From frozen (uncooked): Bake frozen rice balls at 425°F (220°C) for 35-40 minutes.
- From frozen (cooked): Reheat at 350°F (175°C) for 20-25 minutes.
Missing any kitchen essentials? You can grab them on Amazon here.
Serving Suggestions
To create a truly memorable dining experience, consider these serving ideas:
As an Appetizer
- Arrange on a serving platter with a small bowl of warm marinara sauce in the center
- Garnish with fresh basil leaves and a light dusting of grated Parmesan
- Serve with lemon wedges for a bright, acidic accent
As a Main Course
- Create an arancini plate with a side of dressed arugula salad
- Pair with roasted vegetables drizzled with balsamic glaze
- Serve alongside grilled lemon-herb chicken for a protein boost
For a Party Buffet
- Create a rice ball bar with various dipping sauces
- Offer mini versions (about 1-inch diameter) for bite-sized treats
- Provide small plates and cocktail napkins for easy enjoyment
For Family-Style Dining
- Place a large platter of rice balls in the center of the table
- Accompany with a hearty Italian-style salad
- Serve with crusty artisan bread and olive oil for dipping
Missing a few things? You can grab them on Amazon here.
Missing any kitchen essentials? You can grab them on Amazon here.
Common Questions About Baked Rice Balls
Q: Can I use leftover risotto to make these rice balls? Absolutely! In fact, this recipe is perfect for repurposing leftover risotto. Just make sure it’s completely chilled before forming the balls.
Q: Is there a dairy-free option for these rice balls? Yes, you can substitute dairy-free cheese alternatives for both the Parmesan and mozzarella. For the butter in the risotto, use olive oil instead.
Q: How do I know when my rice balls are done baking? They should be golden brown and crispy on the outside, and if you break one open, the cheese inside should be fully melted. This typically takes 25-30 minutes at 425°F.
Q: Can I make smaller rice balls for a party appetizer? Definitely! For cocktail-sized rice balls, use about 1-2 tablespoons of risotto per ball and reduce the baking time to 18-20 minutes.
Q: Why are my rice balls not holding their shape? The most common reason is that the risotto isn’t cool enough or thick enough. Make sure to refrigerate it thoroughly, and if needed, add a bit more Parmesan cheese to help bind it.
Q: Can I prepare these without eggs? Yes! You can create an egg substitute by mixing 2 tablespoons of ground flaxseed with 6 tablespoons of water. Let it sit for 15 minutes until it develops a gel-like consistency.
Q: How can I make these gluten-free? Simply substitute the regular breadcrumbs with your favorite gluten-free breadcrumbs. Many stores now carry gluten-free panko as well.
Q: What rice works best for arancini? Short-grain rice varieties like Arborio, Carnaroli, or Vialone Nano work best because they release more starch, creating that creamy, sticky texture needed for rice balls.
The Perfect Occasion for Baked Rice Balls
I’ve found that these baked Italian rice balls are perfect for so many occasions:
- Weekend family gatherings
- Holiday appetizer spreads
- Game day festivities
- Make-ahead weeknight dinners
- Potluck contributions
- Children’s parties (kids love the surprise center!)
- Italian-themed dinner parties
The beauty of these rice balls is that they’re impressive enough for special occasions yet practical enough for everyday meals. Their make-ahead potential makes them a stress-free option for entertaining, and their portability makes them perfect for picnics or packed lunches.
Final Tips for Rice Ball Perfection
After years of refining this recipe, here are my top tips for guaranteed success:
- Don’t rush the risotto: The slow cooking process is essential for releasing the starch that helps the rice balls hold together.
- Season generously: Rice can absorb a lot of flavor, so be generous with your seasonings in the risotto base.
- Use cold hands: When forming the rice balls, periodically rinse your hands with cold water to prevent the rice from sticking.
- Double-coat for extra crispiness: For an even crispier exterior, double-dip the rice balls in egg and breadcrumbs.
- Rest before serving: Allow the rice balls to cool for 5 minutes after baking. This helps set the filling and makes them easier to handle.
By following these detailed instructions and tips, you’ll create baked Italian rice balls that are just as delicious as their fried counterparts but with a significantly lighter nutritional profile. They’re crispy on the outside, creamy and cheesy on the inside, and absolutely bursting with flavor. Whether you’re serving them as an appetizer, main course, or party snack, these arancini are sure to impress everyone at your table.
Buon appetito!
Missing a few things? You can grab them on Amazon here.
Missing any kitchen essentials? You can grab them on Amazon here.