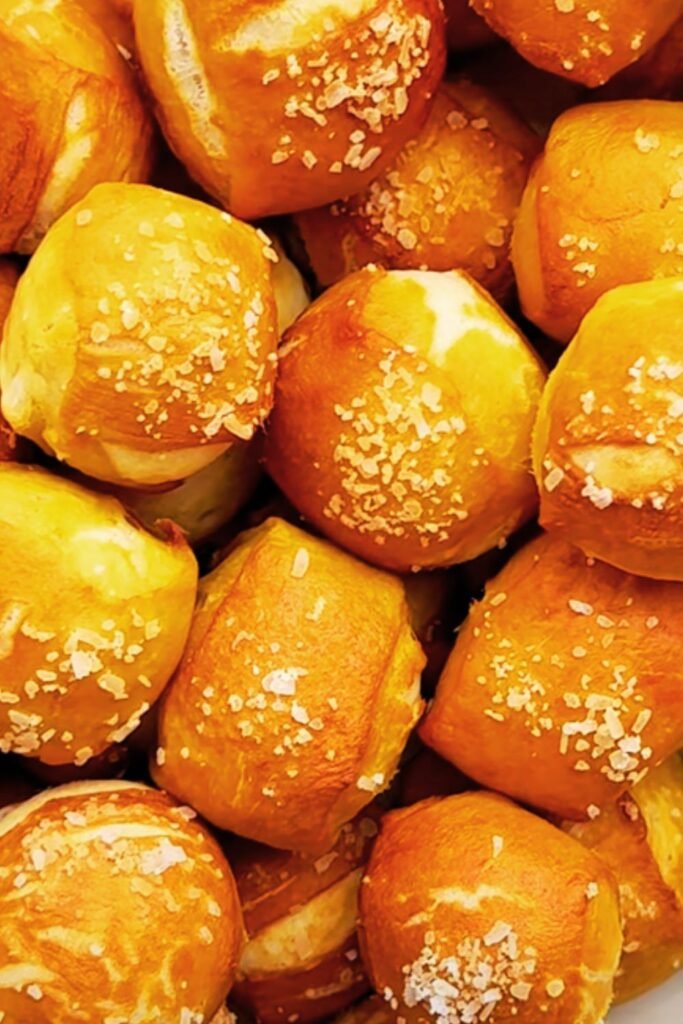
There’s something magical about biting into a warm, freshly baked pretzel. That perfect combination of chewy interior and slightly crisp exterior, finished with that distinctive pretzel flavor we all know and love. But today, I’m taking classic soft pretzels to a whole new level of deliciousness. Get ready for Mozzarella Stuffed Rosemary Parmesan Soft Pretzels – a gourmet twist on the traditional favorite that will have everyone begging for your recipe.
I discovered my love for homemade pretzels years ago when I was living in a tiny apartment with not much more than a mixing bowl and a temperamental oven. Even then, there was something so satisfying about transforming simple ingredients into those distinctive knotted treats. Since then, I’ve experimented with countless variations, but this stuffed version with fragrant rosemary and nutty Parmesan has become my absolute favorite.
What makes these pretzels truly special is the surprise inside – a pocket of melted mozzarella cheese that creates the most incredible cheese pull with every bite. Combined with the aromatic rosemary and savory Parmesan in the dough, these pretzels deliver a flavor experience that’s simply irresistible. Whether you’re serving them as an impressive appetizer at your next gathering or enjoying them as a weekend baking project with the family, they’re guaranteed to be a hit.
What Makes These Pretzels Special
Before we dive into the recipe, let’s talk about what sets these pretzels apart:
- Stuffed with cheese: The hidden mozzarella center creates a delightful surprise with every bite
- Herb-infused dough: Fresh rosemary adds an aromatic flavor that elevates these beyond ordinary pretzels
- Parmesan enriched: Grated Parmesan cheese in the dough adds a savory depth
- Perfectly balanced: The combination of herbs, cheese, and that classic pretzel taste creates a harmonious flavor profile
- Versatile: Enjoy them as a snack, appetizer, or alongside your favorite soup or stew
Ingredients You’ll Need
For the pretzel dough:
- 4½ cups all-purpose flour
- 2 teaspoons salt
- 1 tablespoon sugar
- 2¼ teaspoons active dry yeast (1 standard packet)
- 1½ cups warm water (110-115°F)
- 3 tablespoons unsalted butter, melted and slightly cooled
- ⅓ cup finely grated Parmesan cheese
- 2 tablespoons fresh rosemary, finely chopped
For the filling:
- 8 ounces mozzarella cheese, cut into 12 strips
For the poaching liquid:
- 10 cups water
- ⅔ cup baking soda
For the topping:
- 1 large egg, beaten with 1 tablespoon water
- Coarse sea salt
- 2 tablespoons fresh rosemary, finely chopped
- ¼ cup grated Parmesan cheese
Essential Equipment
- Stand mixer with dough hook (or you can mix and knead by hand)
- Large pot for the baking soda bath
- 2 large baking sheets
- Parchment paper
- Slotted spoon or spider strainer
- Sharp knife or bench scraper
- Pastry brush
The Step-by-Step Process
Making the Pretzel Dough
- In the bowl of your stand mixer, combine the warm water and sugar, stirring gently until the sugar dissolves.
- Sprinkle the yeast over the water and let it sit for about 5 minutes until foamy. If your yeast doesn’t foam up, it might be expired, and you should start over with fresh yeast.
- Add the melted butter to the yeast mixture.
- In a separate bowl, whisk together the flour, salt, grated Parmesan, and chopped rosemary.
- With the mixer on low speed and using the dough hook attachment, gradually add the flour mixture to the wet ingredients.
- Increase the speed to medium-low and knead for 5-6 minutes until the dough is smooth and elastic. The dough should pull away from the sides of the bowl but might still be slightly tacky to the touch.
- If kneading by hand, turn the dough out onto a floured surface and knead for 8-10 minutes.
- Form the dough into a ball and place it in a lightly oiled bowl, turning once to coat. Cover with a clean kitchen towel or plastic wrap.
- Let the dough rise in a warm place for about 1 hour, or until doubled in size.
Shaping and Stuffing the Pretzels
- Preheat your oven to 425°F (220°C). Line two baking sheets with parchment paper and set aside.
- Gently punch down the risen dough and turn it out onto a clean, lightly floured surface.
- Divide the dough into 12 equal portions. I find using a kitchen scale helps ensure uniform pretzels.
- Working with one piece at a time (keep the rest covered with a towel to prevent drying), roll the dough into a rectangle about 5 inches long and 3 inches wide.
- Place a strip of mozzarella in the center of the rectangle, leaving a small border around the edges.
- Fold the long sides of the dough over the cheese, pinching the seam and ends tightly to completely seal the cheese inside. This step is crucial – any gaps will allow the cheese to leak out during baking.
- Roll the stuffed dough gently with your hands to form a rope about 18-20 inches long. The rope should be thicker in the middle (where the cheese is) and slightly tapered at the ends.
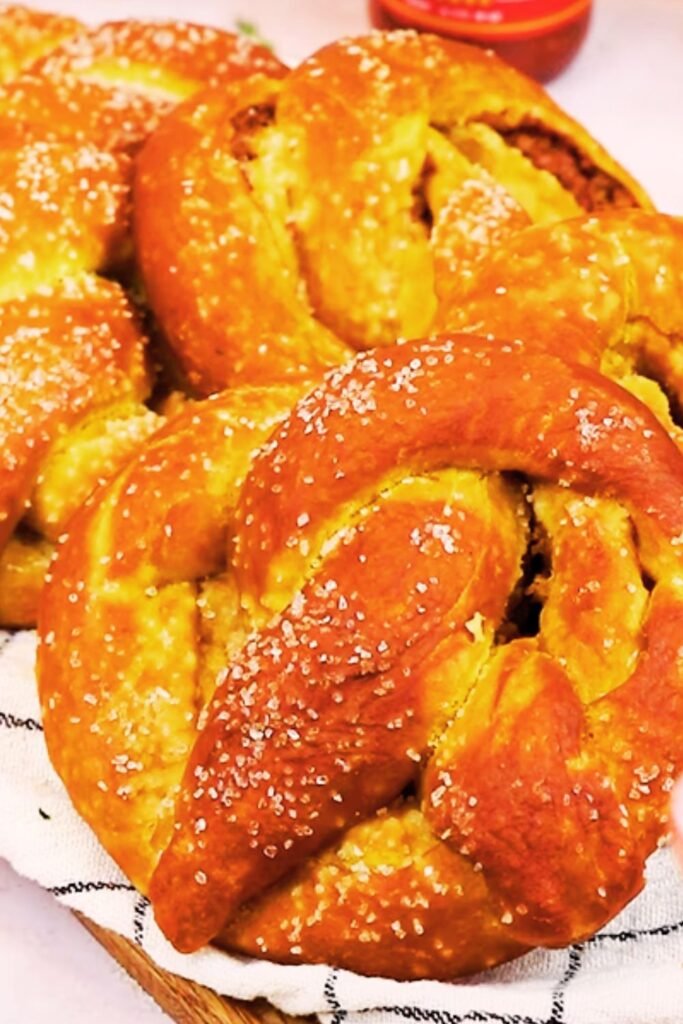
- Form the classic pretzel shape: Make a U-shape with the rope, then cross the ends over each other twice, and press the ends onto the bottom of the U to seal.
- Place the shaped pretzel on the prepared baking sheet and repeat with the remaining dough portions.
The Baking Soda Bath
This step is what gives pretzels their distinctive flavor and beautiful brown exterior. Don’t skip it!
- In a large, wide pot, bring the 10 cups of water and baking soda to a gentle boil. Be careful as the baking soda will cause the water to foam up initially.
- Carefully place 1-2 pretzels into the boiling solution (don’t overcrowd) for 30 seconds, flipping halfway through if the pretzel isn’t fully submerged.
- Using a slotted spoon or spider strainer, remove the pretzels and let the excess water drip off before returning them to the baking sheet, making sure to leave space between each pretzel.
- Repeat with the remaining pretzels.
Topping and Baking
- Brush each pretzel with the egg wash for a shiny, golden-brown finish.
- Sprinkle with coarse sea salt, additional chopped rosemary, and grated Parmesan cheese.
- Bake in the preheated oven for 15-18 minutes, until deeply golden brown, rotating the pans halfway through baking for even coloring.
- Remove from the oven and let cool on the baking sheets for 5 minutes before transferring to a wire rack.
Serving Suggestions
For the ultimate experience, serve these pretzel delights warm while the cheese is still gooey and melted. They’re delicious on their own, but here are some serving ideas to take them to the next level:
- Pair with marinara sauce for dipping
- Serve alongside a mustard flight (I recommend Dijon, whole grain, and honey mustard)
- Enjoy with a creamy herb dip
- Serve as part of a charcuterie board with cured meats and olives
- Accompany with a warm bowl of tomato soup for a comforting meal

Tips For Pretzel Perfection
From my many batches of pretzel making (including more than a few fails), I’ve picked up some helpful tricks:
Working with Yeast
- Make sure your water is at the right temperature (110-115°F). Too hot and you’ll kill the yeast; too cool and it won’t activate properly.
- Always check that your yeast is fresh and active. The foam that forms during proofing is your indicator that the yeast is alive and ready to work.
- A warm spot helps the dough rise beautifully. I like to turn my oven on for just a minute to warm it slightly, then turn it off and place the covered dough inside.
Handling the Dough
- Don’t rush the kneading process. Properly developed gluten gives the pretzels their signature chewy texture.
- If the dough feels too wet, add flour a tablespoon at a time. If it’s too dry, add water a teaspoon at a time.
- When rolling the dough into ropes, use a light touch. Too much pressure will push out the cheese filling.
Getting the Perfect Texture
- Don’t skip the baking soda bath! This alkaline solution is what gives pretzels their distinctive flavor and characteristic dark, shiny crust.
- The bath should be at a gentle boil, not a rolling boil, which can be too aggressive for the shaped pretzels.
- Make sure to thoroughly seal the cheese inside the dough to prevent leakage during baking.
Make-Ahead Options
These pretzels are at their absolute best fresh from the oven, but if you need to prepare ahead:
- The dough can be made up to 24 hours in advance and refrigerated after the first rise. Let it come to room temperature before shaping.
- Shaped, unbaked pretzels can be refrigerated for up to 8 hours. Bring to room temperature before the baking soda bath and baking.
- Fully baked pretzels can be frozen for up to 1 month. Thaw at room temperature and reheat in a 350°F oven for 5-10 minutes to restore their texture and warm the cheese.
Common Challenges and Solutions
Through numerous batches of pretzel making, I’ve encountered various challenges. Here’s how to overcome them:
| Issue | Possible Cause | Solution |
|---|---|---|
| Cheese leaking out | Gaps in the seams | Ensure all seams are pinched completely closed and sealed |
| Pale pretzels | Inadequate baking soda bath | Make sure to boil in the baking soda solution for the full 30 seconds |
| Dense, heavy texture | Insufficient rising time | Allow for full rising time; check that your kitchen isn’t too cold |
| Pretzels stick to paper | No greasing | Make sure to use parchment paper, not wax paper, and consider light greasing |
| Uneven browning | Hot spots in oven | Rotate baking sheets halfway through baking time |
| Tough pretzels | Overworked dough | Handle dough gently and don’t knead longer than recommended |
| Flat, shapeless pretzels | Too long in baking soda bath | Limit bath time to exactly 30 seconds |
| Bland flavor | Insufficient salt | Don’t skimp on the salt in the dough or the topping |
Variations to Try
Once you’ve mastered the basic recipe, here are some delicious variations to explore:
Different Cheese Options
- Substitute the mozzarella filling with sharp cheddar for more intense flavor
- Try pepper jack for a spicy kick
- Use gouda for a smoky dimension
- Create a blend of your favorite melting cheeses
Alternative Herbs and Seasonings
- Replace rosemary with thyme or sage
- Add minced garlic to the dough (2-3 cloves)
- Incorporate cracked black pepper into the dough
- Try an everything bagel topping (sesame seeds, poppy seeds, dried garlic, dried onion, and salt)
Sweet Versions
- Fill with chocolate chips instead of cheese
- Add cinnamon to the dough and brush with melted butter and cinnamon sugar after baking
- Drizzle with a simple glaze made from powdered sugar and milk
Nutritional Information
For those who are watching their nutrition intake, here’s an approximate breakdown per pretzel:
| Nutrient | Amount |
|---|---|
| Calories | 295 |
| Total Fat | 10g |
| Saturated Fat | 6g |
| Cholesterol | 45mg |
| Sodium | 990mg |
| Total Carbohydrates | 38g |
| Dietary Fiber | 1.5g |
| Sugars | 1.5g |
| Protein | 12g |
Please note that sodium content is naturally high in pretzels due to the baking soda bath and salt topping. You can reduce the sodium by using less salt on top if desired.
Storage and Reheating
These pretzels are best enjoyed the day they’re made, but if you have leftovers:
- Store in an airtight container at room temperature for up to 2 days.
- To reheat, place in a 350°F oven for 5-7 minutes until warmed through and the cheese is melty again.
- For longer storage, freeze in a single layer, then transfer to a freezer bag for up to 1 month.
- Reheat frozen pretzels (no need to thaw) in a 350°F oven for 10-12 minutes.
Why Homemade Pretzels Are Worth the Effort
There’s something truly special about making pretzels from scratch. The process connects us to centuries of baking tradition, and the results are infinitely superior to anything you can buy at the mall or grocery store. The aroma that fills your kitchen as they bake is reason enough to give this recipe a try!
Beyond the delicious end result, pretzel making is an enjoyable activity that’s perfect for getting family or friends involved. Children especially love shaping the dough into the classic pretzel twist, and everyone will be amazed when you reveal that these professional-looking treats came from your own kitchen.
Frequently Asked Questions
Q: Can I make these pretzels without a stand mixer? Absolutely! While a stand mixer makes the process easier, you can mix the dough by hand with a wooden spoon and then knead it on a floured surface for 8-10 minutes until smooth and elastic.
Q: Why do you need to boil pretzels in baking soda water? The alkaline bath gives pretzels their distinctive flavor and characteristic dark, shiny crust. It’s what makes a pretzel taste like a pretzel rather than just shaped bread. The traditional method actually uses food-grade lye, but baking soda is a safer and more accessible alternative for home cooks.
Q: My cheese is leaking out during baking. What am I doing wrong? Make sure you’re completely sealing the cheese inside the dough with no gaps or thin spots. Pinch all seams firmly closed and roll the dough gently to avoid pushing the cheese through the dough.
Q: Can I use dried rosemary instead of fresh? Yes, but reduce the amount to 2 teaspoons in the dough and 2 teaspoons for topping, as dried herbs are more potent than fresh. For the best flavor, crush the dried rosemary between your fingers before adding to release the oils.
Q: How do I prevent my pretzels from sticking to the parchment paper? Make sure to remove the pretzels from the baking soda bath with a slotted spoon and let the excess water drip off before placing them on the parchment. You can also lightly spray the parchment with cooking spray for extra insurance.
Q: My pretzels didn’t turn dark brown. What happened? The dark color comes from the baking soda bath. Make sure your solution is the correct concentration (⅔ cup baking soda to 10 cups water) and that you’re boiling the pretzels for the full 30 seconds.
Q: Can I prepare these ahead of time for a party? Yes! See the make-ahead options in the tips section above. For the freshest taste and texture, I recommend completing all steps through shaping, then refrigerating the shaped pretzels. About an hour before serving, bring them to room temperature, do the baking soda bath, add toppings, and bake.
Q: What’s the best cheese to use for stuffing? Mozzarella works beautifully because it melts well without becoming too runny. Low-moisture mozzarella is preferable to fresh for this recipe, as it contains less water and is less likely to make the surrounding dough soggy.
Final Thoughts
There’s something almost magical about breaking open a warm homemade pretzel and watching the cheese stretch into long, irresistible pulls. These Mozzarella Stuffed Rosemary Parmesan Soft Pretzels elevate the humble pretzel into something truly special – perfect for game days, casual gatherings, or whenever you want to impress with your baking skills.
The combination of fragrant rosemary, savory Parmesan, and gooey mozzarella creates a flavor profile that’s sophisticated yet comforting. While they do take some time and attention to prepare, the process is enjoyable and the results are absolutely worth it.
I hope you’ll give these pretzels a try and discover the joy of homemade pretzel making. They might just become your new signature recipe – the one friends and family request time and again. Happy baking!