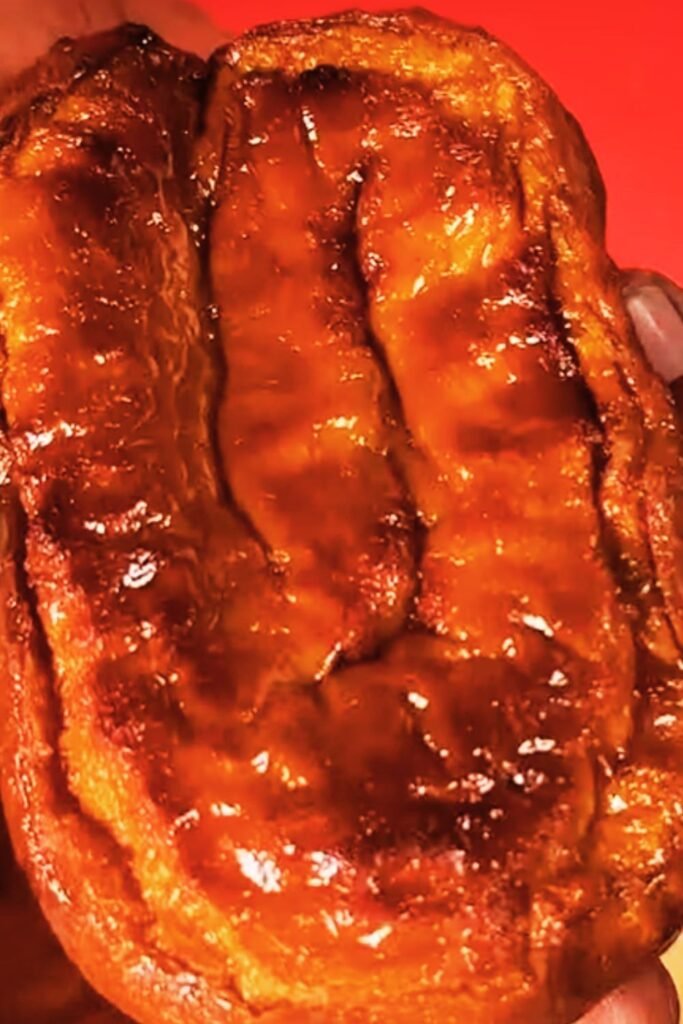
There’s something truly magical about biting into a warm, freshly baked honey bun. That perfect swirl of cinnamon, the sticky sweet glaze, and that pillowy soft dough that practically melts in your mouth. For years, I thought I’d have to give up this simple pleasure after switching to a plant-based diet. But after countless experiments in my kitchen, I’ve finally cracked the code to create the most incredible vegan honey buns that taste even better than the ones from my childhood memories.
These homemade vegan honey buns are everything you could want in a sweet breakfast treat – they’re soft, fluffy, perfectly spiced, and coated with a divine honey-free glaze that will have you licking your fingers clean. And the best part? No one will ever guess they’re completely plant-based and dairy-free!
What Makes These Honey Buns Special?
Traditional honey buns rely heavily on dairy products like milk, butter, and sometimes eggs, not to mention actual honey in the glaze. My plant-based version achieves all the same delicious qualities without any animal products:
- Perfectly soft, pillowy dough that stays tender for days
- A warming cinnamon sugar filling with just the right amount of spice
- A sticky-sweet glaze that mimics honey but is completely vegan
- Make-ahead friendly – prepare the night before and bake in the morning
- Easier than you might think – even beginner bakers can master these!
Whether you’re vegan, dairy-free, or simply looking to try something new, these honey buns will become your new favorite weekend breakfast treat. Let’s get baking!
Ingredients You’ll Need
For the Dough:
- 4 cups all-purpose flour
- 1 package (2¼ teaspoons) active dry yeast
- ¼ cup granulated sugar
- 1 teaspoon salt
- 1 cup warm plant milk (I prefer oat or soy for richness)
- ¼ cup vegan butter, melted
- ¼ cup unsweetened applesauce (acts as an egg replacer)
- 1 teaspoon vanilla extract
For the Filling:
- ½ cup brown sugar, packed
- 2 tablespoons ground cinnamon
- ¼ cup vegan butter, softened
- 1 tablespoon maple syrup
For the “Honey” Glaze:
- 2 cups powdered sugar
- ¼ cup maple syrup
- 2 tablespoons agave nectar
- 1 teaspoon vanilla extract
- 2-3 tablespoons plant milk
- Pinch of turmeric (optional, for color)
Essential Equipment
| Equipment | Purpose | Substitution Options |
|---|---|---|
| Stand mixer with dough hook | Makes kneading effortless | Hand mixing with wooden spoon + hand kneading |
| Large mixing bowl | For dough rising | Any heat-safe large container with cover |
| 9×13 baking dish | Perfect size for 12 honey buns | Two 8×8 square pans |
| Rolling pin | For creating even dough | Clean wine bottle or similar cylindrical object |
| Pastry brush | For applying butter | Spoon + back of a spoon to spread |
| Kitchen thermometer | Ensures milk is proper temperature | Wrist test (should feel warm but not hot) |
| Bench scraper | Helps with handling dough | Sharp knife or metal spatula |
Step-by-Step Instructions
Preparing the Dough
- Activate the yeast: In a small bowl, combine the warm plant milk (105-110°F), 1 tablespoon of the sugar, and the yeast. Let sit for 5-10 minutes until foamy. If it doesn’t foam, your yeast might be dead, and you’ll need to start over with fresh yeast.
- Mix the dry ingredients: In the bowl of your stand mixer, whisk together the flour, remaining sugar, and salt.
- Combine wet ingredients: In a separate bowl, mix together the melted vegan butter, applesauce, and vanilla extract.
- Form the dough: Add the foamy yeast mixture and the wet ingredients to the flour. Using the dough hook attachment, mix on low speed until combined, then increase to medium speed and knead for 5-7 minutes until the dough is smooth and elastic. The dough should pull away from the sides of the bowl but still be slightly tacky to the touch.
- First rise: Transfer the dough to a lightly oiled bowl, cover with a clean kitchen towel or plastic wrap, and place in a warm spot to rise for about 1-1.5 hours, or until doubled in size.
Creating the Honey Buns
- Prepare the filling: While the dough rises, mix together the brown sugar and cinnamon in a small bowl. In another bowl, combine the softened vegan butter with maple syrup until smooth.
- Roll out the dough: Once the dough has doubled, punch it down gently and transfer to a lightly floured surface. Roll it out into a rectangle approximately 18 inches long and 12 inches wide. The dough should be about ¼ inch thick.
- Add the filling: Using a pastry brush or the back of a spoon, spread the vegan butter and maple syrup mixture evenly over the entire surface of the dough, leaving about ½ inch border along one long edge. Sprinkle the cinnamon-sugar mixture evenly over the butter.
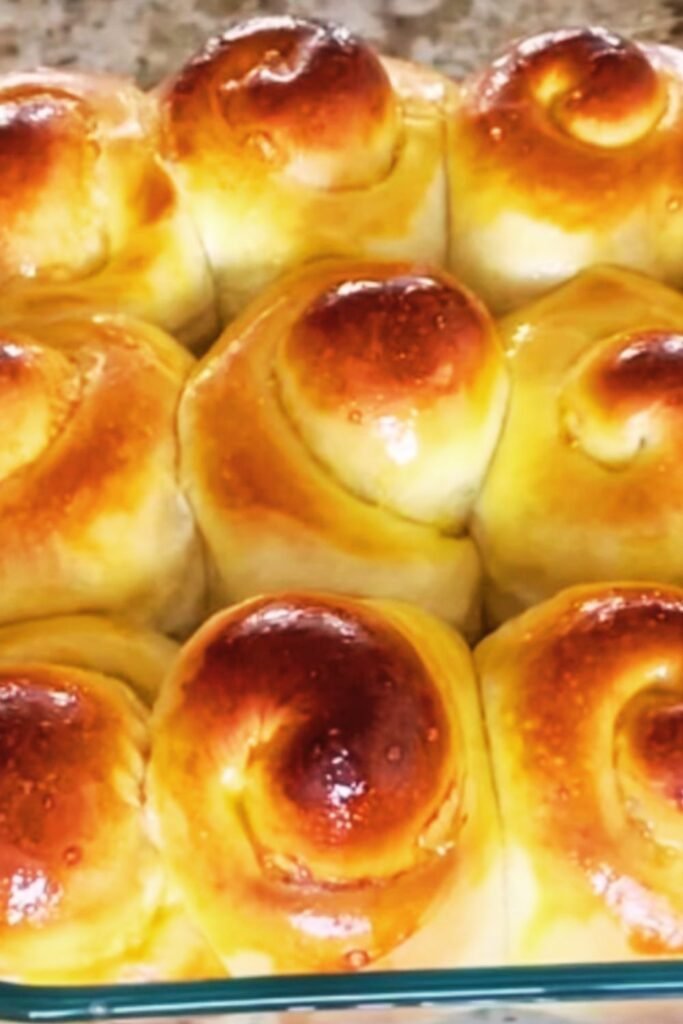
- Roll and slice: Starting from the long edge (opposite from the border you left), tightly roll the dough into a log. Pinch the seam to seal. Using unflavored dental floss or a sharp knife, cut the log into 12 equal pieces, each about 1.5 inches thick.
- Second rise: Place the rolls cut-side up in a greased 9×13 baking dish, spacing them evenly. Cover with a towel and let rise for another 30-45 minutes, or until puffy. Meanwhile, preheat your oven to 350°F (175°C).
- Bake: Bake the honey buns for 22-25 minutes, until golden brown on top. If they’re browning too quickly, tent with aluminum foil.
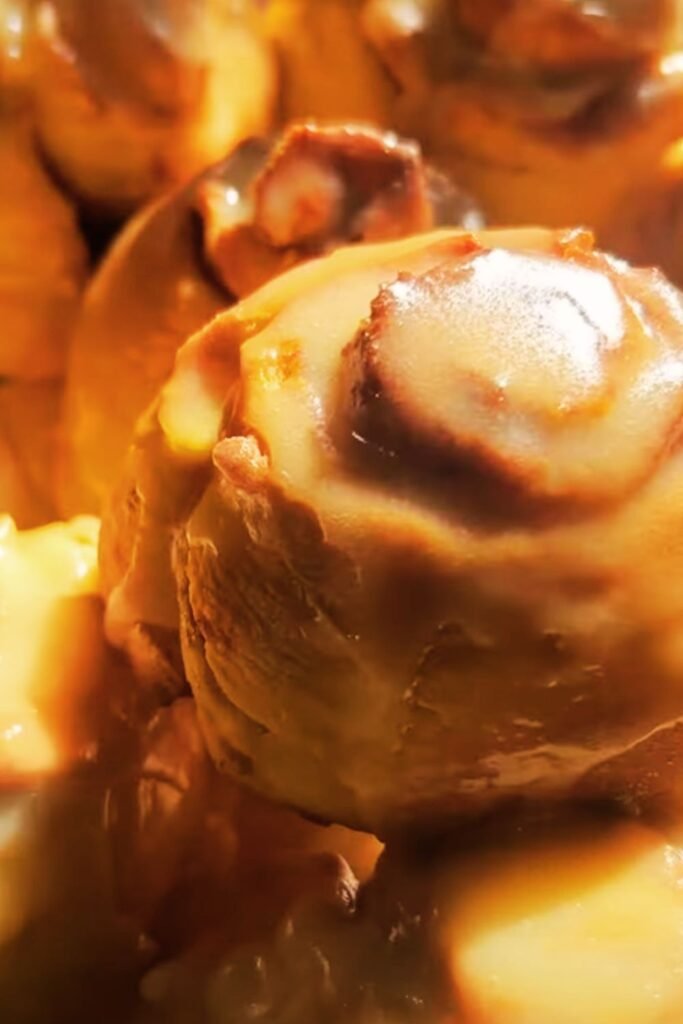
Making the “Honey” Glaze
- While the buns are baking, prepare the glaze by whisking together the powdered sugar, maple syrup, agave nectar, vanilla extract, and 2 tablespoons of plant milk in a medium bowl. Add the pinch of turmeric if using (this gives a subtle golden honey color). The glaze should be thick but pourable – add more plant milk a teaspoon at a time if needed to reach the desired consistency.
- When the honey buns come out of the oven, let them cool for just 5 minutes, then pour about half the glaze over them while still warm. The heat will help the glaze soak in slightly.
- Allow the buns to cool for another 10-15 minutes, then drizzle the remaining glaze over top before serving.
Pro Tips for Perfect Vegan Honey Buns
- Temperature matters: Make sure your plant milk is warm (105-110°F) but not hot, which would kill the yeast.
- Don’t rush the rise: Proper rising time creates that perfect fluffy texture. If your kitchen is cold, turn on the oven light and place the covered dough inside the oven (not turned on) to rise.
- Even cutting: For perfectly even honey buns, use unflavored dental floss instead of a knife. Slide the floss under the rolled dough, cross the ends over the top, and pull to cut through cleanly.
- Adjust sweetness: Feel free to adjust the sweetness of the glaze to your preference. You can add more or less powdered sugar to reach your desired level of sweetness.
- Make ahead option: Prepare the rolls through the second rise, then cover tightly and refrigerate overnight. In the morning, let them sit at room temperature for 30 minutes before baking.
Troubleshooting Common Issues
| Problem | Possible Cause | Solution |
|---|---|---|
| Dough didn’t rise | Dead yeast or too cold environment | Make sure yeast is fresh and active; place dough in warmer location |
| Buns too dense | Insufficient kneading or rising time | Knead dough longer; allow more time for rising |
| Filling leaking out | Butter too warm or not sealed properly | Make sure butter is softened but not melted; seal edges firmly |
| Uneven baking | Oven hot spots or uneven cutting | Rotate pan halfway through baking; use dental floss for even cuts |
| Glaze too runny | Too much liquid added | Add more powdered sugar gradually until desired consistency |
| Glaze too thick | Not enough liquid | Add plant milk 1 teaspoon at a time |
Storage & Reheating
These vegan honey buns stay delicious for several days when stored properly. Here’s how to keep them fresh:
- Room temperature: Store in an airtight container for up to 2 days.
- Refrigerator: Keep for up to 5 days in a sealed container.
- Freezer: Wrap individual buns tightly in plastic wrap and place in a freezer bag for up to 3 months.
To reheat:
- From room temperature: Microwave for 15-20 seconds
- From refrigerated: Microwave for 25-30 seconds
- From frozen: Thaw overnight in the refrigerator, then microwave for 30 seconds or warm in a 300°F oven for 5-7 minutes
Nutritional Information
| Nutrient | Amount per Serving |
|---|---|
| Calories | Approximately 320 |
| Total Fat | 9g |
| Saturated Fat | 3g |
| Carbohydrates | 56g |
| Fiber | 1g |
| Sugars | 28g |
| Protein | 4g |
| Sodium | 220mg |
Nutritional values are approximate and based on 1 honey bun without additional toppings.
Variations to Try
Want to mix things up? Here are some delicious variations on the basic vegan honey bun recipe:
Orange Glazed
Add the zest of one orange to the dough and replace some of the plant milk in the glaze with fresh orange juice for a bright, citrusy twist.
Maple Pecan
Add ½ cup of finely chopped pecans to the filling and use all maple syrup (no agave) in the glaze for a fall-inspired treat.
Cardamom Spice
Add 1 teaspoon of ground cardamom to the cinnamon-sugar filling for a unique, warmly spiced flavor profile that pairs beautifully with the sweet glaze.
Chocolate Drizzle
After glazing, drizzle with melted vegan chocolate for an extra indulgent breakfast or dessert option.
Serving Suggestions
These vegan honey buns make a wonderful weekend breakfast treat, but they’re versatile enough to enjoy in many ways:
- Serve warm with a dollop of vegan whipped cream for dessert
- Pair with fresh berries and a hot cup of coffee for breakfast
- Include in a brunch spread alongside savory options like tofu scramble
- Pack in lunchboxes for a sweet midday treat
- Offer as part of a holiday breakfast tradition
- Serve with non-dairy ice cream for an incredible dessert
Why This Recipe Works
Creating the perfect vegan honey bun was no small feat. After many test batches and refinements, I discovered that the combination of plant milk and vegan butter provides the richness traditionally derived from dairy, while applesauce creates moisture and binding that eggs would typically provide.
The maple syrup and agave nectar in the glaze mimic the complex sweetness of honey beautifully, and that tiny pinch of turmeric gives just enough golden color without affecting the flavor. The overnight refrigeration option not only makes morning preparation easier but actually improves the flavor as the spices have more time to permeate the dough.
By using techniques like proper yeast activation, adequate kneading time, and allowing for sufficient rise periods, we achieve that perfect fluffy texture that makes honey buns so irresistible.
Frequently Asked Questions
Can I use a different plant milk? Yes! Any plant milk works in this recipe. Oat and soy milk provide the richest results, but almond, cashew, or coconut milk will also work well.
What if I don’t have a stand mixer? No problem! You can mix the dough with a wooden spoon and then knead by hand on a floured surface for 8-10 minutes until smooth and elastic.
Can I make these gluten-free? While I haven’t tested a gluten-free version, you could try using a 1:1 gluten-free flour blend designed for baking. The texture may be slightly different, and you might need to adjust the liquid slightly.
How do I know when they’re done baking? The tops should be golden brown, and if you insert a toothpick into the center of the dough (not the filling), it should come out clean. The internal temperature should reach about 190°F if you’re using a thermometer.
Can I reduce the sugar? You can reduce the sugar in the filling by up to half, but I wouldn’t recommend reducing the sugar in the dough as it feeds the yeast. For the glaze, you can make it less sweet by using less powdered sugar, but it will also be thinner.
Why use both maple syrup and agave nectar? The combination creates a more complex flavor profile that better mimics the unique taste of honey. However, you can use all of one or the other if preferred.
Do I have to use the turmeric? Not at all! It’s purely for color to give that honey-like appearance. It doesn’t affect the flavor in the small amount used.
Can I add nuts or raisins to the filling? Absolutely! Add up to ½ cup of finely chopped nuts or raisins to the filling. Sprinkle them over the cinnamon-sugar mixture before rolling.
My dough seems too sticky. What should I do? Add additional flour, but only 1 tablespoon at a time. The dough should be slightly tacky but not stick heavily to your fingers.
Can I double the recipe? Yes! Double all ingredients and either make two 9×13 pans or one large baking sheet of rolls.
The Joy of Homemade Baking
There’s something deeply satisfying about making your own honey buns from scratch. The process of kneading dough, watching it rise, smelling the cinnamon as it bakes—these simple pleasures connect us to a long tradition of baking that transcends dietary choices. The fact that these honey buns are vegan doesn’t make them any less authentic or delicious; if anything, I think the plant-based ingredients let the true flavors shine even more brightly.
When I first went dairy-free, I worried I’d have to give up so many of my favorite baked goods. Now I realize that with a little creativity and persistence, almost any recipe can be made plant-based without sacrificing taste or texture. These honey buns are proof of that—they’re so good that my non-vegan friends and family actually prefer them to the traditional version!
So whether you’re a longtime vegan, newly dairy-free, or just curious about plant-based baking, I hope these honey buns bring as much joy to your kitchen as they have to mine. Happy baking!