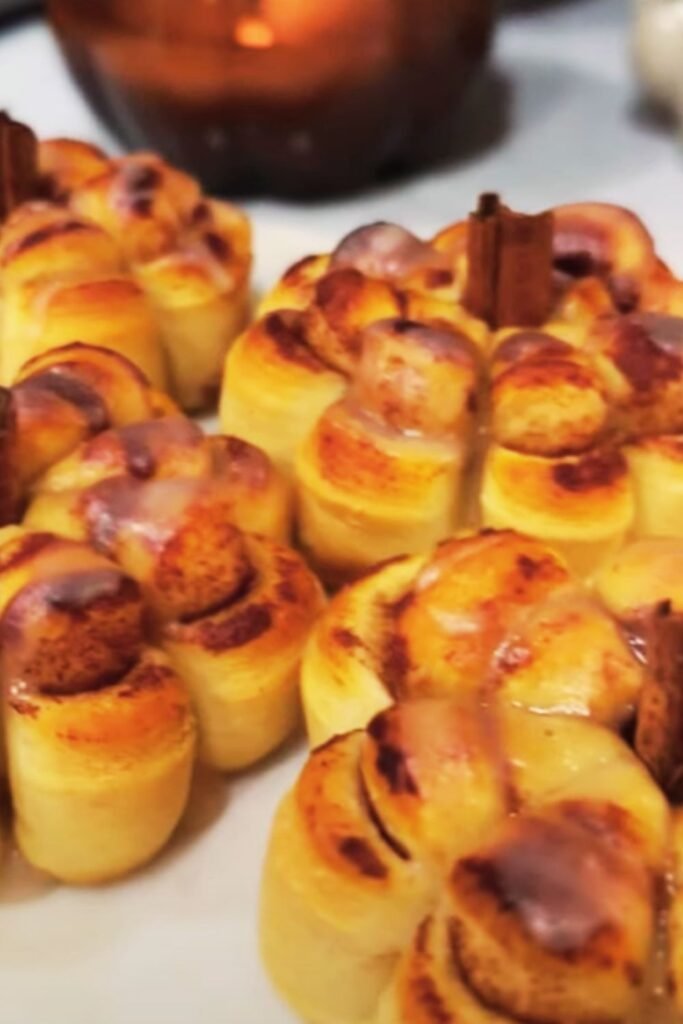
When I first stumbled upon the concept of stuffed cookies, my baking world completely transformed. These Big Blue Monster Stuffed Cookies represent everything I love about creative baking – they’re visually stunning, incredibly delicious, and guaranteed to make anyone smile. The vibrant blue color combined with the surprise filling creates an experience that goes far beyond ordinary cookies. Vibrant blue cookies with exciting surprises inside
These aren’t just cookies; they’re edible works of art that bring out the child in everyone. I’ve served these at birthday parties, family gatherings, and even sophisticated dinner parties, and they never fail to create excitement and conversation. The beauty lies not only in their striking appearance but also in the delightful surprise waiting inside each bite.
Understanding the Big Blue Monster Cookie Phenomenon
Monster Cookies: Originally popularized as oversized cookies packed with multiple mix-ins, these treats have evolved into creative masterpieces that can be customized with various colors and fillings.
Stuffed Cookies: A modern baking technique where cookies are filled with complementary ingredients like chocolate, caramel, or other sweet surprises before baking.
Food Coloring Techniques: The art of achieving vibrant, consistent colors in baked goods without compromising taste or texture.
Dough Consistency: The perfect balance of ingredients that allows for easy handling while maintaining structural integrity during baking.
The concept behind these cookies stems from the beloved monster cookie tradition, but I’ve elevated them by incorporating stunning blue coloring and exciting stuffed centers. The blue hue isn’t just for show – it creates an element of surprise and whimsy that transforms an ordinary baking day into something magical.
Essential Ingredients and Their Roles
Understanding each ingredient’s purpose helps ensure consistent results every time I make these spectacular cookies. The ingredient selection directly impacts both the visual appeal and the final taste.
| Ingredient | Quantity | Purpose | Substitution Options |
|---|---|---|---|
| All-purpose flour | 2¼ cups | Structure and texture | Gluten-free flour blend |
| Unsalted butter | 1 cup (2 sticks) | Richness and moisture | Vegan butter substitute |
| Granulated sugar | ¾ cup | Sweetness and texture | Coconut sugar |
| Brown sugar | ¾ cup packed | Moisture and chewiness | Muscovado sugar |
| Large eggs | 2 | Binding and structure | Flax eggs (vegan option) |
| Vanilla extract | 2 teaspoons | Flavor enhancement | Almond extract |
| Baking soda | 1 teaspoon | Leavening agent | Cannot substitute |
| Salt | 1 teaspoon | Flavor balance | Sea salt or kosher salt |
| Blue food coloring | 1-2 teaspoons | Signature color | Natural blue spirulina |
| Mini chocolate chips | 1 cup | Texture and flavor | White chocolate chips |
| Stuffing ingredients | Varies | Surprise element | Multiple options available |
The beauty of these cookies lies in their adaptability. I’ve experimented with various stuffing options, from classic chocolate to more adventurous combinations, and each variation brings its own unique character to the final product.
Stuffing Options and Flavor Combinations
The stuffing possibilities are virtually endless, and I encourage experimentation based on personal preferences and dietary requirements.
Classic Stuffing Options:
- Chocolate ganache centers
- Caramel sauce pockets
- Peanut butter filling
- Marshmallow fluff
- Nutella spread
Creative Combinations:
- Cream cheese and berry jam
- Cookie dough centers
- Salted caramel with sea salt flakes
- White chocolate and raspberry
- Coconut cream filling
Dietary-Specific Options:
- Sugar-free chocolate centers
- Vegan cream fillings
- Nut-free alternatives
- Gluten-free stuffing options
Each stuffing choice creates a different textural experience. I’ve found that slightly firmer fillings work best, as they maintain their integrity during the baking process while still providing that delightful surprise when bitten into.
Step-by-Step Preparation Method
My approach to these cookies has been refined through countless batches, and I’ve identified the key steps that ensure success every time.
Preparation Phase:
- Preheat your oven to 350°F (175°C)
- Line baking sheets with parchment paper
- Prepare all stuffing ingredients in advance
- Allow butter and eggs to reach room temperature
Dough Creation Process:
- Cream butter with both sugars until light and fluffy (approximately 3-4 minutes)
- Add eggs one at a time, ensuring full incorporation
- Mix in vanilla extract and blue food coloring gradually
- Combine dry ingredients in a separate bowl
- Slowly incorporate dry ingredients into wet mixture
- Fold in mini chocolate chips gently
The food coloring requires special attention. I add it gradually, mixing thoroughly between additions to achieve an even, vibrant blue color without creating streaks or uneven patches.
Assembly Technique:
- Portion dough into 2-tablespoon sized balls
- Flatten each portion slightly
- Add approximately 1 teaspoon of chosen stuffing to center
- Wrap dough around stuffing, sealing edges completely
- Roll gently to create smooth, round shapes
- Place on prepared baking sheets with adequate spacing
The assembly process requires gentle handling to prevent the stuffing from breaking through the dough. I’ve learned that slightly chilled dough is easier to work with, especially during warmer weather.
Baking Techniques and Temperature Control
Achieving the perfect texture requires precise temperature control and timing. These cookies need enough heat to set the exterior while maintaining a soft, chewy interior.
| Baking Stage | Temperature | Time | Visual Cues |
|---|---|---|---|
| Initial bake | 350°F (175°C) | 8-10 minutes | Edges barely set |
| Color check | – | 6 minutes | Even blue color maintained |
| Final texture | – | 10-12 minutes | Slightly soft centers |
| Cooling phase | Room temp | 5 minutes | Firm enough to transfer |
I’ve discovered that slightly underbaking these cookies produces the ideal texture. They continue cooking on the hot baking sheet after removal from the oven, creating that perfect balance between crispy edges and soft centers.
Temperature Monitoring Tips:
- Use an oven thermometer for accuracy
- Rotate baking sheets halfway through
- Watch for color changes in the blue dough
- Test doneness with gentle pressure on cookie edges
Troubleshooting Common Issues
Through my extensive experience making these cookies, I’ve encountered and solved numerous common problems that home bakers often face.
Color Inconsistencies: When the blue color appears streaky or uneven, the issue typically stems from insufficient mixing of the food coloring. I always add coloring gradually and mix thoroughly at each stage.
Stuffing Leakage: If stuffing breaks through during baking, the dough portion was likely too thin, or the stuffing was too liquid. I recommend chilling the assembled cookies for 15 minutes before baking.
Texture Problems: Overly hard cookies usually result from overbaking or too much flour. Conversely, cookies that spread too much often indicate insufficient flour or too-warm butter.
Size Variations: Inconsistent cookie sizes create uneven baking. I use a cookie scoop to ensure uniform portions, which guarantees even baking times.
Storage and Preservation Methods
Proper storage ensures these beautiful cookies maintain their quality and visual appeal for extended periods.
Short-term Storage (1-3 days): Store in airtight containers at room temperature, separating layers with parchment paper to prevent sticking.
Medium-term Storage (1 week): Refrigerate in sealed containers, allowing cookies to return to room temperature before serving for optimal texture.
Long-term Storage (1-3 months): Freeze individual cookies wrapped in plastic wrap, then place in freezer bags. Thaw completely before serving.
Stuffing Considerations: Different stuffing types may affect storage requirements. Cream-based fillings require refrigeration, while chocolate or caramel centers remain stable at room temperature.
Nutritional Information and Dietary Adaptations
Understanding the nutritional profile helps in planning these treats within a balanced diet.
| Nutrient | Per Cookie (Average) | Daily Value % |
|---|---|---|
| Calories | 280-320 | 14-16% |
| Total Fat | 12-15g | 18-23% |
| Saturated Fat | 7-9g | 35-45% |
| Carbohydrates | 42-48g | 14-16% |
| Sugars | 28-32g | – |
| Protein | 4-6g | 8-12% |
| Sodium | 180-220mg | 8-10% |
Dietary Modifications:
Gluten-Free Version: Replace all-purpose flour with a 1:1 gluten-free baking blend. Add 1 teaspoon xanthan gum if not included in the blend.
Vegan Adaptation: Substitute butter with vegan margarine, replace eggs with flax eggs (2 tablespoons ground flaxseed + 6 tablespoons water), and use plant-based stuffing options.
Reduced Sugar Option: Replace half the granulated sugar with sugar substitute designed for baking, though texture may be slightly affected.
Dairy-Free Version: Use dairy-free butter substitute and ensure all stuffing ingredients are dairy-free.
Creative Presentation Ideas
The visual impact of these cookies can be enhanced through thoughtful presentation techniques that I’ve developed over years of serving them at various events.
Individual Presentation:
- Clear cellophane bags tied with colorful ribbons
- Mini cupcake liners for elegant serving
- Decorative plates with coordinating colors
- Custom labels describing the stuffing surprise
Group Display Options:
- Tiered serving stands for height variation
- Color-coordinated serving ware
- Mixed arrangements with complementary treats
- Interactive serving stations where guests can choose stuffing types
Special Occasion Adaptations:
- Birthday parties: Add edible glitter or sprinkles
- Holiday themes: Coordinate with seasonal colors
- Baby showers: Create gender-reveal stuffing surprises
- Corporate events: Custom packaging with branding
Beautiful presentation enhances the experience
Serving Suggestions and Pairings
These cookies pair beautifully with various beverages and complement different dining experiences.
Beverage Pairings:
- Cold milk (classic and timeless)
- Hot chocolate with marshmallows
- Vanilla or cookies-and-cream ice cream
- Freshly brewed coffee or espresso
- Herbal teas, particularly vanilla or chamomile
- Fresh fruit smoothies
- Sparkling water with fruit garnishes
Dessert Combinations:
- Vanilla ice cream sandwiches
- Crumbled over yogurt parfaits
- Incorporated into trifle layers
- Alongside fresh berries and whipped cream
- As components in elaborate dessert platters
Event-Specific Serving:
- Children’s parties: Serve with fun straws and colorful napkins
- Adult gatherings: Present with gourmet coffee selections
- Picnics: Pack individually for easy transport
- Formal events: Arrange on elegant serving pieces with accompanying dessert forks
Advanced Techniques and Variations
Once comfortable with the basic recipe, numerous advanced techniques can elevate these cookies to professional levels.
Flavor Layering: Create multiple stuffing layers within each cookie for complex flavor profiles. I sometimes add a thin layer of jam followed by chocolate ganache for extraordinary depth.
Texture Contrasts: Incorporate contrasting textures like crunchy elements (chopped nuts, cookie pieces) with smooth fillings for enhanced sensory experiences.
Color Variations: While blue is the signature color, experimenting with other vibrant hues creates themed variations. Purple monsters, green creatures, or rainbow combinations all work beautifully.
Size Modifications:
- Mini versions perfect for parties or portion control
- Giant cookies ideal for sharing or special celebrations
- Sandwich cookies using two cookies with stuffing between
Professional Finishing Touches:
- Edible pearl dust for shimmer effects
- Carefully piped decorative elements
- Coordinated packaging for gift-giving
- Custom molds for uniform shapes
Seasonal Adaptations and Holiday Versions
These versatile cookies adapt beautifully to seasonal themes and holiday celebrations throughout the year.
Spring Variations:
- Pastel blue with lemon curd stuffing
- Easter-themed with marshmallow centers
- Fresh berry stuffing combinations
Summer Adaptations:
- Lighter stuffing options like whipped cream
- Tropical fruit combinations
- Picnic-friendly packaging modifications
Fall Modifications:
- Caramel apple stuffing centers
- Spiced variations with cinnamon additions
- Autumn color coordinations
Winter Specialties:
- Peppermint stuffing for holiday appeal
- Hot chocolate-inspired centers
- Festive packaging for gift-giving
Each seasonal adaptation maintains the core appeal while incorporating relevant flavors and presentations that enhance the cookie’s connection to specific times of year.
Quality Control and Consistency Tips
Maintaining consistent quality across batches requires attention to detail and systematic approaches that I’ve refined over time.
Ingredient Quality Standards:
- Use fresh, high-quality butter for optimal flavor
- Ensure food coloring hasn’t expired for vibrant colors
- Check baking soda freshness (replace every 6 months)
- Store chocolate chips properly to prevent blooming
Process Standardization:
- Measure ingredients by weight when possible for precision
- Maintain consistent room temperature for ingredients
- Time mixing stages accurately
- Use identical baking sheets for uniform results
Final Quality Checks:
- Visual inspection for color consistency
- Texture assessment through gentle pressure
- Stuffing distribution verification
- Overall appearance evaluation
Professional Tips from My Kitchen
After making hundreds of batches, certain techniques consistently produce superior results.
Temperature Management: Room temperature ingredients blend more easily and create smoother textures. I always plan ahead to ensure proper ingredient temperatures.
Mixing Technique: Overmixing develops gluten, creating tough cookies. I mix just until ingredients combine, no longer.
Baking Sheet Preparation: Parchment paper prevents sticking better than cooking spray and doesn’t affect cookie bottoms.
Cooling Strategy: Allowing cookies to cool on the baking sheet for 5 minutes before transferring prevents breaking while ensuring they don’t continue cooking excessively.
These professional techniques distinguish homemade cookies from bakery quality, elevating the entire baking experience.
Questions and Answers
Q: How do I achieve the perfect blue color without affecting taste? I recommend using gel food coloring rather than liquid versions, as it provides vibrant color with minimal impact on dough consistency. Start with small amounts and gradually increase until you reach your desired shade. High-quality gel colorings typically don’t affect taste when used in appropriate quantities.
Q: Can I prepare the cookie dough in advance? Absolutely! The dough can be prepared up to 2 days in advance and stored in the refrigerator. I actually prefer working with slightly chilled dough as it’s easier to handle during the stuffing process. You can also freeze portioned, unstuffed dough balls for up to 3 months.
Q: What’s the best way to prevent stuffing from leaking during baking? The key is ensuring adequate dough coverage around the stuffing and sealing edges completely. I recommend using slightly less stuffing than you think you need and making sure the dough isn’t too warm when assembling. Chilling assembled cookies for 15 minutes before baking helps maintain structural integrity.
Q: How do I know when the cookies are perfectly baked? These cookies should appear set around the edges but still slightly soft in the centers when removed from the oven. They’ll continue cooking on the hot baking sheet, so slight underbaking prevents them from becoming too firm. The blue color should remain vibrant throughout the baking process.
Q: Can I make these cookies without artificial food coloring? Yes! Natural alternatives include blue spirulina powder, which creates a beautiful blue-green color, or butterfly pea flower powder for a more traditional blue. Keep in mind that natural colorings may produce slightly different shades and might require larger quantities to achieve vibrant results.
Q: What stuffing options work best for beginners? I recommend starting with firmer stuffings like chocolate chips, small pieces of chocolate bars, or thick caramel that won’t run during baking. These are more forgiving than liquid fillings and help you master the assembly technique before attempting more challenging options.
Q: How should I store cookies with different types of stuffing? Storage requirements depend on your stuffing choice. Cookies with chocolate or candy stuffing can be stored at room temperature, while those with cream-based or fresh fruit fillings should be refrigerated. Always use airtight containers and consume within the recommended timeframes for food safety.
Q: Can I double or triple the recipe for large batches? Certainly! This recipe scales well for larger quantities. When making multiple batches, I recommend preparing all ingredients before starting and working in smaller portions to maintain dough quality. Keep unused dough portions refrigerated while working with others to prevent temperature changes that could affect consistency.
My journey with Big Blue Monster Stuffed Cookies has been filled with experimentation, learning, and countless moments of joy shared with family and friends. These cookies represent more than just a sweet treat – they’re conversation starters, memory makers, and edible expressions of creativity. Whether you’re baking for a special occasion or simply want to brighten an ordinary day, these spectacular cookies deliver both visual impact and incredible flavor that will leave everyone asking for the recipe. The combination of vibrant color, delightful surprises, and perfect texture creates an unforgettable baking experience that I’m thrilled to share with fellow baking enthusiasts.