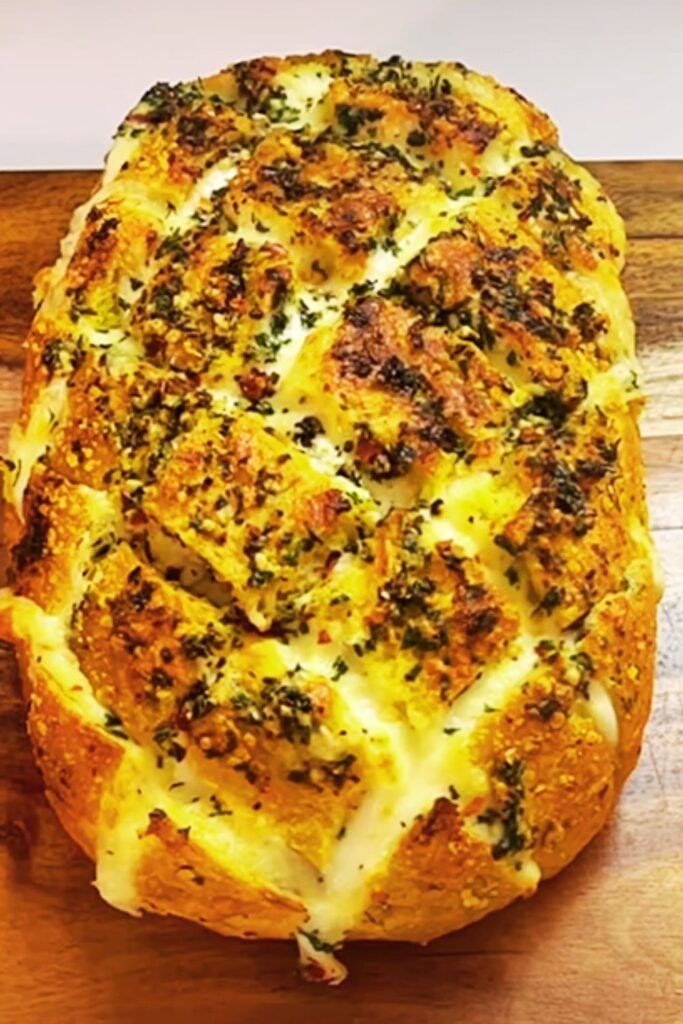
There’s something absolutely magical about watching people gather around a loaf of cheesy pull-apart garlic bread. I’ve witnessed countless dinner parties where this golden, bubbling masterpiece becomes the star of the table, with guests literally fighting over the last gooey piece. After perfecting this recipe over years of experimentation and countless satisfied faces, I’m excited to share everything you need to know about creating this showstopping bread that transforms any ordinary meal into something extraordinary.
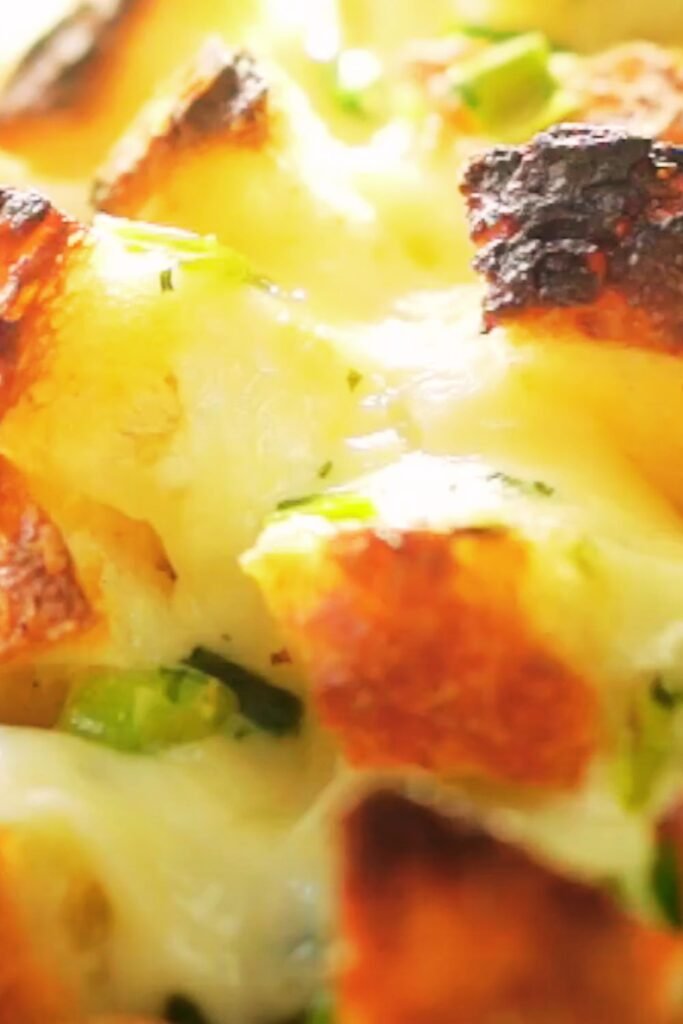
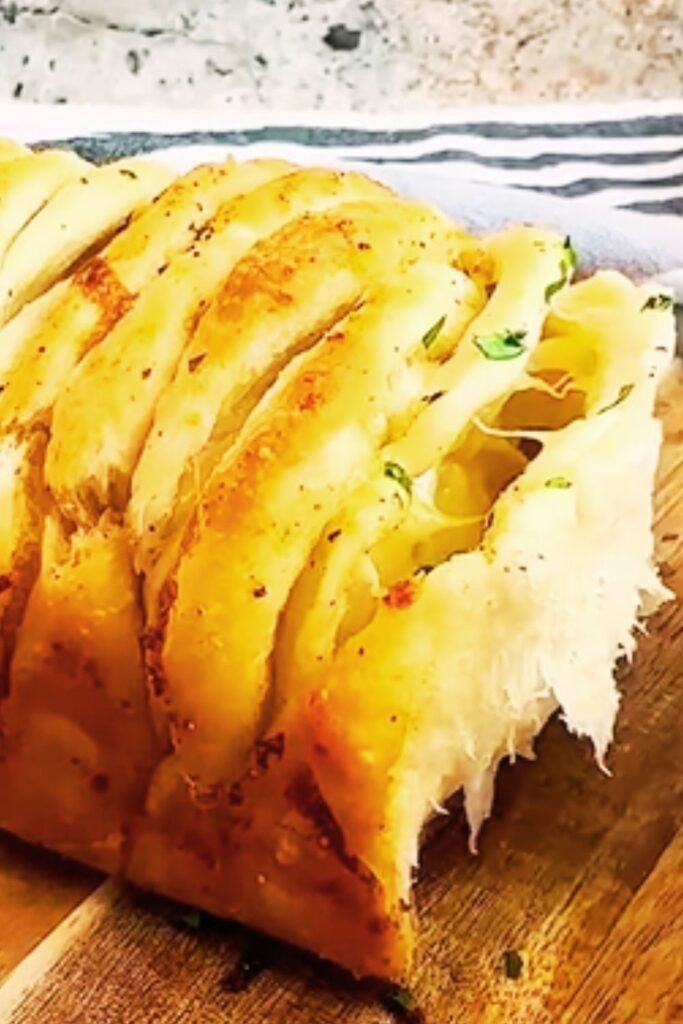
The beauty of cheesy pull-apart garlic bread lies in its perfect harmony of textures and flavors. Each pull reveals stretchy, melted cheese mingling with aromatic garlic butter, all nestled within crusty bread that maintains its structure while offering tender, pillowy softness inside. This isn’t just garlic bread – it’s an experience that brings people together around the dinner table.
Understanding the Art of Pull-Apart Bread
Pull-apart bread represents a fascinating culinary technique that combines the satisfaction of tearing fresh bread with the indulgence of melted cheese and seasoned butter. The method involves creating strategic cuts throughout a loaf without slicing completely through, allowing the bread to maintain its shape while creating pockets for delicious fillings.
Bread Selection: The foundation of exceptional pull-apart bread starts with choosing the right loaf. I’ve discovered that sourdough boules work magnificently due to their sturdy crust and tangy flavor that complements the rich cheese and garlic. Italian bread offers another excellent option with its crispy exterior and airy interior. Avoid overly soft breads that might collapse under the weight of the filling.
Cutting Technique: The crosshatch cutting pattern is crucial for achieving that perfect pull-apart effect. I make cuts approximately one inch apart, ensuring I don’t slice completely through the bottom crust – this bottom layer acts as the structural foundation that keeps everything together.
Cheese Distribution: Even cheese distribution determines whether each bite delivers that coveted cheese pull. I’ve learned to work the shredded cheese deep into every crevice, sometimes using a butter knife to gently open the cuts and ensure proper filling.
Essential Ingredients and Their Roles
| Ingredient | Quantity | Purpose | Substitution Options |
|---|---|---|---|
| Sourdough Boule | 1 large (1.5-2 lbs) | Structural base with tangy flavor | Italian bread, French bread |
| Mozzarella Cheese | 2 cups shredded | Primary melting cheese for pulls | Monterey Jack, Provolone |
| Sharp Cheddar | 1 cup shredded | Flavor depth and color | Gruyere, Fontina |
| Butter | 1/2 cup (1 stick) | Fat base for garlic mixture | Olive oil blend |
| Fresh Garlic | 6-8 cloves minced | Primary flavoring agent | Garlic powder (2 tsp) |
| Fresh Parsley | 1/4 cup chopped | Color and fresh herb notes | Chives, oregano |
| Parmesan | 1/2 cup grated | Umami depth and browning | Pecorino Romano |
The ingredient ratios I’ve developed through extensive testing create the perfect balance. Too much butter makes the bread soggy, while too little results in dry pockets. The cheese combination provides both excellent melting properties from the mozzarella and sharp flavor from the cheddar. Fresh garlic is non-negotiable – the pungent oils that develop during roasting simply cannot be replicated with powdered alternatives.
Step-by-Step Preparation Method
Preparing the Garlic Butter Mixture
I begin by softening the butter to room temperature, which typically takes about 30 minutes outside the refrigerator. In a mixing bowl, I combine the softened butter with minced garlic, creating a paste-like consistency. The key here is allowing the garlic to infuse into the butter for at least 15 minutes before application.
Adding fresh herbs elevates the mixture significantly. I fold in chopped parsley, which provides color contrast and a fresh flavor that cuts through the richness. Some variations I enjoy include adding dried oregano or fresh thyme for Mediterranean notes.
Creating the Perfect Cuts
Positioning the bread on a cutting board, I use a sharp serrated knife to create a crosshatch pattern. The first set of cuts runs parallel, approximately one inch apart, stopping about half an inch from the bottom crust. Then I rotate the bread 90 degrees and repeat the process, creating a grid pattern that forms individual portions while maintaining structural integrity.
This cutting technique requires patience and precision. Rushing through this step often results in cuts that go too deep, potentially causing the bread to fall apart during baking. I’ve learned to take my time, ensuring each cut is deliberate and measured.
Assembly and Filling Distribution
Working the garlic butter mixture into every crevice requires methodical attention. I use my fingers to gently separate each cut, spreading the garlic butter mixture thoroughly. The goal is coating every exposed surface, ensuring that each bite contains the full flavor profile.
Next comes the cheese distribution phase. I work systematically, stuffing shredded mozzarella and cheddar into every opening. The cheese should fill the gaps completely – this abundance ensures those Instagram-worthy cheese pulls that make this bread so visually appealing.
Advanced Techniques for Perfect Results
Temperature Control and Timing
Oven temperature plays a crucial role in achieving the perfect texture balance. I preheat my oven to 375°F (190°C), which provides enough heat to melt the cheese thoroughly while allowing the bread to warm through without becoming overly crispy.
The bread gets wrapped in aluminum foil for the initial baking phase, creating a steamy environment that prevents the top from browning too quickly while the interior heats through. After 15 minutes, I remove the foil and continue baking for an additional 10-15 minutes, allowing the top to develop that golden, bubbly appearance.
Cheese Selection Strategy
My cheese combination has evolved through countless iterations. The mozzarella provides the stretchy, gooey texture that creates those satisfying pulls, while sharp cheddar contributes complex flavor and attractive color. Adding Parmesan creates depth and promotes beautiful browning on the surface.
For special occasions, I sometimes incorporate more exotic cheeses. Gruyere adds nutty complexity, while smoked gouda introduces subtle smokiness that complements the garlic beautifully. The key is maintaining the proper melting cheese ratio – at least 60% should be excellent melting varieties like mozzarella or Monterey Jack.
Flavor Variations and Customizations
Mediterranean Style: I substitute the parsley with fresh basil and oregano, add sun-dried tomatoes, and include crumbled feta cheese for a Greek-inspired variation.
Spicy Version: Incorporating red pepper flakes into the garlic butter and adding pepper jack cheese creates a version with gentle heat that builds with each bite.
Bacon Lovers: Crumbled crispy bacon mixed with the cheese creates an indulgent version that’s perfect for brunch gatherings.
Herb Garden: Using a combination of fresh thyme, rosemary, and sage creates an aromatic version that pairs beautifully with roasted meats.
Nutritional Information and Dietary Considerations
| Nutrient | Per Serving (1/8 loaf) | Daily Value % |
|---|---|---|
| Calories | 385 | 19% |
| Total Fat | 22g | 28% |
| Saturated Fat | 13g | 65% |
| Cholesterol | 58mg | 19% |
| Sodium | 680mg | 30% |
| Carbohydrates | 32g | 12% |
| Protein | 18g | 36% |
| Calcium | 285mg | 22% |
While cheesy pull-apart garlic bread is undeniably indulgent, it does provide significant calcium and protein from the cheese content. The bread contributes complex carbohydrates, and the garlic offers various health benefits including immune system support.
For those with dietary restrictions, several modifications work well. Lactose-intolerant individuals can substitute with lactose-free cheeses, which melt similarly to traditional varieties. Gluten-free versions work beautifully using sturdy gluten-free artisan breads, though the texture differs slightly from wheat-based versions.
Storage and Reheating Guidelines
Leftover pull-apart bread stores well when properly wrapped. I place any remaining portions in airtight containers and refrigerate for up to three days. The bread maintains much of its appeal when reheated correctly.
For reheating, I prefer using the oven rather than the microwave. Wrapping the bread in foil and heating at 350°F for 10-15 minutes restores much of the original texture. The microwave tends to make the bread chewy and the cheese rubbery, though it works for quick reheating when time is limited.
Freezing works surprisingly well for this bread. I wrap individual portions in plastic wrap, then place them in freezer bags. Frozen portions keep for up to three months and can be reheated directly from frozen, adding a few extra minutes to the reheating time.
Serving Suggestions and Pairings
This bread shines as an appetizer for gatherings, but it also complements numerous main dishes beautifully. I serve it alongside hearty soups like tomato basil or minestrone, where guests can dip the cheesy bread directly into the soup for an incredibly satisfying combination.
For dinner parties, it pairs wonderfully with grilled meats, roasted chicken, or pasta dishes. The rich, garlicky flavors complement rather than compete with most main courses. I’ve found it particularly successful at potluck dinners, where it disappears quickly and generates recipe requests.
During holiday gatherings, I sometimes prepare multiple variations, creating a bread bar where guests can choose their preferred flavor profile. This approach accommodates different taste preferences while maintaining the interactive, shareable nature that makes this bread so appealing.
Troubleshooting Common Issues
Problem: Bread falls apart during cutting or serving Solution: Ensure cuts don’t go completely through the bottom crust, and allow the bread to rest for 5 minutes after baking before serving.
Problem: Cheese doesn’t melt evenly Solution: Use freshly shredded cheese rather than pre-shredded, which contains anti-caking agents that impede melting. Also, ensure even distribution throughout all cuts.
Problem: Top browns too quickly Solution: Keep the bread covered with foil longer, or reduce oven temperature by 25°F and extend cooking time.
Problem: Bottom becomes soggy Solution: Reduce butter quantity slightly, or place the bread on a wire rack during baking to promote air circulation.
Problem: Flavors taste flat Solution: Increase garlic quantity, add more herbs, or incorporate grated Parmesan for umami depth.
Professional Tips for Exceptional Results
Through years of making this bread for various occasions, I’ve discovered several professional techniques that elevate the final result. First, I score the garlic cloves with a knife before mincing, which helps release more oils and intensifies the flavor. Second, I let the assembled bread sit at room temperature for 10 minutes before baking, allowing the flavors to begin melding.
Using parchment paper beneath the bread prevents sticking while still allowing proper heat circulation. I also brush the top with a small amount of the garlic butter mixture just before the final uncovered baking phase, which promotes even browning and adds an extra layer of flavor.
For special presentations, I sometimes sprinkle additional herbs or cheese on top during the final minutes of baking. Fresh herbs like parsley or chives added after baking provide color contrast and fresh flavor that brightens the rich, indulgent bread.
Scaling for Different Occasions
This recipe scales beautifully for different group sizes. For intimate dinners of 4-6 people, I use a smaller boule and reduce all ingredients proportionally. For large gatherings, I prepare multiple loaves with different flavor variations, which creates visual interest and accommodates various preferences.
When preparing for potluck events, I partially assemble the bread at home, then complete the final assembly and baking at the destination if kitchen facilities are available. This approach ensures optimal freshness while managing preparation logistics.
For meal prep enthusiasts, the garlic butter mixture can be prepared several days in advance and stored in the refrigerator. This preparation step allows for quick assembly when needed, making it feasible to prepare this impressive bread even during busy periods.
Frequently Asked Questions
Q. Can I prepare this bread ahead of time? I recommend assembling the bread completely, then covering tightly with plastic wrap and refrigerating for up to 24 hours before baking. Add an extra 5-10 minutes to the covered baking time if starting from cold.
Q. What’s the best way to cut the bread without it falling apart? Use a sharp serrated knife and make deliberate, controlled cuts. Stop approximately 1/2 inch from the bottom crust, and take your time with each cut rather than rushing through the process.
Q. Can I use different types of cheese? Absolutely! The key is using at least 60% good melting cheese like mozzarella, Monterey Jack, or provolone. You can experiment with harder cheeses like aged cheddar or Gruyere for flavor, but they don’t create the same stretchy texture.
Q. How do I prevent the bottom from getting soggy? Use a moderate amount of butter mixture, and consider placing the bread on a wire rack during baking to promote air circulation. Avoid over-saturating the bread with the garlic butter mixture.
Q. Can I make this bread dairy-free? Yes! Use dairy-free butter alternatives and dairy-free shredded cheeses. The texture will be slightly different, but the flavor and pull-apart effect still work well with quality dairy-free products.
Q. What if I don’t have fresh garlic? While fresh garlic provides the best flavor, you can substitute with 2 teaspoons of garlic powder mixed into the butter. The flavor will be milder but still delicious.
Q. How do I know when the bread is done baking? The cheese should be bubbly and golden brown on top, and the bread should sound hollow when tapped on the bottom. The internal temperature should reach about 165°F.
Q. Can I freeze the assembled unbaked bread? Yes! Wrap tightly in plastic wrap and aluminum foil, then freeze for up to 2 months. Bake directly from frozen, adding 15-20 minutes to the covered baking time.
Q. What’s the best way to serve this bread at a party? Present it on a large wooden cutting board with small plates and napkins nearby. The bread stays warm longer when left in its original shape, and guests enjoy the interactive experience of pulling apart their own portions.
Q. How can I make this bread less messy to eat? While part of the charm is the hands-on eating experience, you can pre-cut individual portions more deeply (while still maintaining the bottom crust) to make serving easier. Providing plenty of napkins is always recommended!