I’ve been perfecting my crispy honey chilli chicken recipe for years, and I can confidently say this version rivals any restaurant dish you’ve ever tasted. The combination of perfectly crispy chicken pieces coated in a glossy, sweet-spicy sauce creates an irresistible flavor profile that keeps me coming back for more.
This Indo-Chinese fusion dish has become my go-to recipe when I want to impress guests or satisfy my own cravings for something extraordinary. The secret lies in achieving that perfect balance between the crispy texture and the sticky, flavorful sauce that clings beautifully to each piece.
Understanding Crispy Honey Chilli Chicken
Before diving into my recipe, let me explain what makes this dish so special and define the key components that contribute to its success.
Key Terms and Components
Double Frying Method : A technique where chicken is fried twice – first at a lower temperature to cook through, then at higher heat for ultimate crispiness
Cornstarch Coating : A light dusting that creates an incredibly crispy exterior while keeping the interior juicy
Honey-Chilli Glaze : The signature sauce combining sweet honey with spicy chillies and aromatic garlic
Wok Hei : The distinctive “breath of the wok” flavor achieved through high-heat cooking
Velvet Coating : A marinade technique using egg whites and cornstarch to tenderize the chicken
My Secret to Perfect Crispy Honey Chilli Chicken
The magic happens in three distinct phases: preparation, frying, and glazing. Each stage requires attention to detail, but the results are absolutely worth the effort. I’ve refined this process through countless attempts, and now I’m sharing my foolproof method with you.
Ingredients Breakdown
| Category | Ingredient | Quantity | Purpose | Substitution Options |
|---|---|---|---|---|
| Protein | Boneless chicken (thigh/breast) | 500g | Main ingredient | Turkey, prawns |
| Marinade | Soy sauce | 2 tbsp | Flavor base | Tamari, coconut aminos |
| Marinade | Egg white | 1 large | Tenderizing | 2 tbsp yogurt |
| Marinade | Cornstarch | 3 tbsp | Coating base | Potato starch |
| Coating | All-purpose flour | ½ cup | Crispy texture | Rice flour mix |
| Sauce | Honey | 4 tbsp | Sweetness | Maple syrup |
| Sauce | Red chillies | 3-4 pieces | Heat level | Chilli powder |
| Sauce | Garlic | 4 cloves | Aromatic base | Garlic powder |
| Sauce | Ginger | 1 inch piece | Flavor depth | Ground ginger |
| Aromatics | Spring onions | 3 stalks | Garnish | Chives |
Nutritional Information per Serving
| Nutrient | Amount | % Daily Value | Health Benefits |
|---|---|---|---|
| Calories | 285 kcal | 14% | Energy provision |
| Protein | 22g | 44% | Muscle building |
| Carbohydrates | 18g | 6% | Quick energy |
| Fat | 15g | 23% | Satiety factor |
| Sodium | 680mg | 30% | Electrolyte balance |
| Sugar | 14g | 16% | Natural honey content |
Step-by-Step Preparation Method
Phase 1: Preparing the Chicken
I start by cutting my chicken into uniform bite-sized pieces, approximately 1-inch cubes. This ensures even cooking throughout. The chicken pieces need to be patted completely dry with paper towels – any excess moisture will prevent proper crisping.
For the marinade, I combine the soy sauce, egg white, and 1 tablespoon of cornstarch in a bowl. The egg white acts as a natural tenderizer while the cornstarch begins building our crispy foundation. I massage this mixture into the chicken pieces and let them rest for at least 30 minutes, though I prefer an hour when time allows.
Phase 2: Creating the Perfect Coating
My coating mixture combines all-purpose flour with the remaining cornstarch in a 2:1 ratio. This blend creates the ideal texture – the flour provides structure while cornstarch delivers that signature crunch. I season this mixture with a pinch of salt and white pepper.
Each marinated chicken piece gets thoroughly coated in this dry mixture. I press the coating firmly onto each piece, ensuring complete coverage. The excess coating should be shaken off before frying.

Phase 3: The Double-Fry Technique
This is where my years of experimentation really pay off. I heat oil to exactly 325°F (165°C) for the first fry. At this temperature, the chicken cooks through gently without burning the coating. Each piece goes in carefully to prevent oil splatter, and I fry for 3-4 minutes until lightly golden.
After draining briefly on paper towels, I increase the oil temperature to 375°F (190°C) for the second fry. This final 1-2 minute blast creates that incredible crispy exterior I’m after. The contrast between the crunchy outside and tender inside is absolutely perfect.
Temperature Guide for Frying
| Frying Stage | Temperature | Duration | Visual Cue | Internal Temp |
|---|---|---|---|---|
| First Fry | 325°F (165°C) | 3-4 minutes | Light golden | 165°F (74°C) |
| Rest Period | Room temp | 2-3 minutes | Oil draining | Cooling |
| Second Fry | 375°F (190°C) | 1-2 minutes | Deep golden | 175°F (79°C) |
| Final Rest | Room temp | 1 minute | Excess oil removal | Ready to sauce |
Crafting the Honey Chilli Sauce
While my chicken rests after the final fry, I prepare the sauce that transforms this dish from good to extraordinary. The key is achieving the perfect balance of sweet, spicy, and savory elements.
I heat a tablespoon of oil in my wok over high heat. The sliced red chillies go in first, followed immediately by minced garlic and ginger. The timing here is crucial – I want the aromatics fragrant but not burned, which happens in about 30 seconds of high-heat cooking.
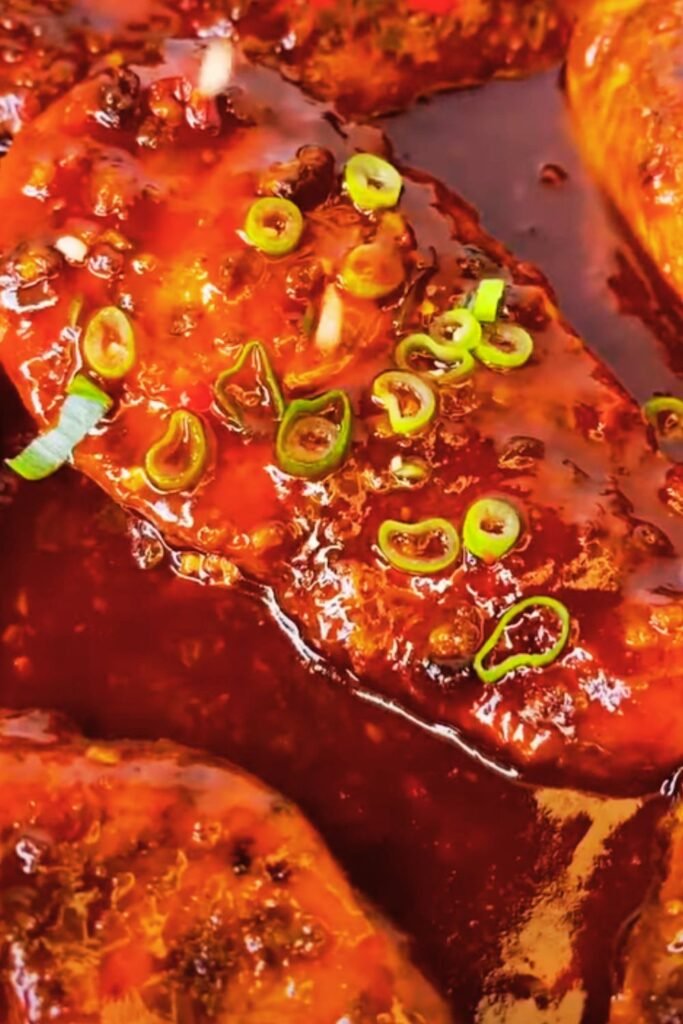
The honey comes next, followed by soy sauce and a splash of rice vinegar for brightness. I let this mixture bubble and reduce slightly until it reaches a glossy, coating consistency. The sauce should coat the back of a spoon when ready.
Sauce Consistency Chart
| Stage | Appearance | Consistency | Cooking Time | Action Required |
|---|---|---|---|---|
| Initial Mix | Thin, watery | Pourable | 0-1 minute | Stir constantly |
| Heating | Bubbling | Slightly thick | 1-2 minutes | Reduce heat if needed |
| Reduction | Glossy | Coats spoon | 2-3 minutes | Test consistency |
| Final Stage | Sticky glaze | Thick coating | 3-4 minutes | Ready for chicken |
Assembly and Final Touches
The moment of truth arrives when I add my crispy chicken pieces to the hot sauce. Working quickly, I toss everything together using a large spoon or tongs, ensuring each piece gets evenly coated. The hot sauce should sizzle when it hits the chicken – this reaction helps the glaze adhere properly.
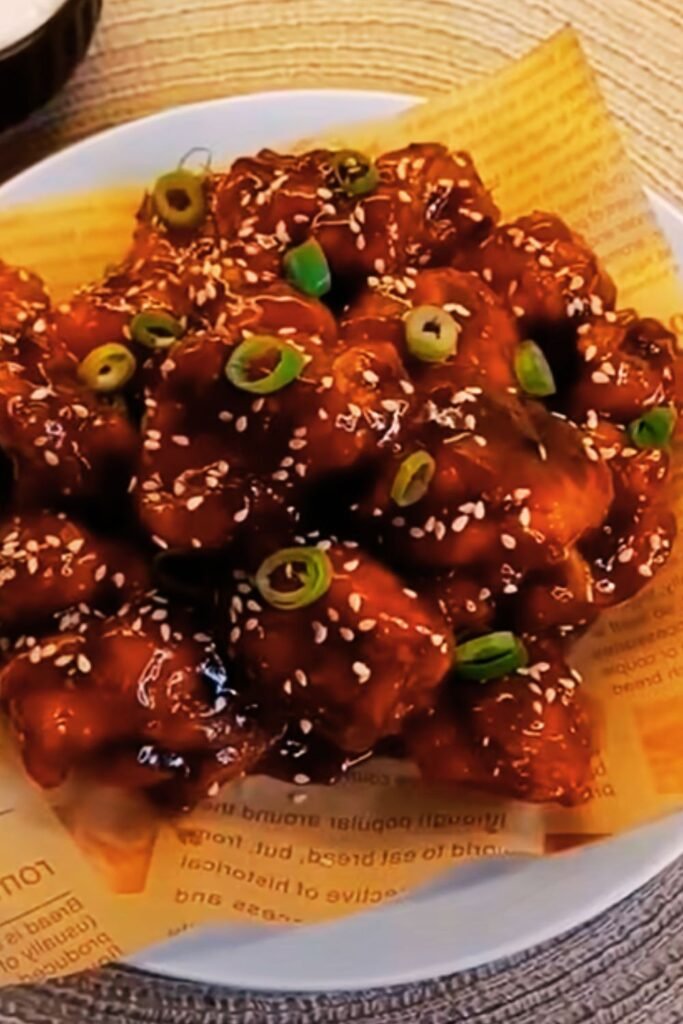
I sprinkle freshly chopped spring onions over the top, along with toasted sesame seeds for added texture and visual appeal. The entire assembly process takes less than a minute to preserve that crucial crispiness.
Serving Suggestions and Pairings
This crispy honey chilli chicken shines as both an appetizer and main course. When serving as an appetizer, I arrange the pieces on a platter with small serving spoons and provide napkins – it’s definitely finger food at its finest.
As a main course, I pair it with steamed jasmine rice to balance the bold flavors. The neutral rice allows the honey-chilli glaze to be the star while providing substance to the meal. Stir-fried vegetables like bok choy or snow peas make excellent sides, adding color and nutritional balance.
For special occasions, I serve this alongside other Indo-Chinese favorites like vegetable fried rice or hakka noodles. The combination creates a restaurant-quality feast that never fails to impress my guests.
Storage and Reheating Tips
While this dish is undoubtedly best served immediately, I understand that leftovers sometimes happen. The key to successful storage lies in separating components when possible.
If I know I’ll have leftovers, I sometimes reserve a portion of the chicken before saucing and store it separately. The unsauced crispy chicken keeps better and can be re-crisped in a hot oven at 425°F for 3-4 minutes before adding fresh sauce.
For already-sauced leftovers, I store them in the refrigerator for up to 2 days. Reheating works best in a hot skillet over medium-high heat, which helps restore some of the lost crispiness. Microwaving, while convenient, tends to make the coating soggy.
Storage Guidelines
| Storage Method | Duration | Quality Retention | Reheating Method | Tips |
|---|---|---|---|---|
| Room Temperature | 2 hours max | Excellent | Not recommended | Serve immediately |
| Refrigerator | 2-3 days | Good | Skillet reheat | Separate sauce if possible |
| Freezer | 1 month | Fair | Oven + fresh sauce | Freeze before saucing |
Troubleshooting Common Issues
Through my journey perfecting this recipe, I’ve encountered and solved several common problems that home cooks face with this dish.
Soggy Coating Problems When my coating turns out soggy instead of crispy, it’s usually due to one of three issues: excess moisture in the chicken, oil temperature too low, or overcrowding the pan. I always ensure my chicken is completely dry before coating, maintain proper oil temperatures, and fry in small batches.
Sauce Consistency Issues If my sauce turns out too thin, I let it reduce longer over medium heat. If it’s too thick, I add a tablespoon of water or chicken stock to loosen it. The ideal consistency should coat the chicken pieces without being gluey.
Heat Level Management Finding the right spice level can be tricky. I start with fewer chillies and taste-test the sauce before adding the chicken. Remember, I can always add more heat, but I can’t take it away once it’s mixed in.
Variations and Customizations
One of the things I love most about this recipe is its adaptability. Over the years, I’ve developed several variations that cater to different preferences and dietary needs.
Protein Alternatives While chicken remains my favorite, I’ve successfully made this recipe with prawns, firm tofu, and even cauliflower florets for vegetarian friends. The cooking times adjust accordingly – prawns need less time, while cauliflower requires a bit more.
Spice Level Modifications For those who prefer milder flavors, I reduce the chillies and add a touch more honey. For heat lovers, I incorporate dried red chilli flakes or a dash of sriracha into the sauce.
Dietary Adaptations I’ve created gluten-free versions using rice flour and cornstarch for the coating, and the results are remarkably similar. For lower-sugar options, I substitute honey with sugar-free alternatives, though the flavor profile changes slightly.
Questions and Answers
Q. Can I prepare the chicken coating in advance?
Absolutely! I often coat my chicken pieces up to 4 hours ahead and store them covered in the refrigerator. This actually helps the coating adhere better. Just make sure to bring them to room temperature for 10-15 minutes before frying.
Q. What’s the best oil for frying this chicken?
I prefer using vegetable oil or peanut oil for their high smoke points and neutral flavors. Avoid olive oil as it can burn at the high temperatures needed for proper crisping. I use about 3-4 cups of oil in a deep, heavy-bottomed pot.
Q. How do I know when the oil is at the right temperature without a thermometer?
I test the oil by dropping a small piece of bread or coating mixture into it. At 325°F, it should sizzle gently and turn golden in about 60 seconds. At 375°F, the same test piece will turn golden in about 30 seconds with more vigorous bubbling.
Q. Can I make this dish less sweet?
Certainly! I sometimes reduce the honey to 2-3 tablespoons and add an extra tablespoon of soy sauce for a more savory profile. You can also add a squeeze of lime juice to balance the sweetness with acidity.
Q. Why does my coating fall off during frying?
This usually happens when the chicken isn’t properly dried before marinating, or when the oil temperature is incorrect. Make sure to pat the chicken completely dry, let the marinade set for at least 30 minutes, and maintain proper oil temperatures throughout the frying process.
Q. Can I bake this chicken instead of frying?
While baking won’t achieve the same level of crispiness, I’ve had decent results baking coated chicken pieces at 425°F for 20-25 minutes, turning once halfway through. The texture will be different, but the flavors remain delicious.
Q. How long does the honey chilli sauce last?
I can store the sauce separately in the refrigerator for up to a week. It’s actually quite versatile and works well with other proteins or as a glaze for grilled meats. I often make extra just to have on hand.
Q. What should I do if my sauce crystallizes?
If the honey in my sauce starts to crystallize during storage, I gently reheat it with a tablespoon of water, stirring until smooth. This usually resolves the issue and restores the proper consistency.
This crispy honey chilli chicken recipe has become a cornerstone of my cooking repertoire, and I’m confident it will become one of yours too. The combination of techniques, flavors, and textures creates a dish that’s both comforting and exciting, familiar yet exotic. Whether you’re cooking for family dinner or entertaining guests, this recipe delivers restaurant-quality results that will have everyone asking for seconds.