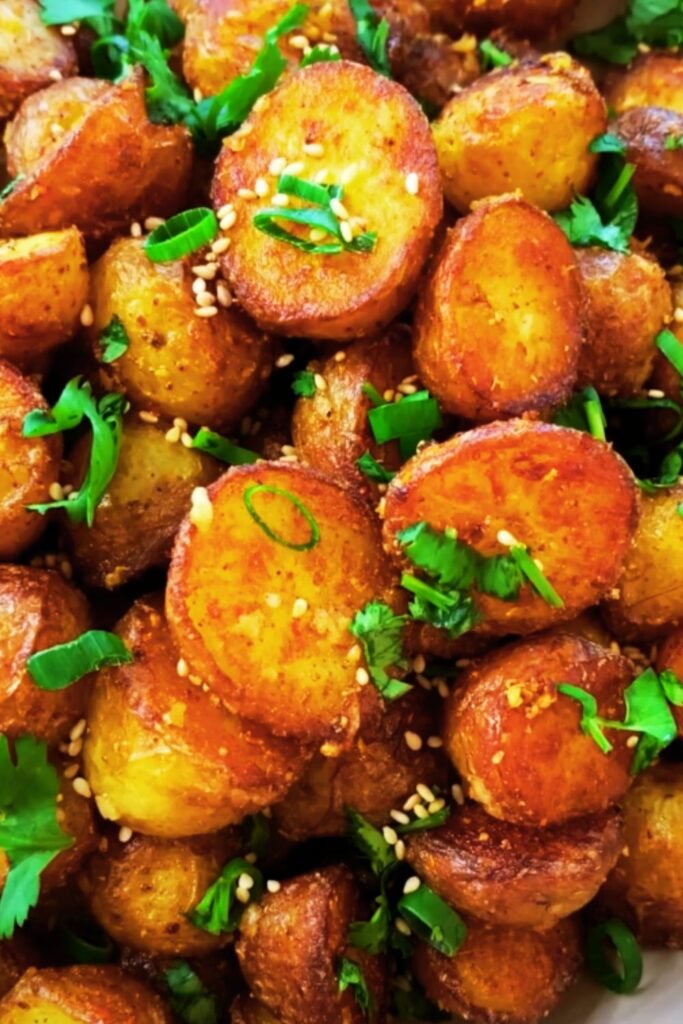
There’s something magical about the combination of perfectly crispy potatoes and aromatic garlic. I’ve been perfecting this recipe for years, and I’m thrilled to share my ultimate version of crushed garlic potatoes with you today. These potatoes deliver an irresistible contrast between their golden, crunchy exteriors and fluffy, tender insides, all infused with rich garlic flavor.
What makes this dish special isn’t just how incredible it tastes, but how surprisingly simple it is to prepare. With just a few basic ingredients and some straightforward techniques, you’ll create a side dish that consistently steals the spotlight at any meal. Whether you’re hosting a dinner party or simply elevating your weeknight dinner, these crushed garlic potatoes are guaranteed to impress.
What Makes These Potatoes Special?
The secret to these exceptional potatoes lies in the crushing technique. By partially flattening the potatoes after boiling, you create more surface area to crisp up in the oven. Those irregular, craggly edges transform into wonderfully crunchy bits, while the centers remain deliciously tender. Combined with generous amounts of garlic and herbs, it’s a texture and flavor experience that’s truly sublime.
I’ve spent years experimenting with different methods, and this approach consistently delivers the most satisfying results. The best part? It’s nearly foolproof and requires minimal hands-on time.
Ingredients
For this recipe, I focus on quality ingredients that work together to create maximum flavor. Here’s what you’ll need:
- 2 pounds (900g) baby potatoes or small waxy potatoes
- 8-10 garlic cloves, finely minced or crushed
- 4 tablespoons olive oil, divided
- 2 tablespoons unsalted butter
- 1 tablespoon fresh rosemary, finely chopped
- 1 tablespoon fresh thyme leaves
- 1 teaspoon sea salt flakes, plus more to taste
- 1/2 teaspoon freshly ground black pepper
- 1/2 teaspoon smoked paprika (optional)
- 2 tablespoons fresh parsley, chopped (for garnish)
- Zest of 1 lemon (optional)
Equipment Needed
- Large pot for boiling
- Colander for draining
- Large baking sheet
- Parchment paper
- Small saucepan (for the garlic oil)
- Potato masher or the bottom of a glass
Step-by-Step Instructions
Preparation Phase
- Preheat your oven to 425°F (220°C). This high temperature is crucial for achieving that perfect exterior crispiness.
- Prepare your potatoes: Wash the potatoes thoroughly under cold running water. For even cooking, try to select potatoes that are similar in size. If some are significantly larger, you can cut them in half.
- Line your baking sheet with parchment paper. This prevents sticking and makes cleanup easier.
Boiling the Potatoes
- Place the potatoes in a large pot and cover with cold water. Add 1 tablespoon of salt to the water.
- Bring to a boil over high heat, then reduce to medium heat and simmer for about 15-20 minutes. You want the potatoes to be tender enough that a fork easily pierces them but not so soft that they fall apart.
- Test for doneness by inserting a knife into the largest potato. It should slide in easily but with slight resistance.
- Drain thoroughly in a colander and allow to steam dry for about 5 minutes. This step is crucial for crispy results!
Creating the Garlic Infusion
While the potatoes are boiling, prepare the garlic infusion:
- In a small saucepan, heat 3 tablespoons of olive oil over medium-low heat.
- Add the minced garlic and cook gently for 2-3 minutes until fragrant but not browned. Garlic burns easily, so watch it carefully.
- Remove from heat and stir in the butter until melted. Add the chopped rosemary and thyme, allowing their flavors to infuse into the warm mixture.
The Crushing Technique
This is where the magic happens:
- Transfer the dried potatoes to your parchment-lined baking sheet, arranging them with plenty of space between each potato.
- Using a potato masher or the flat bottom of a glass, gently press down on each potato until it’s flattened to about 1/2 inch thickness. The goal is to break the skin and flatten the potato while keeping it in one piece. Don’t worry if some break apart more than others – those pieces will become extra crispy!
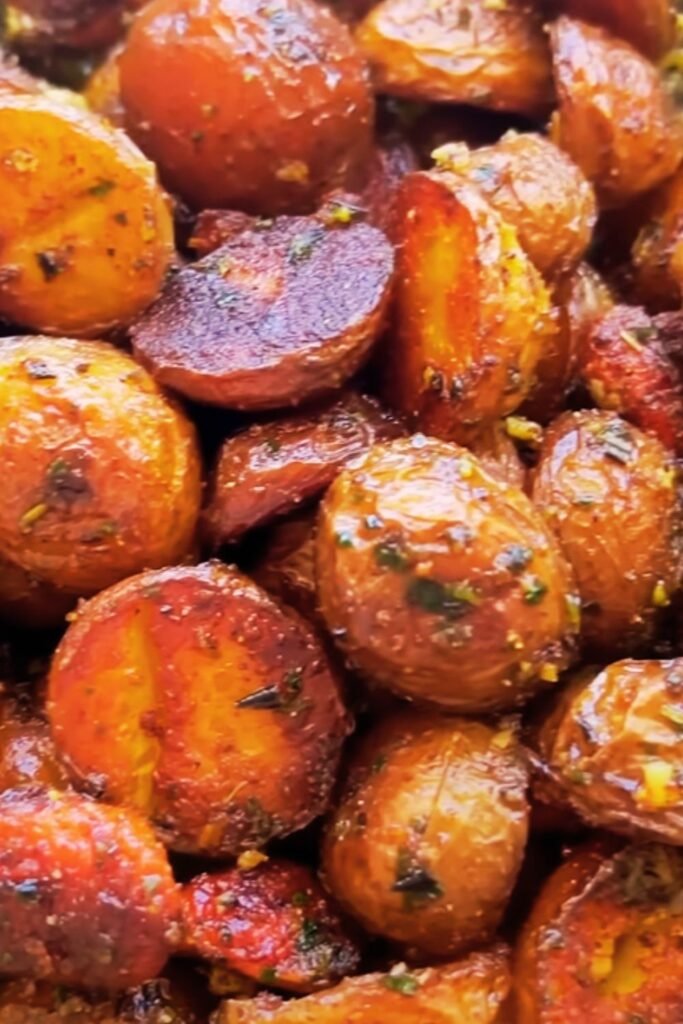
- Brush each potato generously with the garlic herb oil mixture, ensuring some of the minced garlic and herbs get onto each potato.
- Sprinkle with sea salt flakes, freshly ground black pepper, and smoked paprika if using.

Roasting to Perfection
- Place the baking sheet in the preheated oven and roast for 25-30 minutes until the potatoes are deeply golden and crispy.
- For extra crispiness, flip the potatoes halfway through cooking and brush with any remaining garlic oil.
- Check frequently during the last 5 minutes to ensure they don’t burn. Every oven is different, so cooking times may vary.
The Finishing Touches
To elevate these potatoes from great to extraordinary:
- Remove from the oven and immediately sprinkle with a little extra sea salt while still hot.
- Transfer to a serving platter and scatter freshly chopped parsley over the top.
- For brightness, add freshly grated lemon zest if desired.
- Serve immediately while still hot and at their crispiest.
Variations and Additions
The beauty of this recipe is its versatility. Here are some of my favorite ways to customize:
Cheese Lovers’ Version
- Sprinkle with 1/4 cup freshly grated Parmesan cheese during the last 5 minutes of roasting
- Or try crumbled feta or blue cheese added after roasting for a tangy contrast
Spice It Up
- Add 1/4 teaspoon cayenne pepper to the garlic oil
- Include 1 teaspoon of red pepper flakes for heat
- Try 1 tablespoon of harissa paste mixed into the oil for North African flair
Herb Alternatives
- Substitute sage and thyme for a more autumnal flavor
- Use dill and parsley for a lighter, spring-inspired version
- Try za’atar seasoning for a Middle Eastern twist
Add-ins
- Mix in caramelized onions after roasting
- Add roasted red peppers, chopped and mixed in before serving
- Top with crispy bacon bits for an indulgent treat
Make-Ahead Tips
While these potatoes are best served immediately, there are ways to prep ahead:
- Boil and crush the potatoes up to a day in advance. Store them covered in the refrigerator.
- Prepare the garlic herb oil separately and store in an airtight container in the refrigerator for up to 3 days. Gently reheat before using.
- When ready to serve, bring the pre-crushed potatoes to room temperature, then brush with the garlic herb oil and roast as directed. They may need a few extra minutes in the oven if starting from cold.
Serving Suggestions
These crispy garlic potatoes pair beautifully with a wide range of main dishes:
- Serve alongside a perfectly grilled steak for a classic combination
- Complement a roasted chicken for a simple yet impressive meal
- Pair with grilled or baked fish for a lighter option
- Excellent with roasted vegetables for a hearty vegetarian meal
- Delicious with a simple green salad for lunch
For breakfast lovers, try topping these potatoes with a fried egg and some chives for an elevated breakfast potato experience.
Nutritional Benefits
These potatoes aren’t just delicious—they also offer several nutritional benefits:
| Nutrient | Benefit |
|---|---|
| Potassium | Potatoes are naturally high in potassium, which helps regulate blood pressure and fluid balance |
| Vitamin C | One serving provides a significant portion of your daily vitamin C needs |
| Vitamin B6 | Supports brain development and function |
| Fiber | The skin of the potatoes adds beneficial dietary fiber |
| Antioxidants | Garlic contains compounds with antioxidant properties |
| Healthy Fats | Olive oil provides heart-healthy monounsaturated fats |
Common Mistakes to Avoid
For guaranteed success, watch out for these common pitfalls:
- Skipping the drying step after boiling—moisture is the enemy of crispiness
- Overcrowding the baking sheet—potatoes need space to release steam and crisp up
- Using too low an oven temperature—high heat is essential for that perfect crust
- Burning the garlic—always cook it gently to avoid bitterness
- Under-seasoning—potatoes absorb a lot of salt, so be generous
- Not allowing enough roasting time—patience yields the crispiest results
Storage and Reheating
If you happen to have leftovers (though that’s rarely the case in my house!):
- Store in an airtight container in the refrigerator for up to 3 days
- Reheat in a 375°F (190°C) oven for 10-15 minutes until hot and crispy again
- Avoid microwaving if possible, as it will make them soggy
Why This Recipe Works Every Time
The science behind these perfect potatoes:
- Boiling before roasting gelatinizes the starches in the potato, setting you up for that perfect fluffy interior
- The crushing technique creates more surface area for crisping
- High oven temperature quickly dehydrates the exterior while the interior stays moist
- Infusing the oil with garlic distributes flavor evenly and prevents the garlic from burning
- The combination of oil and butter provides both high-heat cooking ability and rich flavor
My Expert Tips
After making this recipe hundreds of times, I’ve collected these professional tips:
- For the crispiest results, make sure your oven is fully preheated before adding the potatoes
- A metal baking sheet conducts heat better than glass or ceramic dishes
- The type of potato matters—waxy varieties like Yukon Gold or red potatoes hold their shape better than starchy russets
- Don’t rush the garlic infusion step—low and slow creates the best flavor without bitterness
- Finishing with flaky sea salt adds both flavor and texture contrast
Questions and Answers
Can I use dried herbs instead of fresh ones? Yes, but reduce the quantity to about one-third of what the recipe calls for with fresh herbs. Dried herbs are more concentrated in flavor. For best results, add dried herbs to the oil while it’s still warm to help release their flavors.
What’s the best type of potato to use for this recipe? Baby potatoes or small waxy potatoes like Yukon Gold, red potatoes, or fingerlings work best. They hold their shape after boiling and crushing, and develop a wonderful contrast between crispy exterior and creamy interior.
Can I make these potatoes vegan? Absolutely! Simply substitute the butter with additional olive oil or use a plant-based butter alternative. The result will still be deliciously crispy with great flavor.
Why aren’t my potatoes getting crispy? There are a few common culprits: 1) The potatoes weren’t dried thoroughly after boiling, 2) The oven temperature isn’t hot enough, 3) The potatoes are too crowded on the baking sheet, or 4) The potatoes weren’t boiled until tender enough before crushing.
Can I prepare these in an air fryer? Yes! After crushing and seasoning the potatoes, air fry at 380°F (193°C) for about 15-18 minutes, checking frequently. You may need to work in batches depending on the size of your air fryer.
How do I know when the potatoes are perfectly cooked before crushing? A knife should slide into the potato with minimal resistance, but the potato shouldn’t be falling apart. If you’re uncertain, it’s better to slightly undercook than overcook at this stage, as they’ll continue cooking in the oven.
Can I use this method with larger potatoes? Yes, but you’ll need to adjust the cooking times. Cut larger potatoes into halves or quarters before boiling, and they may require slightly longer in the oven to crisp up properly.
What if I don’t have fresh garlic? While fresh garlic provides the best flavor, you can substitute 1-2 teaspoons of garlic powder added directly to the oil. Avoid garlic salt, as it will make the dish too salty.
A Final Note
These crispy crushed garlic potatoes have become my signature side dish, requested by friends and family for every gathering. What makes them truly special is their perfect balance of simplicity and extraordinary flavor. With minimal ingredients and straightforward techniques, you create something truly memorable.
I hope this recipe brings as much joy to your table as it has to mine. Remember, cooking is about experimenting and making recipes your own, so don’t hesitate to play with the variations or add your personal touch.
Happy cooking, and enjoy those gloriously crispy potatoes!