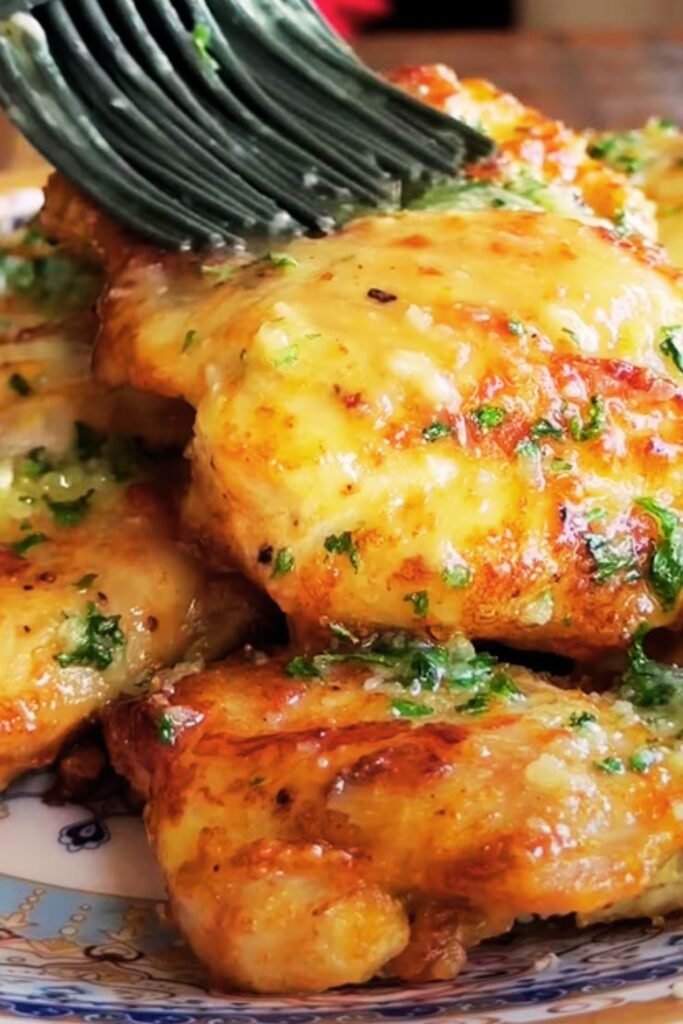
When I first discovered the magic of combining garlic, parmesan, and air-fried chicken thighs, my weeknight dinner game changed forever. There’s something absolutely irresistible about the way the savory garlic mingles with the nutty, sharp parmesan while the air fryer works its magic to create that perfect golden-brown crispy skin.
I’ve been perfecting this recipe for months, tweaking seasonings and timing until I achieved what I consider the holy grail of chicken thigh preparations. The result? Juicy, tender meat that practically falls off the bone, encased in a gloriously crispy coating that delivers an explosion of garlic and parmesan flavors with every bite.
Why Air Fryer Chicken Thighs Are Superior
Let me tell you why I’ve become obsessed with cooking chicken thighs in my air fryer. Unlike chicken breasts, thighs contain more fat and connective tissue, which means they stay incredibly moist during the cooking process. The air fryer’s circulating hot air creates an environment that renders the fat beautifully while crisping up the skin to perfection.
I’ve found that chicken thighs are practically foolproof in the air fryer. Even if you slightly overcook them, they remain tender and juicy thanks to their higher fat content. This makes them ideal for busy weeknights when you want restaurant-quality results without the stress of precise timing.
The bone-in, skin-on variety delivers the best results in my experience. The bone helps retain moisture and adds flavor, while the skin becomes incredibly crispy when properly prepared. I always pat the skin completely dry before seasoning – this step is crucial for achieving that coveted crunch.
Essential Ingredients and Their Roles
For the Chicken:
- 6-8 bone-in, skin-on chicken thighs (about 2-3 pounds)
- 2 tablespoons olive oil
- 1 teaspoon salt
- ½ teaspoon black pepper
For the Garlic Parmesan Coating:
- 4 cloves garlic, minced
- ¾ cup freshly grated Parmesan cheese
- 2 tablespoons fresh parsley, chopped
- 1 teaspoon garlic powder
- 1 teaspoon onion powder
- ½ teaspoon paprika
- ¼ teaspoon cayenne pepper (optional)
Equipment Needed:
- Air fryer (6-quart capacity recommended)
- Instant-read thermometer
- Large mixing bowl
- Paper towels
| Ingredient | Purpose | Substitution Options |
|---|---|---|
| Bone-in chicken thighs | Primary protein, stays moist | Boneless thighs (reduce cooking time by 5 minutes) |
| Fresh garlic | Intense flavor base | Garlic powder (1 tsp = 1 clove) |
| Parmesan cheese | Umami and nuttiness | Pecorino Romano, aged cheddar |
| Olive oil | Helps seasoning adhere, promotes browning | Avocado oil, melted butter |
| Paprika | Color and mild smokiness | Smoked paprika for deeper flavor |
| Fresh parsley | Brightness and color | Dried parsley (use half the amount) |
Step-by-Step Cooking Instructions
Preparation Phase
I always start by removing the chicken thighs from the refrigerator about 30 minutes before cooking. This allows them to come to room temperature, which promotes even cooking. While they’re warming up, I prepare my garlic parmesan mixture.
Step 1: Prepare the Chicken Pat each chicken thigh completely dry with paper towels. I cannot stress this enough – any moisture on the skin will prevent proper crisping. Season both sides generously with salt and pepper, then drizzle with olive oil and rub it into the skin.
Step 2: Create the Garlic Parmesan Mixture In a large bowl, combine the minced garlic, grated Parmesan, chopped parsley, garlic powder, onion powder, paprika, and cayenne if using. Mix thoroughly until everything is evenly distributed.
Step 3: Coat the Chicken Press the garlic parmesan mixture firmly onto both sides of each chicken thigh. I like to really pack it on – the more coating that adheres, the more flavorful your finished dish will be.
Cooking Process
Step 4: Preheat the Air Fryer Set your air fryer to 380°F (193°C) and let it preheat for 3-4 minutes. This initial heat blast helps create that immediate searing effect we’re after.
Step 5: First Cook Cycle Place the chicken thighs skin-side down in the air fryer basket, ensuring they don’t overlap. Cook for 12 minutes without opening the air fryer. This initial phase renders the fat and starts the crisping process.
Step 6: Flip and Continue Carefully flip each thigh using tongs, revealing beautifully golden skin. Cook for an additional 10-12 minutes, or until the internal temperature reaches 165°F (74°C) when measured in the thickest part of the thigh.
Step 7: Rest and Serve Let the chicken rest for 5 minutes before serving. This allows the juices to redistribute throughout the meat, ensuring maximum tenderness.
Timing and Temperature Guide
| Phase | Temperature | Time | Internal Temp Goal |
|---|---|---|---|
| Preheating | 380°F (193°C) | 3-4 minutes | N/A |
| First side | 380°F (193°C) | 12 minutes | 140°F (60°C) |
| Second side | 380°F (193°C) | 10-12 minutes | 165°F (74°C) |
| Resting | Room temperature | 5 minutes | N/A |

Nutritional Information and Benefits
I love that this recipe delivers incredible flavor while maintaining a relatively healthy profile. Chicken thighs provide high-quality protein along with essential vitamins and minerals.
| Nutritional Component | Per Serving (1 thigh) | Daily Value % |
|---|---|---|
| Calories | 285 | 14% |
| Protein | 24g | 48% |
| Total Fat | 18g | 23% |
| Saturated Fat | 6g | 30% |
| Carbohydrates | 2g | 1% |
| Sodium | 420mg | 18% |
| Calcium | 120mg | 12% |
| Iron | 1.2mg | 7% |
The garlic in this recipe provides allicin, a compound known for its anti-inflammatory properties. Parmesan cheese contributes calcium and phosphorus, essential for bone health. By using the air fryer instead of deep frying, we significantly reduce the overall fat content while maintaining that satisfying crispy texture.
Troubleshooting Common Issues
Problem: Coating Falls Off During Cooking I’ve learned that this usually happens when the chicken isn’t dry enough before coating. Make sure to pat the thighs completely dry and let them sit for a few minutes after patting before applying the coating mixture.
Problem: Skin Isn’t Crispy Enough If your skin isn’t as crispy as you’d like, increase the temperature to 400°F (204°C) for the last 2-3 minutes of cooking. Just watch carefully to prevent burning.
Problem: Uneven Cooking This typically occurs when the chicken thighs are different sizes. Try to select thighs that are similar in size, or adjust cooking times for larger pieces.
Problem: Dry Chicken Overcooking is usually the culprit here. Always use an instant-read thermometer and remove the chicken as soon as it hits 165°F (74°C).
Flavor Variations and Customizations
I love experimenting with different flavor profiles using this base recipe. Here are some of my favorite variations:
Mediterranean Style: Replace half the Parmesan with crumbled feta cheese and add dried oregano, lemon zest, and a pinch of dried rosemary.
Spicy Cajun: Increase the cayenne to 1 teaspoon and add ½ teaspoon each of smoked paprika, dried thyme, and garlic powder.
Herb-Crusted: Add 2 tablespoons of mixed fresh herbs like thyme, rosemary, and sage to the coating mixture.
Asian-Inspired: Mix in 1 tablespoon of sesame seeds and 1 teaspoon of Chinese five-spice powder.

Perfect Side Dishes and Serving Suggestions
When I serve these garlic parmesan chicken thighs, I like to create a complete meal that complements the rich, savory flavors. Here are my go-to accompaniments:
Vegetable Sides:
- Roasted Brussels sprouts with balsamic glaze
- Air-fried asparagus with lemon
- Honey-glazed carrots
- Garlic mashed cauliflower
- Simple green salad with vinaigrette
Starch Options:
- Creamy garlic mashed potatoes
- Wild rice pilaf
- Herb-roasted baby potatoes
- Buttered egg noodles
- Garlic bread or focaccia
Light and Fresh Options:
- Caprese salad with fresh basil
- Cucumber tomato salad
- Coleslaw with Greek yogurt dressing
- Quinoa tabbouleh
Storage and Reheating Tips
I often make extra chicken thighs because the leftovers are fantastic. Here’s how I store and reheat them:
Refrigerator Storage: Place cooled chicken in an airtight container and refrigerate for up to 4 days. I like to store any leftover coating mixture separately to sprinkle on during reheating.
Freezer Storage: These chicken thighs freeze beautifully for up to 3 months. Wrap individually in plastic wrap, then place in a freezer bag. Thaw overnight in the refrigerator before reheating.
Reheating Methods:
- Air fryer: 350°F (175°C) for 3-4 minutes
- Oven: 325°F (163°C) for 8-10 minutes
- Microwave: 30-second intervals until heated through (though this won’t maintain crispiness)
Meal Prep Applications
This recipe works wonderfully for meal prep. I often cook a double batch on Sunday and use the chicken throughout the week in various ways:
Weekday Lunch Ideas:
- Slice over mixed greens for a protein-packed salad
- Chop and add to grain bowls with quinoa and roasted vegetables
- Use in wraps with fresh vegetables and hummus
- Add to pasta with a light cream sauce
Quick Dinner Solutions:
- Reheat and serve with microwaveable vegetables
- Shred the meat for chicken salad sandwiches
- Use in quesadillas with cheese and vegetables
- Add to homemade pizza as a gourmet topping
Kitchen Equipment Recommendations
After making this recipe countless times, I’ve learned that having the right equipment makes all the difference:
| Equipment | Why It Matters | My Recommendation |
|---|---|---|
| Air Fryer | Even heat circulation | 6-quart capacity minimum |
| Instant-Read Thermometer | Prevents overcooking | Digital probe thermometer |
| Kitchen Scale | Consistent portion sizes | Digital scale accurate to 1g |
| Fine Grater | Fresh Parmesan texture | Microplane zester/grater |
| Tongs | Safe flipping | Silicone-tipped tongs |
Questions and Answers
Q: Can I use boneless chicken thighs for this recipe? Yes, you absolutely can use boneless thighs, but you’ll need to reduce the cooking time to about 8-10 minutes per side. The bone-in variety stays more moist and has better flavor, but boneless works well if that’s your preference.
Q: How do I know when the chicken is done without a thermometer? While I always recommend using a thermometer for safety, you can check by cutting into the thickest part of the thigh. The juices should run clear with no pink areas. The meat should also feel firm to the touch.
Q: Can I prepare the coating mixture in advance? Definitely! I often mix the dry ingredients up to a week ahead and store them in an airtight container. Just add the fresh garlic and parsley when you’re ready to cook.
Q: My air fryer is smaller than 6 quarts. Can I still make this recipe? You can absolutely adapt this recipe for a smaller air fryer. Just cook the chicken in batches, making sure not to overcrowd the basket. Overcrowding leads to uneven cooking and less crispy skin.
Q: What’s the best way to get the Parmesan to stick to the chicken? The key is making sure the chicken skin is slightly moist from the olive oil but not wet from excess moisture. Pat the chicken dry first, then apply oil, then press the coating mixture firmly into the skin.
Q: Can I double this recipe? Yes, but you’ll need to cook in batches unless you have a very large air fryer. The chicken pieces shouldn’t overlap or touch for best results.
Q: How can I make this recipe dairy-free? You can substitute the Parmesan with nutritional yeast for a similar umami flavor, or try a dairy-free Parmesan alternative. The texture will be slightly different, but the flavor will still be delicious.
Q: Is it necessary to flip the chicken during cooking? Yes, flipping ensures even browning and cooking on both sides. The initial skin-side-down placement helps render the fat and crisp the skin beautifully.
Q: Can I marinate the chicken before coating it? While not necessary, a 2-4 hour marinade in olive oil, garlic, and herbs can add extra flavor. Just make sure to pat the chicken dry before applying the coating.
Q: What should I do if my coating is browning too quickly? If the coating starts to brown too rapidly, reduce the temperature to 360°F (182°C) and continue cooking. You can also tent the chicken with foil for the remaining cooking time.
This garlic parmesan air fryer chicken thigh recipe has become a staple in my kitchen because it delivers restaurant-quality results with minimal effort. The combination of crispy skin, juicy meat, and bold flavors makes it perfect for both casual family dinners and entertaining guests. Once you master this technique, you’ll find yourself reaching for chicken thighs again and again, knowing you can create something truly special in just 25 minutes.