Have you ever found yourself craving that perfect combination of crunchy and soft textures wrapped up in one delicious handheld meal? I know I have! After countless late-night Taco Bell runs, I finally decided to try making my own crunch wraps at home. Not only did they turn out amazing, but I discovered they’re surprisingly easy to make and taste even better than the original!
In this article, I’ll walk you through everything you need to know to create restaurant-quality crunch wraps in your own kitchen. We’ll cover the essential ingredients, step-by-step instructions, helpful tips for perfect folding, and even some creative variations to make this recipe your own. Let’s dive in and create some crunch wrap magic!
What Exactly Is a Crunch Wrap?
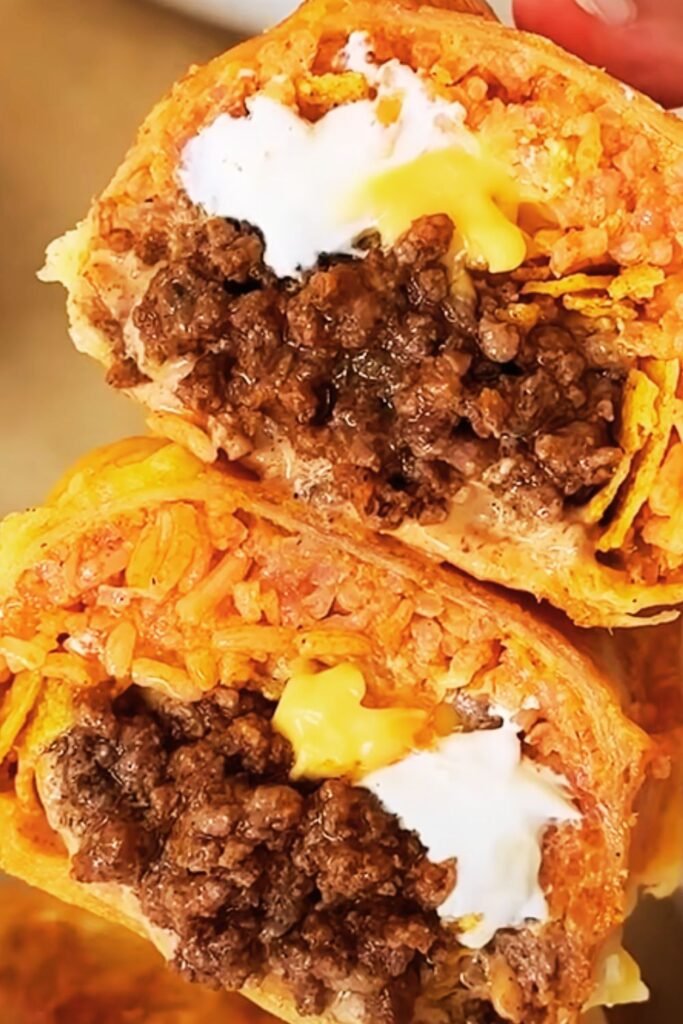
Before we start cooking, let’s understand what makes a crunch wrap so special. A crunch wrap is essentially a large flour tortilla stuffed with seasoned meat, cheese sauce, sour cream, lettuce, tomatoes, and—most importantly—a crunchy tostada shell in the middle. The tortilla is then carefully folded into a hexagonal shape and grilled until golden and crispy on the outside while maintaining all those delicious textures inside.
The beauty of the crunch wrap lies in its perfect balance of textures and flavors. You get the warm, seasoned meat, the cool sour cream, the fresh vegetables, and that satisfying crunch all in one bite. It’s truly a masterpiece of fast-food engineering that we can recreate at home with even better ingredients!
Why Make Crunch Wraps at Home?
Making crunch wraps at home isn’t just about saving money (though that’s definitely a bonus). Here are some compelling reasons to try this recipe:
- Customization: You control exactly what goes inside—more cheese? Extra meat? No problem!
- Quality ingredients: Use fresher produce and higher-quality meat than what you’d get at a fast-food restaurant.
- Dietary needs: Easily adapt the recipe for vegetarian, gluten-free, or other dietary restrictions.
- Family fun: Making crunch wraps can be a fun cooking activity that everyone can participate in.
- Impressive meal: These look and taste restaurant-quality but are surprisingly simple to make.
- Portion control: Make them as big or small as you’d like.
Now that you’re convinced (and I’m sure you are!), let’s gather our ingredients and get cooking!
Ingredients You’ll Need

For this recipe that serves 4 people, you’ll need:
For the Beef Filling:
- 1 pound ground beef (80/20 lean-to-fat ratio works best)
- 1 packet taco seasoning (or 2-3 tablespoons homemade taco seasoning)
- 1/4 cup water
For the Cheese Sauce:
- 1 cup shredded cheddar cheese
- 1/4 cup milk
- 1 tablespoon butter
- 1 tablespoon flour
For Assembly:
- 4 large burrito-size flour tortillas (at least 12-inch diameter)
- 4 small flour tortillas (6-inch) or corn tostada shells
- 1 cup shredded lettuce
- 1/2 cup diced tomatoes
- 1/2 cup sour cream
- 1 cup shredded Mexican blend cheese
- Optional: diced onions, sliced jalapeños, guacamole, or pico de gallo
Kitchen Equipment:
- Large skillet
- Small saucepan (for cheese sauce)
- Spatula
- Measuring cups and spoons
- Cutting board and knife
Visit Amazon for any required items
Homemade Taco Seasoning (Optional)
If you prefer to make your own taco seasoning instead of using a packet, here’s my go-to blend that makes enough for about 1 pound of meat:
- 1 tablespoon chili powder
- 1 teaspoon ground cumin
- 1 teaspoon garlic powder
- 1/2 teaspoon onion powder
- 1/2 teaspoon dried oregano
- 1/2 teaspoon paprika
- 1/4 teaspoon salt
- 1/4 teaspoon black pepper
- Pinch of cayenne pepper (optional, for heat)
Simply mix all these spices together in a small bowl until well combined. This mixture stores well in an airtight container for up to 3 months!
Visit Amazon for any required items
Step-by-Step Instructions
Preparing the Beef Filling
- Heat a large skillet over medium-high heat.
- Add the ground beef and break it apart with a spatula as it browns.
- Once the meat is no longer pink (about 5-7 minutes), drain excess grease if necessary.
- Add the taco seasoning and water to the skillet.
- Stir well and simmer for 3-5 minutes until the liquid is mostly absorbed and the meat is well-coated with seasoning.
- Remove from heat and set aside.
Making the Cheese Sauce
- In a small saucepan over medium heat, melt the butter.
- Whisk in the flour and cook for about 1 minute to create a roux.
- Slowly add the milk while continuing to whisk to prevent lumps.
- Once the mixture is smooth and begins to thicken slightly, reduce heat to low.
- Add the shredded cheddar cheese a handful at a time, stirring until completely melted before adding more.
- Continue stirring until the sauce is smooth. Add a touch more milk if it seems too thick.
- Remove from heat and set aside.
Crisping the Tostada Shells (If Using Flour Tortillas Instead of Premade Tostadas)
- If you’re using small flour tortillas instead of tostada shells, you’ll need to crisp them up.
- Heat a small amount of oil in a skillet over medium-high heat.
- Fry each small tortilla for about 30 seconds per side until golden and crisp.
- Transfer to paper towels to drain excess oil and set aside.
Assembling Your Crunch Wraps
- Place a large flour tortilla on a clean work surface.
- Spread about 2-3 tablespoons of the cheese sauce in the center of the tortilla, creating a circle about the size of your tostada shell.
- Add approximately 1/4 of the seasoned beef on top of the cheese sauce.
- Place a tostada shell (or crisped small tortilla) on top of the meat.
- Spread a layer of sour cream on the tostada shell.
- Add shredded lettuce, diced tomatoes, and any other toppings you desire.
- Sprinkle some shredded Mexican blend cheese on top.
The Perfect Fold
The folding technique is what makes a crunch wrap special! Here’s how to do it:
- Start by folding the edge of the large tortilla up and over the filling toward the center.
- Continue folding the edge of the tortilla every inch or so, working your way around in a clockwise direction, creating pleats as you go.
- You should end up with a neat hexagonal package with the filling completely enclosed.
- If your tortilla isn’t quite large enough to fully close over the filling, you can place a small piece of another tortilla in the center before adding your fillings.
Cooking Your Crunch Wraps
- Heat a large skillet over medium heat and lightly coat with cooking spray or a small amount of oil.
- Place the crunch wrap, seam side down, in the skillet.
- Cook for 2-3 minutes until golden brown and crispy on the bottom.
- Carefully flip and cook for another 2-3 minutes until the other side is golden brown and crispy as well.
- Remove from the skillet and repeat with the remaining crunch wraps.
- Let them cool for a minute before cutting in half to serve.
Visit Amazon for any required items
Nutritional Information
For those who are watching their intake, here’s a detailed nutritional breakdown of a standard homemade crunch wrap:
| Nutrient | Amount per Serving |
|---|---|
| Calories | 650-750 |
| Total Fat | 35-40g |
| Saturated Fat | 15-18g |
| Cholesterol | 90-100mg |
| Sodium | 1200-1400mg |
| Total Carbohydrates | 55-60g |
| Dietary Fiber | 4-5g |
| Sugars | 2-3g |
| Protein | 30-35g |
*Note: Values may vary based on specific ingredients and portions used.
Tips for Crunch Wrap Success
Getting the Fold Right
- If you’re struggling with the fold, try using a slightly smaller amount of filling at first.
- Make sure your large tortillas are at least 12 inches in diameter. Smaller tortillas can be difficult to fold properly.
- If your tortilla tears during folding, use a small piece of another tortilla as a “patch.”
- Warming your tortillas slightly before folding can make them more pliable and less likely to tear.
Make-Ahead Options
Crunch wraps are best enjoyed fresh, but you can prep components ahead of time:
- Cook the beef filling up to 2 days in advance and store in the refrigerator.
- Prepare and store toppings separately in the refrigerator.
- Assemble the crunch wraps just before cooking for the best texture.
Reheating Leftovers
If you end up with leftover crunch wraps:
- Reheat in a skillet over medium-low heat for 2-3 minutes per side.
- Alternatively, reheat in an air fryer at 350°F for 3-4 minutes.
- Avoid microwaving if possible, as it can make the tostada shell soggy.
Visit Amazon for any required items
Delicious Variations to Try

One of the best things about making crunch wraps at home is the ability to customize them to your taste. Here are some exciting variations to try:
Chicken Crunch Wrap
- Replace the ground beef with 1 pound of diced chicken breast, seasoned and cooked with the same taco seasoning.
- Add a tablespoon of lime juice to the chicken while cooking for extra flavor.
Vegetarian Crunch Wrap
- Substitute 1 (15 oz) can of black beans (drained and rinsed) for the meat.
- Mash half the beans slightly and mix with taco seasoning and 1/4 cup water.
- Add 1/2 cup of cooked corn and 1/2 cup of diced bell peppers for extra texture and nutrients.
Breakfast Crunch Wrap
- Replace the meat with scrambled eggs (about 6 eggs for 4 servings).
- Add crispy bacon or breakfast sausage crumbles.
- Use hash browns instead of a tostada for the crunchy layer.
- Serve with salsa instead of (or in addition to) sour cream.
Spicy Crunch Wrap
- Add 1 tablespoon of hot sauce to your meat mixture.
- Include sliced jalapeños or serrano peppers in your toppings.
- Mix a teaspoon of chipotle powder into your sour cream.
Mediterranean-Inspired Crunch Wrap
- Season ground lamb with 2 teaspoons each of cumin and coriander.
- Replace sour cream with tzatziki sauce.
- Add diced cucumber, red onion, and feta cheese.
- Use hummus instead of cheese sauce.
Serving Suggestions
Complete your crunch wrap meal with these perfect accompaniments:
- Mexican rice
- Refried or black beans
- Fresh guacamole or sliced avocado
- Pico de gallo
- Lime wedges
- Hot sauce options
- Corn salad
- Mexican street corn (elote)
For beverages, consider serving:
- Homemade fruit agua frescas
- Sparkling water with lime
- Horchata
- Virgin margarita mocktails
- Iced tea with fresh mint
Storage and Make-Ahead Instructions
If you want to make a larger batch of crunch wraps for future meals:
To Store:
- Wrapped tightly in aluminum foil, cooked crunch wraps will keep in the refrigerator for up to 3 days.
To Freeze:
- Let the cooked crunch wraps cool completely.
- Wrap each one tightly in plastic wrap, then in aluminum foil.
- Place in a freezer-safe bag and freeze for up to 3 months.
- To reheat from frozen, remove the plastic wrap, rewrap in the foil, and heat in a 375°F oven for 15-20 minutes.
Visit Amazon for any required items
Common Questions & Answers
Q: What if I can’t find large enough tortillas for the crunch wrap? A: If you can only find smaller tortillas (10-inch), you can still make crunch wraps! Simply use smaller tostadas and less filling, or place a small piece of another tortilla in the center before adding your fillings to help cover the gap when folding.
Q: Can I make these gluten-free? A: Yes! Use gluten-free tortillas and ensure your taco seasoning is gluten-free. If making your own tostada shells, use corn tortillas which are naturally gluten-free.
Q: How can I make this healthier? A: Try using lean ground turkey or chicken instead of beef, whole wheat tortillas instead of white flour, Greek yogurt instead of sour cream, and load up on the vegetables. You can also reduce the cheese and add more lettuce and tomatoes.
Q: My cheese sauce is too thick/thin. How do I fix it? A: If your cheese sauce is too thick, add a little more milk and whisk until you reach your desired consistency. If it’s too thin, cook it a bit longer to reduce or add a little more cheese.
Q: Can I use store-bought nacho cheese sauce instead of making my own cheese sauce? A: Absolutely! For a quicker option, 1 cup of store-bought nacho cheese or queso dip works perfectly.
Q: How do I keep my crunch wraps from coming apart during cooking? A: Make sure to place them seam-side down first when cooking. The heat will help seal the fold. If they’re still coming apart, you can secure them with toothpicks before cooking (just remember to remove them before eating!).
Q: Can I make these in an air fryer? A: Yes! Preheat your air fryer to 370°F and cook the assembled crunch wraps for 5-7 minutes until crispy and golden brown. You may want to spray them lightly with cooking oil first.
Why This Recipe Works
After making countless crunch wraps at home, I’ve found that the success of this recipe comes down to a few key factors:
- The right tortilla size: Using a truly large (12-inch+) tortilla makes folding much easier.
- The crispy layer: The tostada shell in the middle provides that authentic crunch that makes these wraps special.
- Proper heat: Cooking over medium heat gives you the perfect golden exterior without burning while ensuring all the fillings get warm.
- The folding technique: Creating those neat pleats around the edge ensures all the goodness stays inside during cooking.
- Balanced fillings: Having a combination of warm (meat, cheese) and cool (sour cream, lettuce) elements creates that perfect contrast of temperatures.
I hope you enjoy making these homemade crunch wraps as much as I do! They’ve become a regular in my household’s meal rotation – perfect for a fun dinner, weekend lunch, or even game day snacks. The best part is seeing everyone’s faces light up when they bite into that perfectly crispy, cheesy, meaty goodness!
So go ahead, fire up that skillet, and create your own restaurant-quality crunch wraps at home tonight. I guarantee they’ll become a new family favorite!