Have you ever bitten into chicken that’s perfectly juicy on the inside with a crispy, flavorful coating that makes your taste buds dance? That’s exactly what I’m bringing to your kitchen today with this incredible Garlic Parmesan Air Fryer Chicken recipe. After testing dozens of variations, I’ve cracked the code to getting restaurant-quality chicken right in your own home, without the mess and calories of deep frying.
I still remember the first time I made this recipe—my kitchen filled with the intoxicating aroma of roasted garlic and fresh herbs while the air fryer worked its magic. The look on my family’s faces when they took their first bite told me everything I needed to know. This wasn’t just good chicken; this was a game-changer. Today, I’m sharing all my secrets so you can recreate this mouthwatering dish yourself.
What Makes This Garlic Parmesan Chicken Special
The beauty of this air fryer chicken recipe lies in its perfect balance of flavors and textures. The garlic provides a robust punch, the Parmesan adds a salty, nutty dimension, and the air fryer ensures that perfect juicy-inside, crispy-outside texture that’s often difficult to achieve with traditional cooking methods.
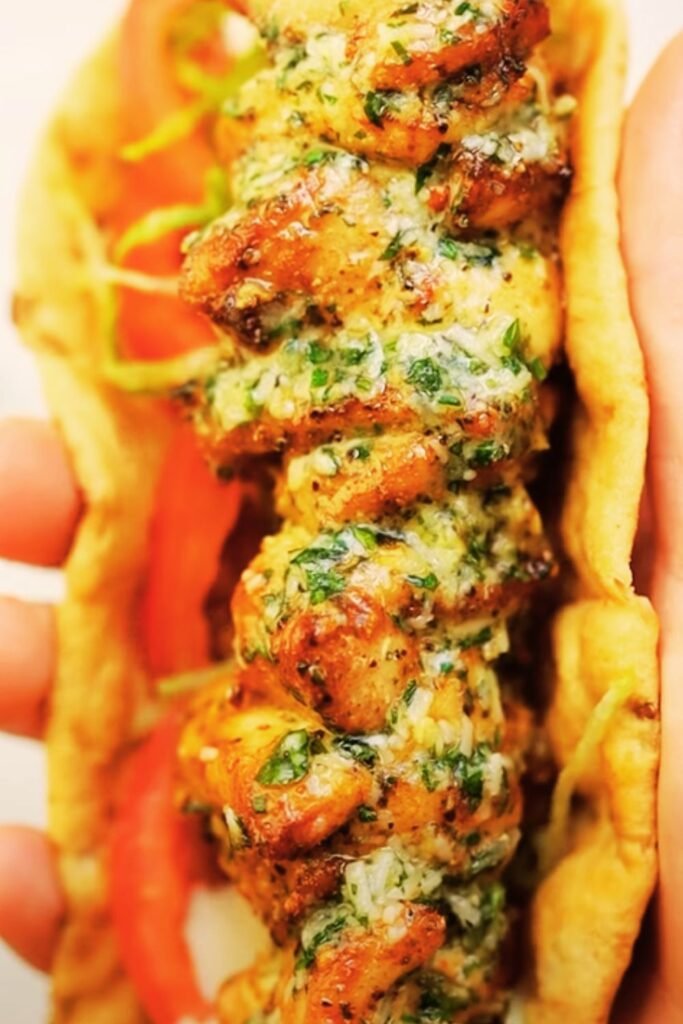
What I love most about this recipe is its versatility. You can serve it as a main dish with some vegetables, slice it for sandwiches, or cube it for salads. It’s also meal-prep friendly—I often make a big batch on Sundays for quick and delicious lunches throughout the week.
Ingredients You’ll Need
For this mouthwatering air fryer chicken, I’ve carefully selected ingredients that work together to create layers of flavor:
- 4 boneless, skinless chicken breasts (about 6-8 oz each)
- 3 tablespoons olive oil
- 4 cloves garlic, finely minced (not the jarred stuff—trust me on this)
- 1 cup freshly grated Parmesan cheese (please avoid the pre-grated kind)
- 1/2 cup panko breadcrumbs
- 1/2 cup regular breadcrumbs
- 1 tablespoon Italian seasoning
- 1 teaspoon paprika
- 1/2 teaspoon garlic powder
- 1/2 teaspoon onion powder
- 1/2 teaspoon black pepper
- 3/4 teaspoon salt
- 2 large eggs
- 1 tablespoon Dijon mustard
- Fresh parsley for garnish

Kitchen Tools Required
Before diving into the cooking process, make sure you have these tools ready:
- Air fryer (3.5 qt or larger)
- Meat tenderizer or rolling pin
- 3 shallow bowls for the dredging station
- Meat thermometer
- Mixing bowls
- Measuring cups and spoons
- Sharp knife
- Cutting board
- Paper towels
Preparation Steps
Step 1: Prepare the Chicken
Let me walk you through getting your chicken perfectly prepared for maximum juiciness:
- Take the chicken breasts out of the refrigerator about 20 minutes before cooking to bring them to room temperature (this helps them cook more evenly).
- Pat the chicken breasts dry with paper towels—this is crucial for getting that crispy exterior.
- Place each chicken breast between two sheets of plastic wrap or parchment paper.
- Using a meat tenderizer or rolling pin, gently pound the chicken to an even thickness of about 1/2 inch. This step is non-negotiable if you want perfectly cooked chicken!
- Season both sides of each chicken breast with a pinch of salt and pepper.
Step 2: Set Up Your Dredging Station
This organized approach will make the coating process much cleaner and more efficient:
- In the first shallow bowl, mix the flour with 1/4 teaspoon each of salt and pepper.
- In the second bowl, whisk together eggs and Dijon mustard until well combined.
- In the third bowl, combine panko breadcrumbs, regular breadcrumbs, freshly grated Parmesan cheese, minced garlic, Italian seasoning, paprika, garlic powder, onion powder, remaining salt, and black pepper. Mix thoroughly.
Step 3: Coat the Chicken
This triple-coating method is the secret to that perfect crispy exterior:
- Take each chicken breast and dredge it in the flour mixture, shaking off any excess.
- Dip the floured chicken into the egg mixture, ensuring it’s fully coated.
- Finally, press the chicken into the breadcrumb mixture, making sure both sides are generously and evenly coated. Press the mixture gently onto the chicken to help it adhere.
- Set the coated chicken on a plate and repeat with the remaining pieces.
- Let the coated chicken rest for 5 minutes—this helps the coating stick better during cooking.
Cooking Process
Step 1: Preheat Your Air Fryer
Always start with a properly heated air fryer:
- Preheat your air fryer to 375°F (190°C) for about 3 minutes.
- Lightly spray the air fryer basket with cooking oil spray to prevent sticking.
Step 2: Cook the Chicken
Here’s where the air fryer truly shines:
- Place the coated chicken pieces in the air fryer basket, making sure they don’t touch each other. Depending on your air fryer size, you may need to cook in batches.
- Lightly spray the top of the chicken with cooking oil spray—this helps achieve that golden-brown color.
- Cook for 6 minutes, then carefully flip the chicken pieces over.
- Spray the other side lightly with cooking oil and continue cooking for another 6-8 minutes.
Step 3: Check for Doneness
Safety first, always:
- Use a meat thermometer to check that the internal temperature has reached 165°F (74°C) at the thickest part of the chicken.
- If needed, cook for additional 1-2 minute intervals until the chicken reaches the safe temperature.
- Let the chicken rest for 3-5 minutes before serving—this allows the juices to redistribute throughout the meat.
Why This Method Works
I’ve experimented with countless chicken recipes, and I’ve found that this specific combination of techniques yields the best results every time:
- Pounding the chicken: Creates an even thickness that cooks uniformly and stays juicy.
- Room temperature chicken: Promotes even cooking from edge to center.
- Triple coating: Provides maximum flavor and creates a moisture-sealing barrier.
- Resting before cooking: Allows the coating to adhere better.
- Resting after cooking: Lets the juices redistribute throughout the meat.
Serving Suggestions
This versatile chicken dish pairs beautifully with many sides. Here are some of my favorite combinations:
For a Light Meal
- Fresh garden salad with a lemon vinaigrette
- Steamed asparagus with a touch of butter and lemon
- Zucchini noodles tossed with olive oil and herbs
For a Heartier Dinner
- Creamy garlic mashed potatoes
- Roasted Brussels sprouts with balsamic glaze
- Buttered egg noodles with herbs
- Risotto with mushrooms and Parmesan
For a Family-Friendly Option
- Mac and cheese with a side of steamed broccoli
- Sweet potato fries
- Corn on the cob
- Garlic bread

Nutritional Information
For those keeping track of their macros, here’s the approximate nutritional breakdown per serving (one chicken breast with coating):
| Nutrient | Amount |
|---|---|
| Calories | 420 |
| Protein | 45g |
| Carbohydrates | 14g |
| Fat | 21g |
| Fiber | 1g |
| Sugar | 1g |
| Sodium | 620mg |
| Calcium | 240mg |
| Iron | 2mg |
Variations to Try
Once you’ve mastered the basic recipe, try these delicious variations:
Spicy Garlic Parmesan Chicken
Add 1/2 teaspoon of cayenne pepper and 1/4 teaspoon of crushed red pepper flakes to the breadcrumb mixture for a dish with a kick.
Herb-Loaded Version
Double the Italian seasoning and add 2 tablespoons each of fresh chopped basil and rosemary to the breadcrumb mixture.
Lemon Garlic Parmesan Chicken
Add the zest of one lemon to the breadcrumb mixture and squeeze fresh lemon juice over the chicken just before serving.
Gluten-Free Option
Replace regular breadcrumbs with gluten-free alternatives or crushed pork rinds for a zero-carb option.
Storage and Reheating Tips
This chicken reheats beautifully when done right:
Refrigerating
- Let the chicken cool completely.
- Store in an airtight container in the refrigerator for up to 3 days.
Freezing
- Place cooled chicken pieces on a baking sheet lined with parchment paper.
- Freeze for 2 hours until solid.
- Transfer to a freezer-safe container or ziplock bag.
- Store in the freezer for up to 2 months.
Reheating
For the best texture when reheating:
- Air Fryer: Reheat at 350°F for 3-4 minutes until warmed through.
- Oven: Place on a wire rack over a baking sheet and heat at 350°F for 8-10 minutes.
- Microwave: Use 50% power and heat in 30-second intervals (though this method may slightly compromise the crispy texture).
Pro Tips From My Kitchen to Yours
After making this recipe countless times, I’ve compiled these game-changing tips:
- Chicken thickness matters: Aim for exactly 1/2 inch thickness throughout for perfect doneness.
- The Parmesan quality: Freshly grated Parmesan makes a world of difference compared to pre-packaged varieties.
- Don’t rush the process: Letting the coated chicken rest before cooking helps the breading adhere better.
- Oil spray technique: A light, even spray of oil gives you that perfect golden color without excess calories.
- Batch cooking: Don’t overcrowd your air fryer basket—it’s better to cook in batches than to have unevenly cooked chicken.
- Internal temperature: Always check with a meat thermometer for food safety and optimal juiciness.
- Let it rest: Those few minutes of resting after cooking make the difference between juicy chicken and dry chicken.
Common Mistakes to Avoid
Even experienced cooks can fall into these traps:
- Skipping the pounding step: This leads to uneven cooking—thick parts will be undercooked while thin parts dry out.
- Cold chicken straight from the fridge: This often results in overcooked exteriors and undercooked centers.
- Wet chicken surfaces: Not patting the chicken dry first can make your coating soggy instead of crispy.
- Pre-grated cheese: These contain anti-caking agents that affect both flavor and texture.
- Overcrowding the air fryer: This steams the chicken instead of air frying it, resulting in a soggy coating.
- Not preheating: Starting with a cold air fryer leads to inconsistent cooking results.
- Cutting into the chicken immediately: This releases all those precious juices you worked so hard to keep in!
Frequently Asked Questions
Q: Can I use chicken thighs instead of breasts? Yes, absolutely! Chicken thighs work wonderfully in this recipe and often result in even juicier meat. Just adjust cooking time—boneless skinless thighs typically need about 12 minutes total in the air fryer.
Q: My coating keeps falling off during cooking. What am I doing wrong? Make sure you’re following the correct order: flour first, then egg mixture, then breadcrumb mixture. Also, let the coated chicken rest for 5 minutes before cooking, and don’t flip too early—give it time to set on the first side.
Q: I don’t have an air fryer. Can I make this in the oven? Definitely! Place the coated chicken on a wire rack over a baking sheet and bake at 425°F for about 20-25 minutes, or until the internal temperature reaches 165°F.
Q: Can I prep this ahead of time? Yes! You can coat the chicken up to 2 hours ahead and keep it refrigerated. I wouldn’t go much longer than that as the coating can start to get soggy.
Q: My air fryer is small. Should I adjust anything? Cook in batches rather than crowding the basket. It takes a bit longer, but the results are worth it. Keep the first batch warm in a 200°F oven while cooking the remaining chicken.
Q: How can I tell if the chicken is done without a meat thermometer? While I strongly recommend using a thermometer, in a pinch, you can cut into the thickest part of the chicken—the meat should be white throughout with no pink, and the juices should run clear.
Q: My breadcrumb coating isn’t as golden as yours. What’s the secret? Make sure you’re using the oil spray on both sides of the chicken, and try increasing the temperature of your air fryer by 10 degrees if needed. Different air fryer models perform slightly differently.
Q: Is there a dairy-free version of this recipe? Yes! You can substitute nutritional yeast for the Parmesan cheese or use a dairy-free Parmesan alternative. The flavor will be slightly different but still delicious.
The Science Behind Air Frying
Understanding how air fryers work will help you get the best results from this recipe:
Air fryers use rapid air technology to circulate hot air around your food. This creates a convection effect that cooks food quickly and evenly while creating a crispy exterior similar to deep-frying, but with up to 80% less oil.
When cooking chicken, the hot air helps form a quick crust on the outside, sealing in moisture while the inside cooks to tender perfection. The Maillard reaction (the browning process that creates hundreds of new flavor compounds) happens efficiently in an air fryer, giving your food that golden color and complex taste.
Perfect Pairings
Complete your meal with these perfect accompaniments:
Beverages
- Sparkling water with a lemon twist
- Iced tea with fresh mint
- Homemade lemonade
- Non-alcoholic apple cider
Desserts
- Lemon sorbet for a light, refreshing finish
- Vanilla bean ice cream with fresh berries
- Apple crisp with cinnamon
- Classic tiramisu for a more indulgent option
A Personal Note
I’ve served this garlic Parmesan chicken at countless family dinners, potlucks, and even date nights at home. The beauty of this recipe is its ability to feel both special enough for company and easy enough for a busy weeknight.
What I love most is watching people’s reactions to their first bite—that moment of surprise when they realize chicken can be this flavorful and juicy from an air fryer. It’s become my signature dish, the one friends always request when they come over.
I hope this recipe brings the same joy to your table. Remember, cooking is about more than following instructions—it’s about creating moments and memories with the people you care about. This garlic Parmesan chicken has certainly created many wonderful ones in my home.
So fire up that air fryer, grab your ingredients, and get ready to enjoy chicken that’s crispy, juicy, and bursting with flavor. Your kitchen is about to smell amazing, and your taste buds are in for a treat!